If you're creating any kind of tutorial or demo on macOS, you know the struggle. You're trying to explain a complex process, but your audience can't see the shortcuts you're using. The solution is simple: you need a way to show keystrokes on screen. It’s the single best way to turn a confusing follow-along into a crystal-clear guide.
Why Displaying Keystrokes on macOS Changes Everything
Have you ever watched a macOS tutorial and found yourself hitting pause, rewinding, and squinting at the screen, trying to figure out what just happened? “Wait, how did they open that menu?” It's a common frustration, and the secret to fixing it is making your keyboard shortcuts visible.
This isn't just a flashy trick; it’s about respecting your viewer's time and attention. When you make your actions transparent, you remove all the guesswork. People stop getting frustrated and start learning, which is the whole point of a Mac tutorial.
Elevating Your Content From Good to Great
Think about a developer walking through a complex coding workflow on their Mac or a graphic designer showing off their Photoshop wizardry. Without seeing the keyboard commands, the viewer is always a step behind. But when you pop the exact key combinations right on the screen, you close that gap in an instant.
I've seen this make a huge difference in all sorts of macOS-focused videos:
- Software Demos: You can clearly show off the time-saving shortcuts that make your macOS app feel powerful and efficient.
- Educational Content: Students can visually connect the action with the command, helping them learn and retain information much faster.
- Customer Support: Troubleshooting videos for Mac users become far more effective, cutting down on support tickets and frustrated customers.
Displaying keystrokes on macOS is a game-changer when you want to create explainer videos that convert, because it makes complicated instructions feel simple.
The Impact on Viewer Engagement
When your audience can follow along without getting lost, they stick around. They feel more confident, trust your expertise, and actually learn what you're trying to teach. It turns passive watching into active learning.
The goal is to remove friction. Every time a viewer has to guess a shortcut, you risk losing their focus. A visible keystroke overlay keeps them locked in, learning, and appreciating the clarity you provide.
Ultimately, showing your keystrokes isn't just a feature—it's a powerful communication tool. It adds a layer of professionalism that makes your content stand out, ensuring every move you make on your Mac is perfectly clear.
The Best Way to Show Keystrokes on Your Mac
Let's get practical. Any Mac user who has tried to show keystrokes knows the pain of juggling multiple apps: one for recording, another for the keystroke overlay, and a third for editing it all together. The cleanest workflow is to choose one dedicated keystroke visualizer, set it up before recording, and then record your screen as usual.
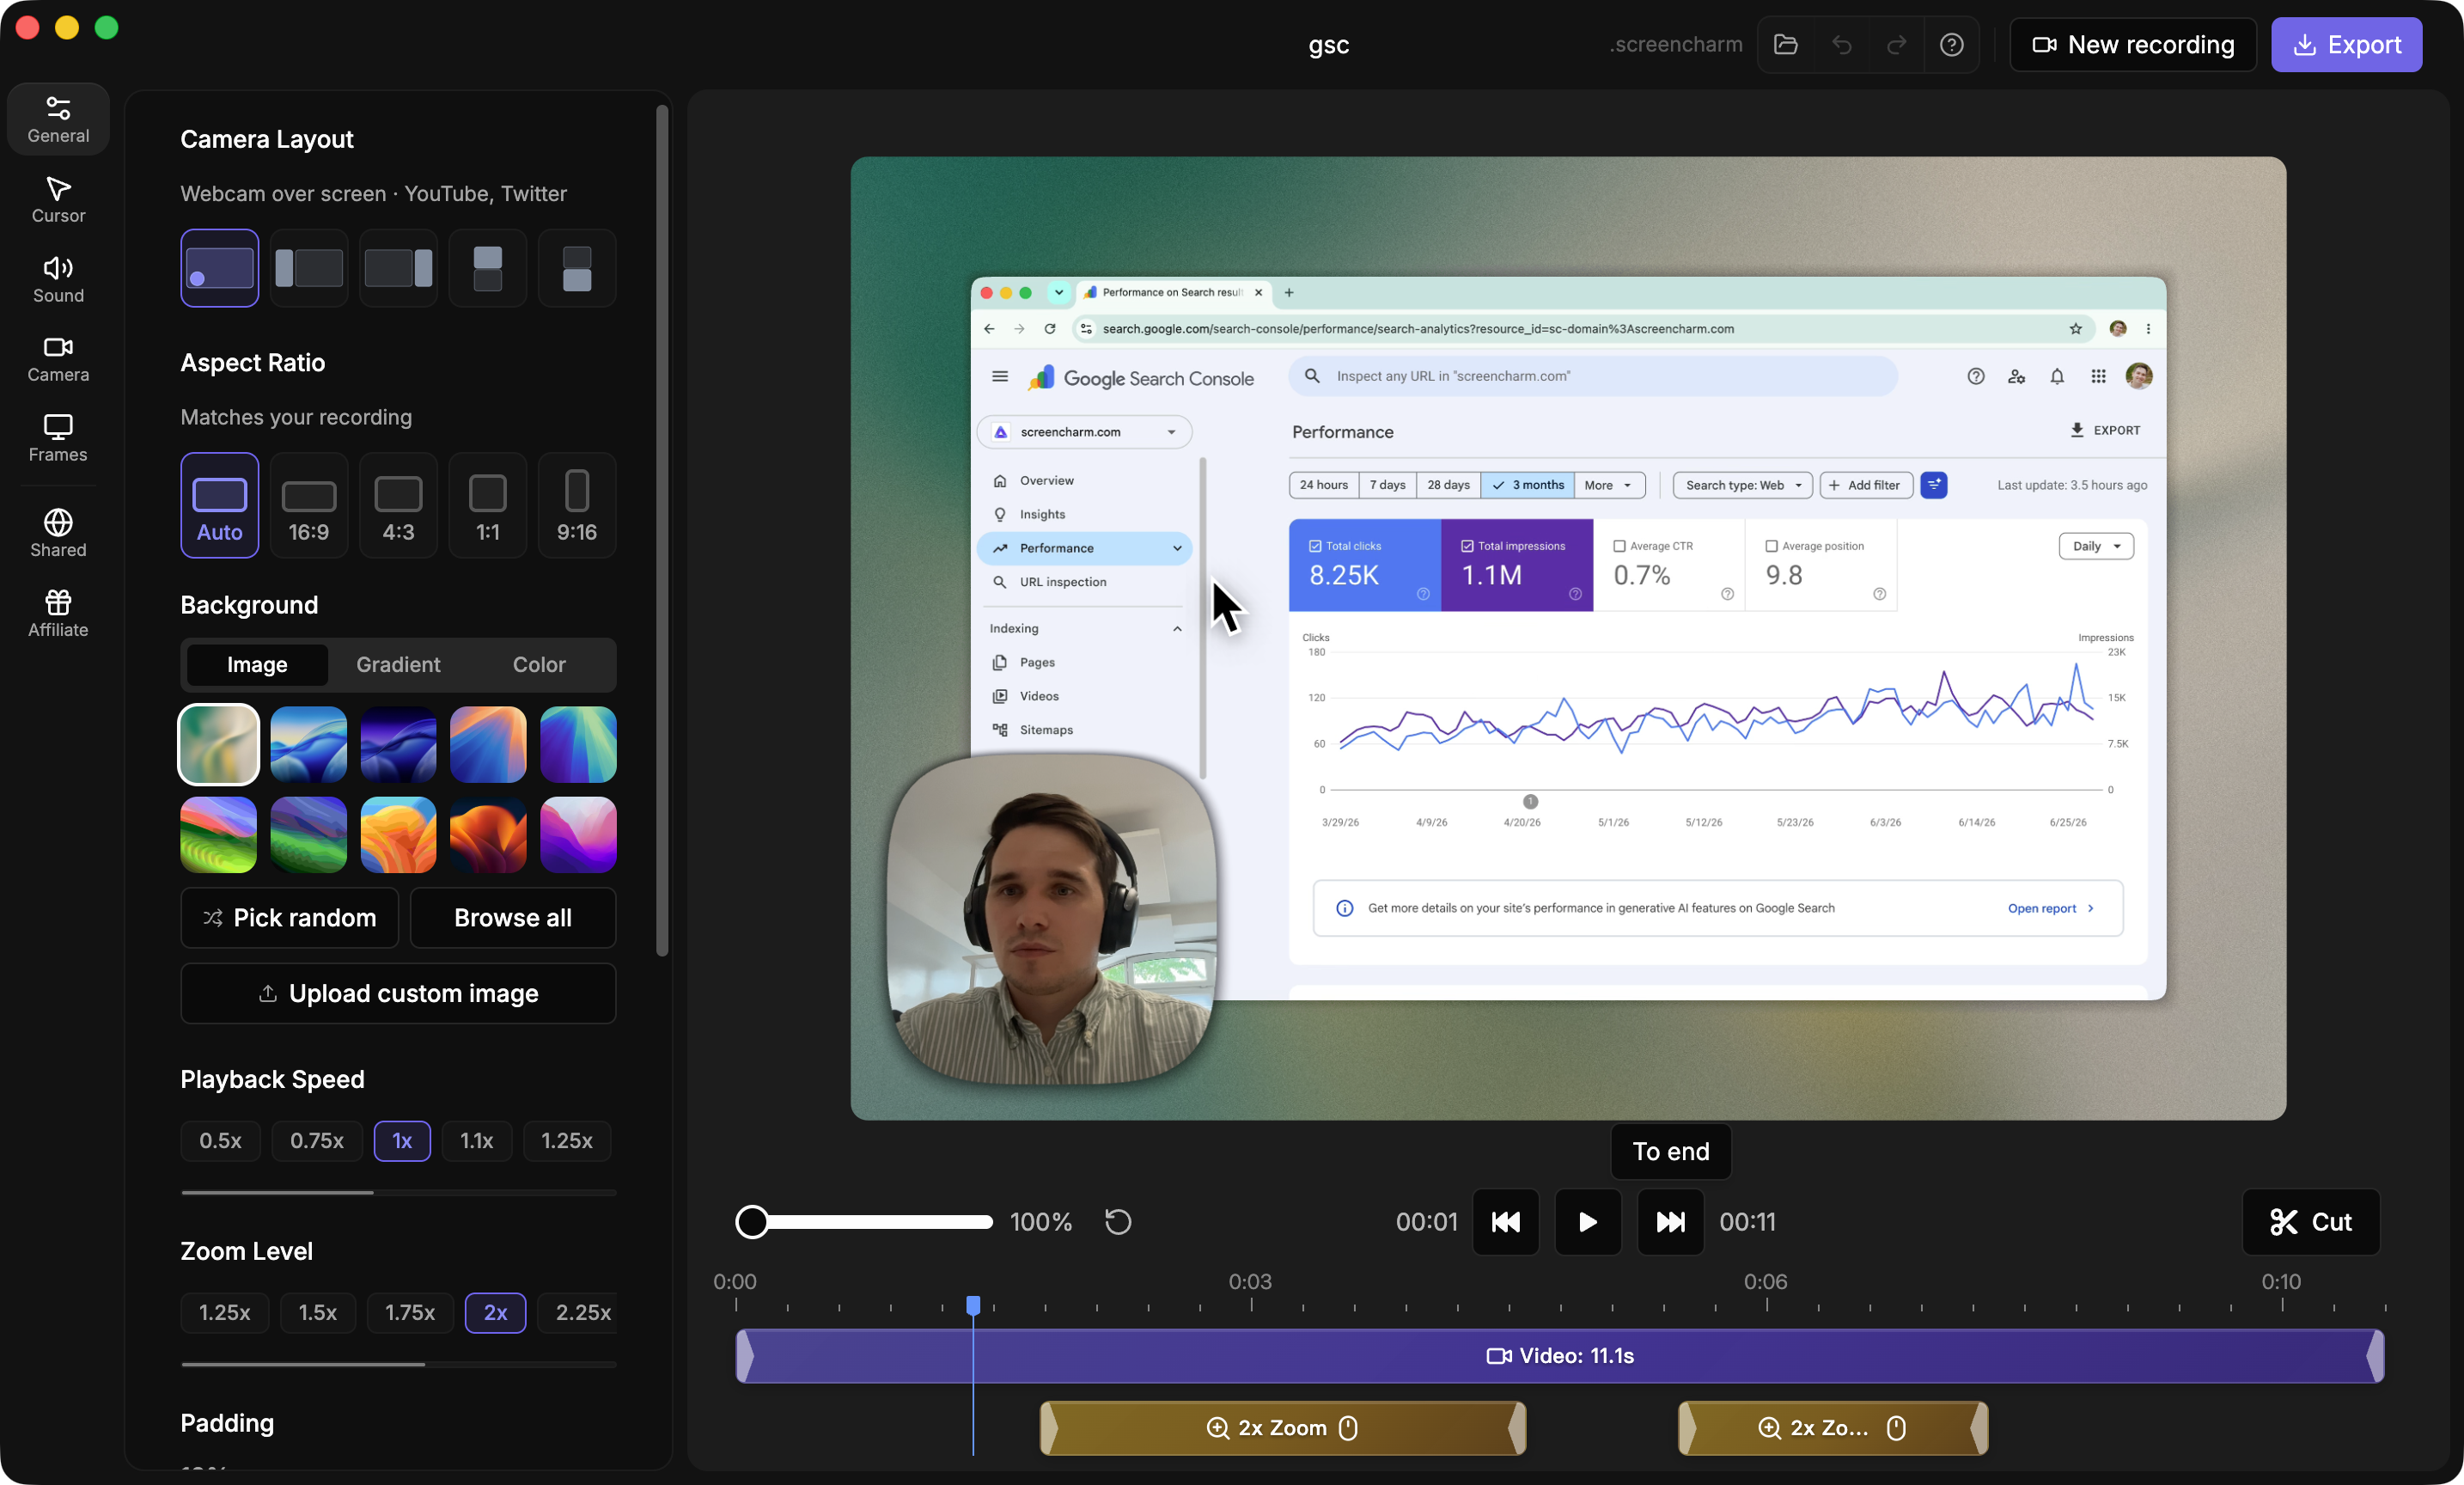
Important note: Screen Charm does not currently include a built-in keystroke display feature. If you want a Mac recorder with keystroke display built in, Screen Studio is a strong option. If you prefer Screen Charm's recording and editing workflow, use a dedicated macOS keystroke visualizer alongside it.
For polished Mac tutorials, the practical choice depends on your workflow: use Screen Studio when visible keystrokes are essential, or run a keystroke visualizer while recording with Screen Charm for clean capture, automatic zoom, cursor focus, webcam recording, trimming, and export.
Setting Up the Keystroke Display
The key is to configure the keystroke overlay before you start recording. Open your keystroke visualizer, choose where the overlay should appear, and test a few shortcuts like ⌘ + S, ⌘ + C, and ⌘ + Tab to make sure they are readable.
Once the overlay looks right, start your screen recording. Because the keystrokes are shown live on screen, they will be captured directly in the recording.
The best workflow is one you test before recording. Spend a minute checking overlay size, position, and contrast so you do not need to re-record later.
This is especially useful for indie makers and developers creating product demos for macOS. A visible keystroke overlay explains the shortcuts. Screen Studio can handle that inside the recorder, while Screen Charm can help make the recording itself look more professional with automatic zoom and editing tools. It's not just for small creators, either; IT, retail, and healthcare teams use clear training videos for onboarding and have reportedly slashed training time by 30%. You can dig into more data on the screen recording software market to see the wider impact.
Customizing Your Keystroke Overlay
Once your keystroke visualizer is running, the next step is making it look good. The default style will get the job done, sure, but a custom overlay adds a layer of polish that makes your video feel uniquely yours.
The goal here is to match the overlay's vibe to your content's tone and brand. A highly technical coding tutorial shouldn't have the same visual style as a slick product marketing video for a new Mac app.
Here are the key adjustments you can make:
- Color Palette: Tweak the background and text colors of the overlay. A high-contrast combo (like black text on a white background) is great for instructional videos where readability is king. For branded content, you can dial in your company's exact hex codes.
- Font and Size: Adjust the typography to match your brand's style guide. Bumping up the font size is also smart, ensuring the keystrokes are easy to read even on the small mobile screens where so many people will watch your video.
- Position on Screen: You get to decide where the overlay lives. A central position is a common default, but you might want to tuck it into a corner so it doesn't cover up an important part of your user interface.
Real-World Customization Examples
Let's look at how this plays out in two very different macOS scenarios.
Scenario 1: The Technical Coding Tutorial Imagine you're a developer showing off complex shortcuts in your code editor on a Mac. Clarity is non-negotiable. You need an overlay that’s impossible to ignore.
- Style Choice: A bold, opaque background with high-contrast text.
- Color: A simple black or dark gray box with crisp white text.
- Font: A clean, monospaced font like Courier New that fits the coding aesthetic.
- Result: The keystrokes pop off the screen, making it easy for viewers to follow along with every single command.
Scenario 2: The Sleek macOS App Demo Now, picture a marketing video for a beautiful new macOS app. Here, the overlay should feel like a natural part of the experience—helpful, but not distracting.
- Style Choice: A subtle, semi-transparent overlay that blends in.
- Color: A slightly blurred background with text that pulls from the app's own UI colors.
- Font: A modern, sans-serif font that aligns with your brand identity.
- Result: The display gently informs the viewer without ever pulling focus from the product you’re trying to show off.
By taking just a minute or two to dial in these settings, you can create a professional-looking keystroke overlay that fits your video's purpose before you start recording.
Sponsored by the makers
Tired of boring screen recordings?
Try Screen Charm.
Auto-zoom, captions, motion blur, camera overlay and a vertical layout for Shorts. Record once, export a polished video.
Screen Charm is a native macOS app.
Fine-Tuning Your Keystroke Overlay for Maximum Impact
Flipping on the keystroke display is a solid start, but the real artistry lies in the fine-tuning. A thoughtfully configured overlay looks intentional and professional, guiding your viewer’s attention without ever becoming a distraction. It’s what separates simply showing keys from using them as a powerful teaching tool.
The whole point is to make the overlay feel like a natural part of your video's visual language. This means getting strategic about its placement, timing, and exactly what information it reveals. An overlay that’s too loud can overwhelm the screen; one that’s too subtle might get missed entirely.
Strategic Positioning and Timing
Where you put the overlay has a huge impact on your video’s overall composition. The default bottom-center position is popular, but let's be honest—it often covers up crucial parts of an app's interface, especially in a dock-heavy macOS environment. I usually find that tucking it into a corner keeps it visible but out of the main action.
Timing is just as critical. If an overlay vanishes instantly, it’s hard for anyone to register what just happened. But if it hangs around for too long, it just adds clutter. I've found that a fade-out delay of 1-2 seconds is the sweet spot. This gives viewers enough time to process the command before it gracefully disappears.
A well-timed overlay respects the viewer's cognitive load. It should appear, deliver its information, and then get out of the way, keeping the focus squarely on your content.
Filtering What Viewers See
Let’s face it, not every keystroke is worth showing. Displaying every single key you press is great for a typing tutorial, but for a software demo? It’s mostly just visual noise. The best way to handle this is to filter the display to show only the keystrokes that actually matter.
- Modifier Key Combinations: I always recommend setting your tool to only display shortcuts that use modifier keys like
⌘(Command),⌥(Option),⌃(Control), and⇧(Shift). This puts the spotlight on important commands like⌘ + S(Save) or⌘ + C(Copy) while smartly ignoring all the standard text you type. - Mouse Clicks and Scrolls: Pairing keystroke displays with visual cues for mouse actions gives your audience the full picture of your workflow. For more on this, we have a great guide on how to change your mouse cursor on Mac to make it more visible.
This selective approach keeps the screen clean and ensures that when a keystroke does pop up, your audience knows it’s important.
Matching Overlay Style to Your Use Case
The visual design of your overlay should match the vibe of your video. A one-size-fits-all approach just doesn't cut it. You want to adapt the look and feel to your content's tone to maintain clarity and a professional feel.
To help you get started, here are a few common scenarios and the styles that work best for them.
Keystroke Overlay Styles for Different Use Cases
| Use Case | Recommended Style | Key Benefit |
|---|---|---|
| Technical Tutorials | Bold, opaque background with high-contrast text. | Maximum Readability: Ensures every command is crystal clear and impossible to miss during complex sequences. |
| Product Marketing Videos | Semi-transparent, minimalist look that matches brand colors. | Aesthetic Integration: Provides helpful context without distracting from the product's visual appeal. |
| Live Streaming | Larger font size with a subtle, non-intrusive animation on appear. | Immediate Clarity: Catches the eye in a busy live environment, making it easy for viewers to follow along in real-time. |
Thinking through these details transforms your keystroke display from a simple gimmick into a strategic asset that will seriously level up your macOS recordings.
Building a Seamless macOS Recording Workflow
Displaying keystrokes is a great start, but it really shines when it’s just one piece of a bigger, smoother recording process. You get a truly polished, professional result when you stop thinking of it as the whole workflow and instead pair it with clear cursor movement, zoom, narration, and editing.
The real goal here is to create a guided visual experience where every element on the screen is working together. Showing the keystrokes tells one part of the story; other features are what complete the narrative.
Combining Visual Cues for Maximum Clarity
One of the most powerful things I've learned to do is combine the keystroke overlay with other dynamic visual aids. For instance, pairing a dedicated keystroke visualizer with cursor highlighting and automatic zoom creates this perfect trifecta of clarity. The zoom pulls your viewer’s eye right where it needs to be, the highlighted cursor shows the exact click point, and the keystroke display reveals how it all happened.
This combination makes even complex steps feel totally intuitive because you're guiding your audience's attention without them even realizing it. It’s a technique you see all the time in high-quality macOS tutorials because it just plain works, leaving no room for confusion. For more tips on this, check out our guide on screen recording for tutorials.
The flowchart below breaks down the three core adjustments—Position, Timing, and Style—that I always tweak to get the overlay looking just right.
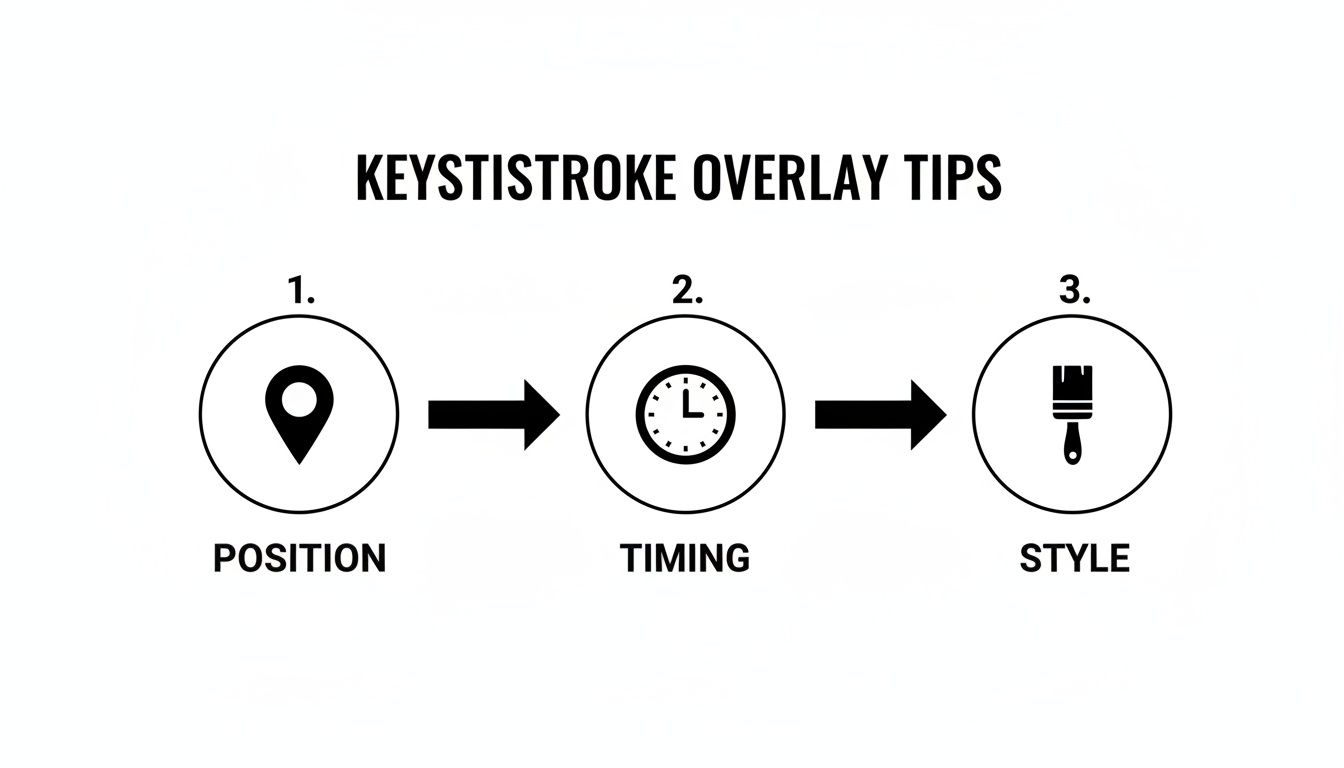
It’s a good reminder that a professional-looking overlay comes from intentional design choices, not just flipping a switch.
Reinforcing Actions with Your Voice
Don't forget that your narration is a huge part of the experience. A simple but incredibly effective habit is to verbally call out important shortcuts just as they appear on screen. Saying, "Okay, I'll save this by hitting Command-S," right as the overlay pops up reinforces the action through two different senses.
This multi-sensory approach is a game-changer for learning and retention. Consider this: in the e-learning sector, which accounted for 25% of screen recording growth, videos showing keystrokes retain 50% more viewers. It's not just for tutorials, either. Customer support teams have seen 45% faster onboarding with keystroke-enhanced videos, which says a lot about their power to clarify instructions.
My Pro Tip: A pre-flight checklist is your best friend. Before you even think about hitting record, double-check that your keystroke overlay app is visible, your cursor effects are clear, and your zoom settings are ready. A few minutes of prep can save you hours of headaches in post-production.
To really nail this seamless macOS recording workflow, think about how your keystroke display fits in with other powerful screen recording tools. Looking into resources like this guide on free Snagit alternative tools can help you discover software that complements your visual storytelling. When you bring all these elements together, you can create incredibly polished recordings without relying on one app to do everything.
Integrated Tools vs. Standalone Apps: Which Is Better for Mac?
If you've been searching for ways to show your keystrokes on macOS, you've probably run into two good options: a recorder with keystrokes built in, like Screen Studio, or a dedicated visualizer app that displays keyboard shortcuts live on screen while you record.
Screen Charm is still useful in this workflow, but for a different reason. It helps you record and polish the screen video; it does not show keystrokes for you. So the accurate setup is either Screen Studio for built-in keystrokes, or a keystroke visualizer for the keyboard overlay plus Screen Charm for recording and editing.
The Hidden Hassles of Separate Tools
The real trouble begins when you forget to prepare the visualizer before recording. Because the keystroke app is separate from your screen recorder, you need to make sure it is visible, readable, and positioned correctly before you press record.
- Overlay placement: If the overlay covers an important button, menu, or code area, it can make the tutorial harder to follow.
- Permanent overlay: Most standalone visualizers are captured directly into the video. If the style or position is wrong, you usually need to re-record.
- Double the setup: You have to configure both your recorder and your keystroke app, so a short pre-flight check matters.
Treat the keystroke overlay like lighting or audio: set it up before recording, test it once, and then leave it alone while you focus on the demo.
Why a Two-Tool Workflow Makes Sense
The best practical workflow is to let each tool do its job. If you want one app with keystrokes built in, use Screen Studio. If you want to use Screen Charm, pair it with a keystroke visualizer to show keystrokes on screen, then use Screen Charm to make the finished video clear and polished.
This is where Screen Charm fits well for Mac creators. It can help with automatic zoom, cursor focus, webcam recording, trimming, and export after you have captured the keystroke overlay from a dedicated visualizer. For a broader view of recording tools, see our guide to the best screen capture app for Mac.
Answering Your Questions About Showing Keystrokes on macOS
Even after getting the hang of it, a few questions always pop up when you start showing keystrokes in your Mac recordings. Let’s tackle some of the most common ones I hear from creators.
Will This Slow Down My Mac?
It’s a fair question—nobody wants a laggy computer, especially while recording. The good news is that on any modern Mac, the answer is a resounding no.
Dedicated keystroke visualizers are usually lightweight. The resources needed to display a simple text overlay are minimal, so you typically will not notice a performance hit. It should not affect your recording quality or the app you're trying to demonstrate.
Can It Keep Up With Complex macOS Keyboard Shortcuts?
Absolutely. Any decent keystroke visualizer for Mac is designed to handle whatever you throw at it. We’re talking about those complex, multi-key shortcuts using ⌘ (Command), ⌥ (Option), ⌃ (Control), and ⇧ (Shift) all at once.
It also has no problem with quick sequences, like the kind you’d use in a code editor where one command fires right after another. The tool captures and displays everything in the right order, so your audience never misses a beat.
Is the Keystroke Overlay a Permanent Part of the Video?
This is a big one, and the answer completely depends on your setup. If you’re using a separate, standalone app to show keystrokes, that overlay gets "burned into" the video file. It becomes a permanent part of the pixels, and you can’t edit it later.
Screen Charm does not currently capture keystrokes as a separate editable layer. If you record a standalone keystroke visualizer, assume the overlay is permanent and get the size, position, and style right before recording.
This is why a quick test recording matters. Record ten seconds, review the overlay, then start the real take once everything looks clear.
How Does This Actually Improve My Workflow?
Showing your keystrokes is about more than just clarity; it’s a huge time-saver. Manually adding text boxes or captions for every shortcut is a tedious process that kills creative momentum.
This is a major driver in the creative software market, which is on track to hit nearly USD 15 billion by 2030. For hobbyist creators, automatic keystroke overlays can slash production time by reducing the need to manually add shortcut labels in editing. I've even seen marketing pros report that they create promo videos three times faster, which led to a 25% jump in conversions. If you want to dive into the numbers, you can read more about the impact of video presentation software.
At the end of the day, it's about communicating your actions clearly and efficiently, making your macOS tutorials more professional and valuable for your audience.
Ready to create macOS tutorials that are easier to follow? Use Screen Studio if built-in keystroke display is essential, or use a dedicated keystroke visualizer for keyboard shortcuts and Screen Charm to record, auto-zoom, trim, and export a polished final video. Download Screen Charm today and feel the difference.
Deciding between Screen Charm and Screen Studio? Read the Screen Charm vs Screen Studio comparison for a full feature and pricing breakdown.