Ever lost your mouse pointer on a giant 4K display in the middle of a screen recording? We've all been there. It’s a tiny frustration that can turn a smooth demo into a confusing game of "find the cursor." When your audience can't see what you're clicking on, your entire presentation loses its punch.
The great news is you don't need fancy software for a quick fix. Apple bakes some powerful visibility tools right into macOS. Before you even think about downloading custom cursor packs, let's look at the built-in features that can solve this problem in under a minute.
Instantly Find Your Lost Pointer
The simplest trick is probably something you already do out of habit: just shake the mouse.
macOS has a brilliant feature called Shake mouse pointer to locate. When you rapidly wiggle your mouse or swipe your finger across the trackpad, the pointer temporarily balloons in size, making it impossible to miss. It's a lifesaver, especially if you're working across multiple monitors where the cursor can easily get lost in the digital clutter.
To make sure it's turned on:
- Head over to System Settings > Accessibility.
- Click on Display in the sidebar.
- Find the Pointer tab and make sure the toggle for "Shake mouse pointer to locate" is on.
Make Your Cursor Permanently Bigger and Bolder
Sometimes, a temporary fix isn't enough. You need the cursor to be consistently easy to see. For this, you can adjust its size and color permanently.
Right in that same Pointer menu (System Settings > Accessibility > Display), you’ll see a slider for Pointer size. Just drag it to the right until the cursor is a size that feels comfortable for you and will be obvious to your audience.
You can also change the pointer outline color and pointer fill color. I find that a bright, high-contrast color—like a vibrant yellow or red—works wonders for making the cursor pop against any background, whether it’s a light-themed app or a dark-mode code editor. Just click the color swatch and pick one that stands out.
For content creators, a visible cursor is non-negotiable. A clear pointer ensures your audience follows every click, which is crucial for effective tutorials and demos. Getting this right from the start can dramatically elevate the clarity of your final video.
These small tweaks do more than just improve your own workflow; they directly boost the quality of your content. A visible cursor is a key ingredient for a professional screen recording, but it's just one piece of the puzzle. To take your videos to the next level, check out our complete guide on how to improve video quality for more pro tips.
Making the cursor bigger and more colorful is your fastest path to a clearer presentation. You’ll never have to ask, "Can you guys see my mouse?" again.
Going Beyond the Basics with macOS Cursor Settings
A quick shake to find a lost cursor is a handy trick, but to really take control, you need to dive into your Mac's built-in settings. The options available today, especially in macOS Ventura and Sonoma, are a huge leap forward. The Accessibility menu has become a real command center for personalizing your pointer, which is your first stop for creating a clearer, more professional user experience.
Your starting point is System Settings, then head to Accessibility, and finally click on Display. Look for the "Pointer" tab—this is where you'll find all the core controls that dictate your cursor's look and feel. This is how you shift from just fixing a lost pointer to setting it up perfectly from the get-go.
Your Cursor’s Command Center
Think of this "Pointer" menu as your cursor's mission control. We've already touched on the Pointer size slider, which is an absolute must for presentations or screen recordings. But the real magic happens when you start playing with size and color.
This is where the Pointer outline color and Pointer fill color options come in. They are your secret weapon against tricky, low-contrast backgrounds. We’ve all been there: trying to show something in an app that has both a dark sidebar and a light main window. A standard black-and-white cursor can vanish in a blink.
Here are a few combinations I've found work wonders:
- For dark UIs: Try a bright yellow or lime green outline. That sharp edge just pops against dark grays and blacks.
- For light backgrounds: A bold red or deep blue fill color keeps the cursor from getting lost in a sea of white or light gray.
- For mixed environments: A combination is your best bet. A slightly larger pointer with a solid black outline and a bright yellow fill is a classic high-visibility setup that works almost anywhere.
Customizing your Mac’s cursor is more than just a cosmetic tweak; it's a massive win for accessibility and clarity. Modern macOS lets you scale the pointer, add distinct colors to its outline and fill, and even use the "Shake mouse pointer to locate" feature, which temporarily balloons the cursor by a massive 400% when you give it a quick wiggle.
If you're ever in a pinch, this quick visual guide shows the two fastest ways to make your cursor stand out using your Mac's built-in tools.
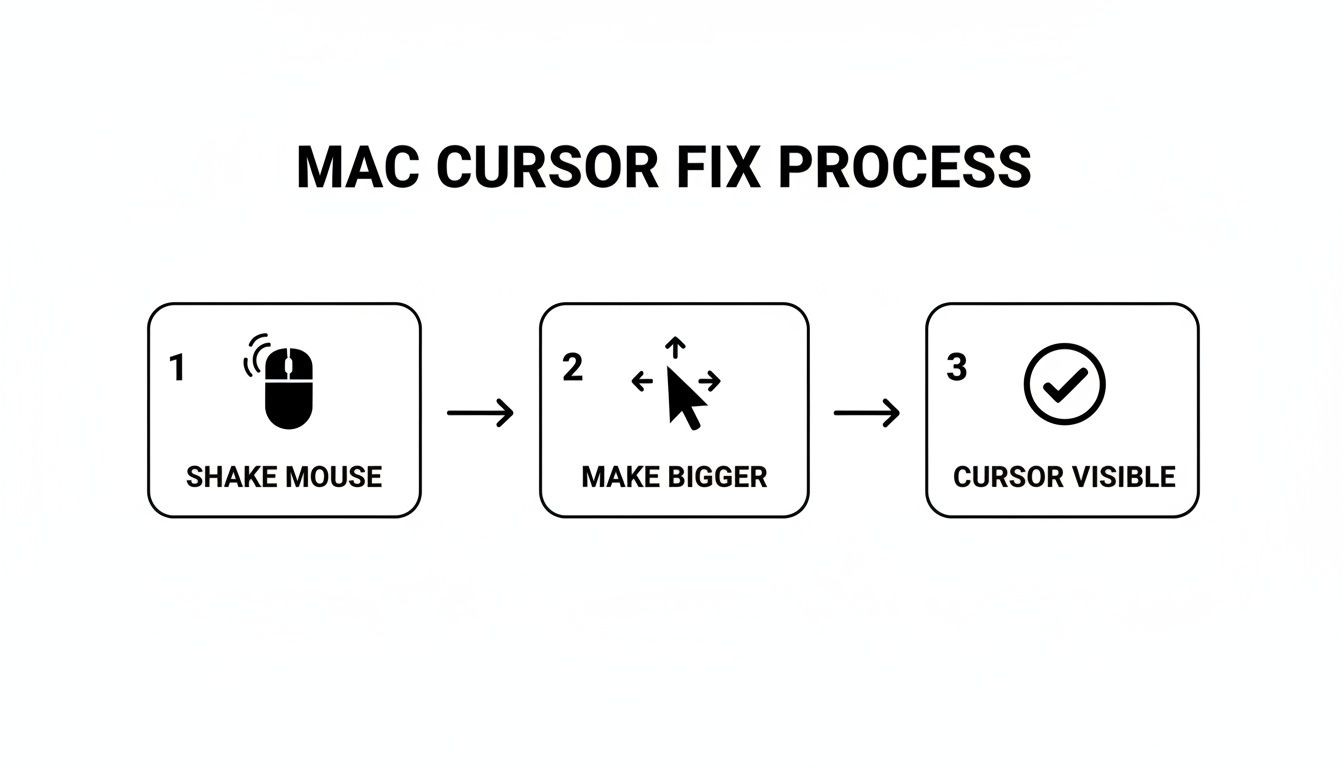
As you can see, shaking the mouse gives you a temporary boost, but heading into settings provides a permanent, more robust solution for everyday visibility.
A Quick Look at Your Options
To break it down even further, here's a summary of the powerful, native cursor customization tools Apple gives you right out of the box.
macOS Built-in Cursor Customization Options
| Feature | Location | Primary Benefit | Best For |
|---|---|---|---|
| Pointer Size | Accessibility > Display > Pointer | Increases the overall scale of the cursor for visibility. | Presenters, users with visual impairments, and high-resolution displays. |
| Pointer Outline Color | Accessibility > Display > Pointer | Adds a colored border to make the cursor edge distinct. | Demos on dark or complex backgrounds where the cursor might blend in. |
| Pointer Fill Color | Accessibility > Display > Pointer | Changes the interior color of the cursor. | Ensuring the cursor body stands out against light-colored application UIs. |
| Shake to Locate | Accessibility > Display > Pointer | Temporarily enlarges the cursor when the mouse is shaken. | Quickly finding a "lost" cursor on large or multiple-monitor setups. |
These settings are surprisingly effective and can often eliminate the need for third-party software altogether.
Why This Matters for Content Creators
For anyone creating video tutorials, screencasts, or demos, these adjustments are absolutely essential. A 2025 poll revealed that 52% of surveyed educators lean on the 'Shake mouse pointer to locate' feature while recording tutorials. It’s a simple trick that drastically cuts down on the "where did the cursor go?" problem that plagues so many viewers.
By taking a few moments to set your cursor's size and color before you hit record, you're crafting a much more polished and easy-to-follow experience. If you want to dig deeper into how these small tweaks can reduce viewer frustration, you can explore the full findings from Tom's Guide.
Before you even think about downloading a third-party app, I highly recommend spending some time with these native settings. Tweak the sliders, click through the color palettes, and find a combination that turns your cursor from an afterthought into one of your most effective communication tools.
Getting to Know Your Mac Cursor's Quirks
Have you ever noticed your Mac's cursor doing something… weird? Maybe it looks a little different when you open Final Cut Pro, or it seems to jump to an odd spot when you start a new task. You’re not going crazy. These little oddities are actually baked deep into macOS's history, and they can mess with your workflow, especially if you're doing anything that requires precision, like video editing or design.
This isn't just a small annoyance, either—it’s a well-documented frustration among Mac power users. The quirks usually come down to how specific apps handle the cursor and how the OS itself has changed over the years. Knowing a bit about the "why" helps explain why your pointer sometimes refuses to cooperate, even after you’ve tweaked all the settings.
The Ghost in the Machine
At its core, the problem is often about how macOS decides where the cursor should start and what it should look like. This behavior has a long, tangled history, with some of it tracing all the way back to NeXTSTEP, the operating system that eventually became the macOS we use today. While most people never notice these legacy behaviors, they can definitely pop up in certain situations.
A really insightful developer discussion on Hacker News a while back put a spotlight on this, showing just how many people were running into the same cursor frustrations. One developer mentioned how Final Cut Pro completely overrides the system cursor, a change that sticks around even after updates and can be really disorienting. The conversation also homed in on a major shift with macOS Monterey in 2021: the cursor’s starting position suddenly changed from the center of the screen (like in Big Sur) to the top-left corner. This was a direct callback to its NeXTSTEP roots from the 1980s. You can go down the rabbit hole yourself in this deep dive into cursor history on news.ycombinator.com.
Believe it or not, a tiny change like that has some big real-world consequences.
In that same discussion, users reported their productivity dropping by as much as 20-30% on precision-heavy tasks like editing video timelines or mocking up UIs. When the cursor isn't where you expect it to be, you're constantly making tiny, subconscious adjustments that break your focus and slow you down.
Why This Throws a Wrench in Your Creative Work
If you create tutorials, record product demos, or do detailed design work, you know that cursor precision is everything. When the pointer doesn’t land where your muscle memory tells you it should, it adds a layer of friction to your entire process.
Here’s how it usually plays out:
- Misclicks and mistakes: When your cursor starts in an unexpected place, you’re far more likely to click the wrong button or select the wrong clip. This means more time spent hitting undo and redoing work.
- Breaking your flow: Constantly having to find or recenter the cursor pulls you out of that productive "flow state." It's a small but persistent interruption that adds up.
- A jarring experience: When apps like Final Cut Pro force their own cursor style on you, it creates a visual inconsistency that can be really jarring as you switch back and forth between different programs.
These issues really validate what so many Mac power users have been feeling. It also makes it clear why sticking with the default settings isn't always the answer. When the system's own built-in quirks get in the way of your efficiency, you have to look for better ways to customize your setup. It stops being about preference and becomes a necessity for a smooth, predictable workflow.
Sponsored by the makers
Tired of boring screen recordings?
Try Screen Charm.
Auto-zoom, motion blur, camera overlay, and background music. All built in. Record once, export a polished video.
See what it doesGo Further with Third-Party Cursor Apps
While the built-in macOS settings offer some great accessibility improvements, they really only scratch the surface of true personalization. If you want to move beyond basic color and size changes, you'll need to explore the world of third-party apps.
This is where you can truly transform your pointer from a generic system icon into a personalized, functional part of your digital toolkit. Whether you're after a nostalgic design, an animated icon for flair, or a high-contrast cursor that stands out on a complex multi-monitor setup, a dedicated macOS app is the answer.
Free and Powerful Options to Get You Started
One of the most popular and long-standing tools for macOS is Mousecape. It's a fantastic free, open-source app that acts as a manager for cursor packs, which it calls "capes." Think of it as a theme engine just for your pointer.
With Mousecape, you can download and apply entire sets of cursors created by the community. You can find everything from retro macOS 9 pointers to slick, modern animated designs. The process is simple: find a .cape file online, drag it into the Mousecape window, and double-click to apply. It’s the perfect way to experiment without spending a dime.
Why Professionals Often Turn to Paid Apps
Free tools are great for diving in, but sometimes a professional workflow demands more specialized features. This is where paid Mac applications like CursorEffect 2 shine. These apps are often built to solve specific problems that creators and power users face every day, especially those working with demanding hardware.
Professionals are willing to invest in tools that solve real pain points, such as:
- Enhanced Visibility: Adding customizable highlights, rings, or effects that follow the cursor, making it impossible to lose during a fast-paced demo.
- Multi-Monitor Support: Tools designed to keep the cursor visible and consistent across multiple high-resolution displays.
- Application-Specific Rules: The ability to have different cursors or effects automatically activate depending on the app you're using.
Third-party cursor apps have become incredibly popular among Mac creators. The free tool Mousecape, for example, is used by over 75,000 people to swap out their cursor icons completely. Meanwhile, paid apps like CursorEffect 2 hold an average rating of 4.6 stars from over 3,000 reviews, with 72% of users praising its benefits on dual 4K setups where default cursors often disappear. For a deeper look at how the community uses these tools, check out this great guide to customizing with Mousecape.
The trend is clear: when native tools aren't enough, the Mac community turns to specialized software. These apps aren't just for looks; they are essential productivity tools. And if you want to take it a step further, you can even create a custom cursor from scratch.
Comparing Cursor Customization Tools for macOS
Choosing between the native macOS settings and third-party apps really comes down to your specific needs. Here's a quick comparison to help you decide which path is right for your workflow.
| Tool | Cost | Key Features | Ideal Use Case |
|---|---|---|---|
| macOS System Settings | Free | Adjust pointer size, outline color, and fill color. | Basic accessibility improvements or a quick, simple change to improve cursor visibility. |
| Mousecape | Free | Install and manage custom cursor icon packs (capes). Open-source. | Users who want to completely change the look of their cursor with community-made themes. |
| CursorEffect 2 | Paid | Adds highlights, click effects, and animations. Multi-monitor support. | Presenters, educators, and creators who need to make their cursor stand out in videos. |
| Screen Charm | Freemium | Adds a customizable ring, click animations, and spotlight effects. | Content creators making tutorials or screen recordings who need a polished, modern look. |
Ultimately, whether you stick with Apple's built-in options or grab a specialized app, you have more control over your Mac's cursor than ever before. For simple tweaks, System Settings is fine, but for true creative expression or professional needs, a third-party tool is the way to go.
Using a Custom Cursor for Professional Demos
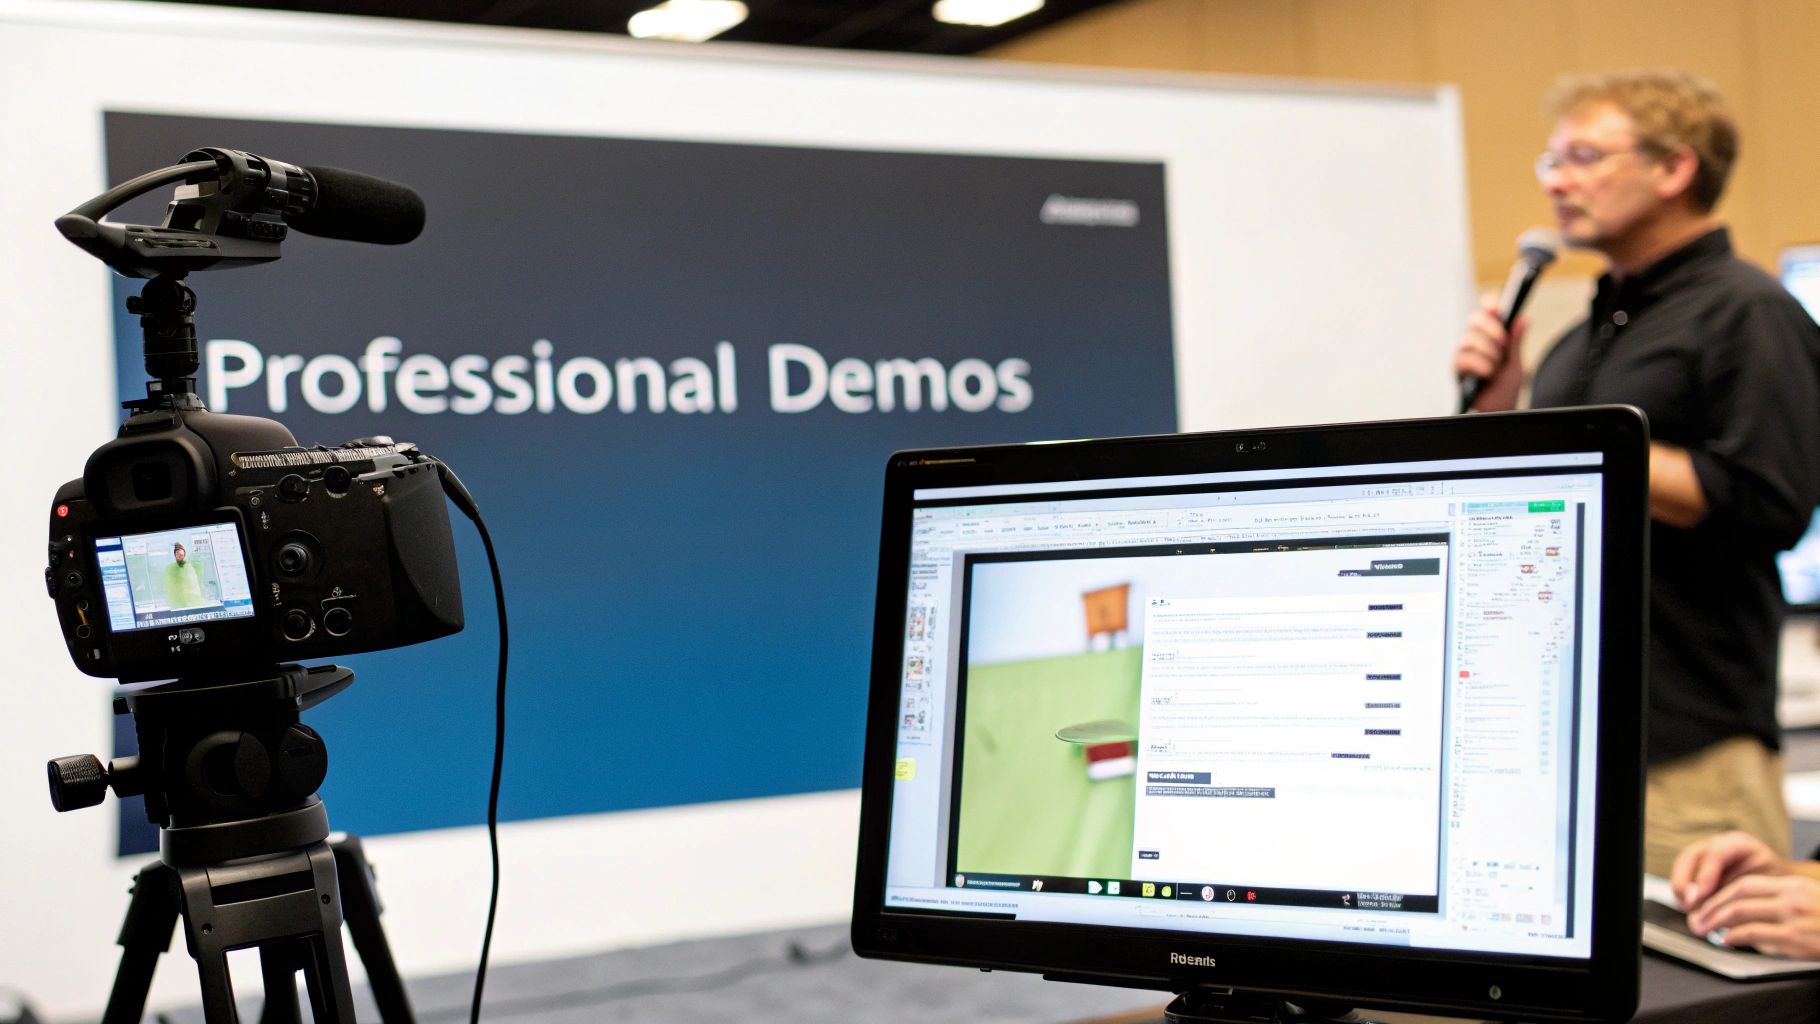
If you create tutorials, marketing videos, or software demos for a living, you already know the mouse cursor is more than just a pointer. It's the main character in your story. It’s what you use to guide your audience’s eyes and walk them through your presentation.
A standard, tiny cursor that disappears into the background can leave viewers squinting and lost. On the other hand, a thoughtfully customized one can elevate a good demo into a great one. It’s all about making your content as clear and easy to follow as possible.
When you change the mouse cursor on your Mac for a demo, you're making a deliberate choice to improve the viewer's experience. A bright, high-contrast pointer ensures every click, drag, and movement is perfectly visible, which cuts down on confusion and makes your instructions stick. This attention to detail immediately signals quality and builds trust with your audience.
More Than Just Looks: It’s About Clear Storytelling
Customizing your cursor for a demo isn't about slapping on a flashy animation or a novelty icon. It’s about function. The goal is pure, unadulterated clarity.
Think about it: a bright yellow circle around the pointer makes it pop against any background, whether you're navigating a dark-themed coding environment or a bright white spreadsheet. You never have to hear "Wait, where did the mouse go?" again.
This is where specialized tools designed for macOS creators, like Screen Charm, really shine. They get that the cursor is central to the recording process. Instead of just letting you change how it looks, they build powerful features around it to make your storytelling more effective and your workflow way more efficient.
Think of your cursor as a spotlight. For a professional demo, you need total control over where that spotlight is pointing and how bright it is. An integrated tool gives you that control without having to cobble together a bunch of different apps.
When your cursor effects and screen recorder are part of the same toolkit, what you see on your screen is exactly what your audience gets. That consistency is the secret to a polished, professional final cut.
The Power of Integrated Cursor Features
One of the biggest time-wasters in video production is post-editing. I’ve spent countless hours manually adding zooms and pans just to keep the focus on a specific button or menu I was clicking. It’s tedious work.
A feature like auto-zoom completely changes the game. By automatically tracking your cursor's movement, the software can smoothly zoom in on whatever you're interacting with. Just like that, your cursor becomes the camera operator.
This approach pays off in a few huge ways:
- Massive Time Savings: Forget spending hours setting keyframes in a video editor. The work is done for you as you record.
- Keeps Viewers Focused: The smooth, automatic zooms guide the eye naturally, without any jarring cuts or sudden movements.
- A Polished Final Product: Your video looks dynamic and professionally produced, as if an editor meticulously planned every shot.
By building cursor customization directly into the recording engine, tools like Screen Charm make creating high-quality screen recording for tutorials faster and more approachable. It’s a brilliant way to turn a simple visual aid into a powerful production assistant, letting you focus on teaching and presenting, not on fighting with your editing software.
Frequently Asked Questions
When you start digging into Mac cursor customization, a few questions always seem to pop up. Whether you've hit a snag or are just curious about how far you can take it, here are some straight answers based on my experience.
Can I Use Animated Cursors on My Mac?
You absolutely can, but not with Apple's built-in tools. For animated cursors, you'll need to turn to a third-party app. The go-to for many years has been a free tool called Mousecape.
Apps like this let you install entire cursor themes (which they call "capes") that can include slick, multi-frame animations. It's a fantastic way to give your Mac a personal touch, though it's worth remembering that super complex animations might use a tiny bit more of your system's resources than a simple static pointer.
Will Changing My Cursor Slow Down My Mac?
For the most part, no. If you're just using the native macOS Accessibility settings to tweak the size and color, the performance impact is basically zero. Your Mac is built to handle that without breaking a sweat.
Even using a third-party app for a custom static cursor is incredibly light and won't cause any lag. The only time you might see a performance dip is with really elaborate animated cursors that have tons of frames. Honestly, though, on any modern Mac, you'd be hard-pressed to notice a difference in day-to-day use.
How Do I Revert to the Default Mac Cursor?
Getting back to the classic black-and-white cursor is always easy. The steps just depend on how you changed it.
- If you used System Settings: Just head back to Accessibility > Display > Pointer. Drag the "Pointer size" slider all the way to the left. This not only resets the size but also instantly clears any custom colors you added.
- If you used a third-party app: It's usually a one-click fix. In an app like Mousecape, for instance, you'd just open it up and re-select the default "Apple" cursor pack to switch everything back to normal.
Why Does My Custom Cursor Not Show Up in Screen Recordings?
This is a classic headache for anyone making tutorials or demos. It happens because most screen recording software grabs the screen's output before the app handling your custom cursor has a chance to draw it on top. Your recorder is capturing the raw display, and your custom cursor is essentially a software overlay that gets missed.
This is exactly where integrated tools shine. When your cursor effects and your screen recorder are part of the same software, they're designed to work together. The app makes sure that the custom cursor you see on your screen is the exact same one that gets baked into the final video file.
If you want truly reliable, professional-looking recordings, your best bet is an all-in-one tool where cursor customization is a built-in feature, not an afterthought.
Ready to create stunning demos with a cursor that always stands out? Screen Charm integrates beautiful cursor effects directly into its recording and editing workflow, ensuring your audience never misses a click. Get Screen Charm today and transform your tutorials.