Ever wonder how some Mac users produce such incredibly sharp, professional-looking videos? It's not magic, and you don't need a Hollywood budget. The secret is focusing on three distinct phases: the recording, the edit, and the final export. Get these right, and you can turn a decent video into a truly impressive one.
We'll walk through exactly how to do it. Think of this as your roadmap for creating videos that don't just get watched, but actually command attention.
Why Bother With Video Quality?
Let's be honest. Have you ever bailed on a video because it was a pixelated, shaky mess? We all have. In an endless sea of online content, high-quality video is your non-negotiable ticket to entry. It’s what keeps people from clicking away.
A polished, professional video instantly tells your audience you're serious and that you respect their time. It makes your message land with far more impact. For anyone on a Mac creating tutorials, product demos, or marketing content, this is paramount. When your screen recording is crisp and clear, your instructions are easier to follow, and your brand just feels more trustworthy. The goal is to make the technical stuff invisible so your message can take center stage.
It's All About Trust and Keeping People Hooked
This isn't just a hunch; the numbers back it up. The global market for video quality enhancement was valued at around $2.7 billion and is expected to skyrocket, largely thanks to streaming services and new AI tools. As marketintelo.com reports on the video enhancement market's growth, it's clear that viewers now expect and demand better visuals.
Putting in the effort to improve your video quality is a direct investment in your viewer's experience.
Here’s what you get out of it:
- More Authority: Pro-level video makes you look like an expert who knows their stuff.
- Longer Watch Times: When a video is easy on the eyes, people stick around to see what you have to say.
- A Stronger Brand: Quality reflects quality. A great video elevates the perception of your product or service.
"Your video’s quality is the first impression you make. Before a viewer even processes your message, they've already judged the professionalism of your delivery based on what they see and hear."
Ultimately, knowing how to make your videos look better is a fundamental skill for anyone trying to communicate effectively. It’s a key piece of the puzzle that fits right in with other successful strategies, which you can read more about in our guide to video marketing best practices.
So, let's dive into how you can make it all happen on your Mac.
Key Pillars of Video Quality Improvement on macOS
To get a quick sense of our approach, this table breaks down the three core areas we'll be focusing on. Mastering each one contributes directly to a better final product.
| Pillar | Key Focus Area | Impact on Final Video |
|---|---|---|
| Recording | Capturing clean, high-resolution source material | Establishes a strong foundation. You can't fix fundamentally bad footage. |
| Editing | Refining the narrative, flow, and visual appeal | Enhances clarity, viewer engagement, and professional polish. |
| Exporting | Choosing the right settings to preserve quality | Ensures your hard work isn't lost to compression or incorrect formats. |
Getting a handle on these three pillars—recording, editing, and exporting—is the most reliable path to creating videos that look fantastic and perform even better.
Optimizing Your Mac Recording Environment
Great video quality starts long before you ever touch an editor. The choices you make before hitting that record button on your Mac have the single biggest impact on your final product. Trust me, a few minutes of prep work upfront will save you hours of headaches later.
First things first, you need the right tool for the job. While macOS has a built-in screen recorder in QuickTime Player, it's pretty basic. For polished tutorials or product demos, you'll want a dedicated Mac app like Screen Charm. It’s built from the ground up to help you guide your viewer's attention and create a professional-looking video with less effort.
Configuring Your Mac for a Crisp Recording
Before you hit record, you have to get your settings right. You simply can't fix a low-quality source file in post-production—it's a classic "garbage in, garbage out" situation. The goal is to capture as much detail as humanly possible from the very start.
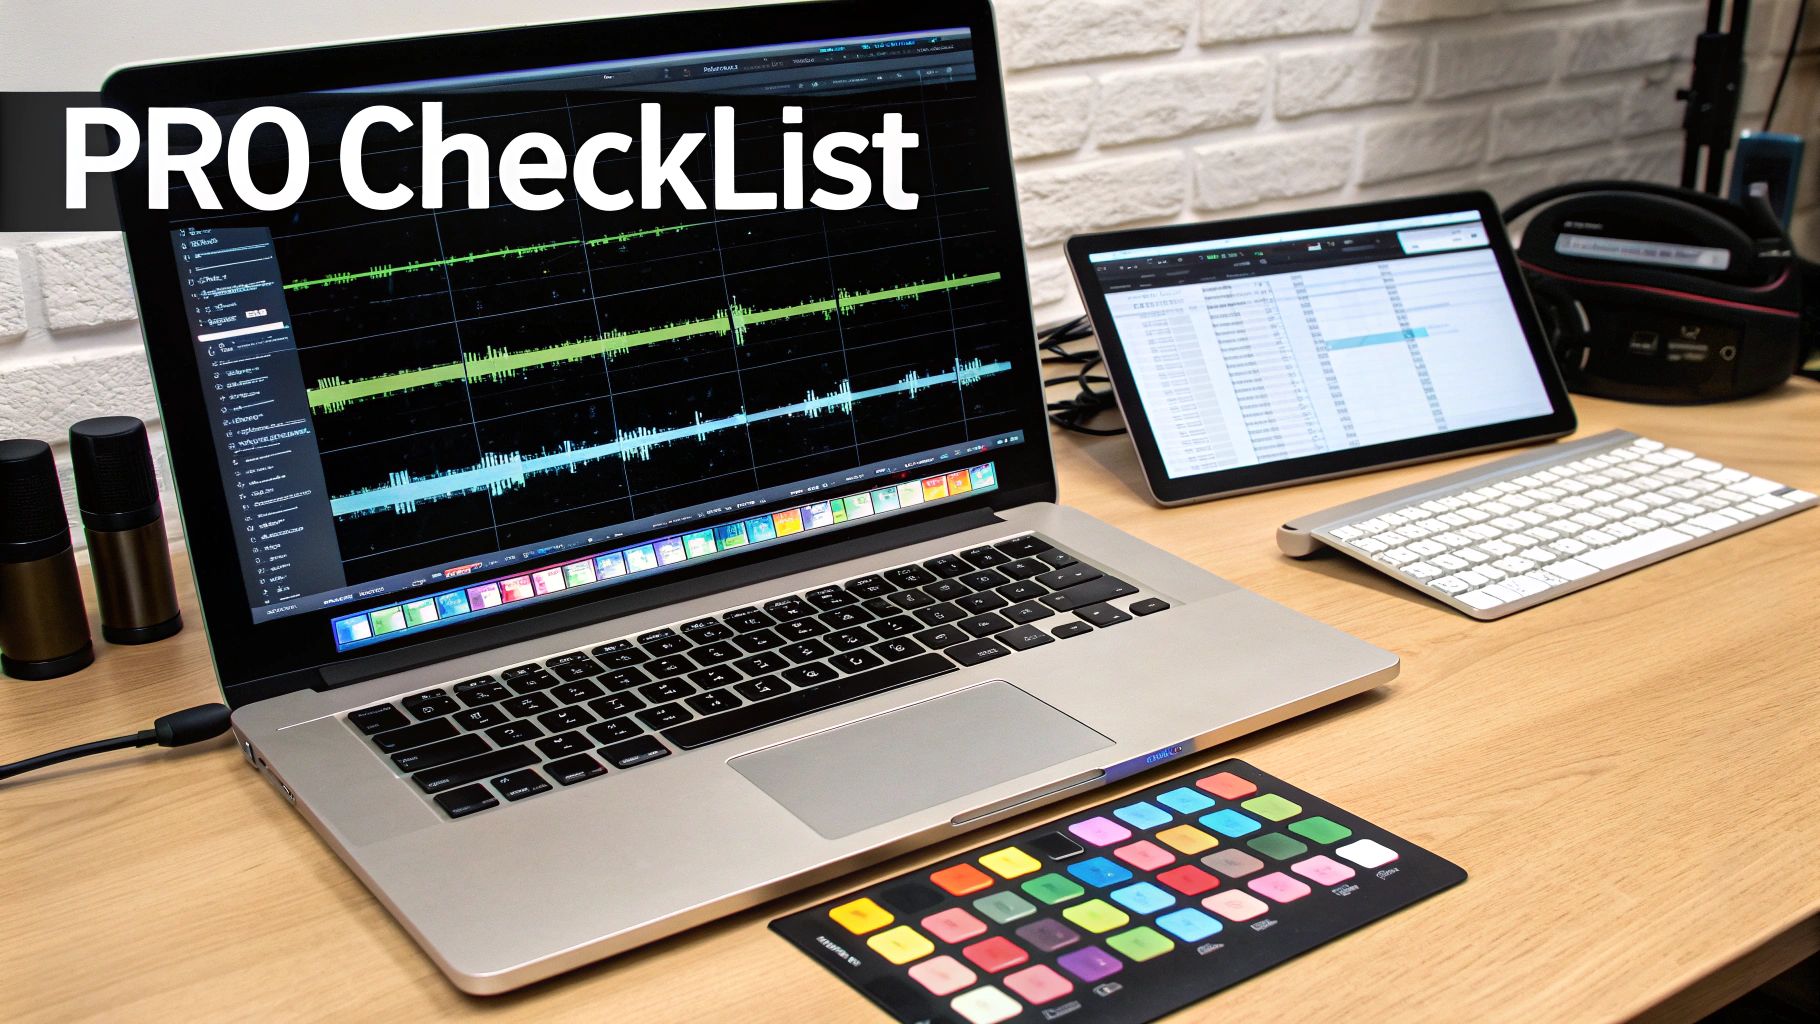
Here's a quick checklist I run through every time:
- Resolution: Always record in the highest native resolution your display supports. If you have a Retina display or a Studio Display, record at that native resolution. It's easy to downscale a sharp video later, but trying to upscale a blurry one is a recipe for disaster.
- Frame Rate (fps): For most screen recordings like software walkthroughs, 30 fps is perfectly fine. But if you’re capturing fast-paced action or silky-smooth macOS animations, bumping it up to 60 fps will make a world of difference.
- Close Unnecessary Apps: Seriously, quit everything you don't absolutely need for the recording. Use Command+Q on every non-essential app. This frees up precious system resources and dramatically reduces the chance of lag or stuttering that can ruin a perfect take.
Your digital workspace is just as important as your physical one. You're aiming for a clean, focused recording that doesn't distract the viewer.
Thankfully, the modern macOS interface gives you a fantastic canvas to work with.
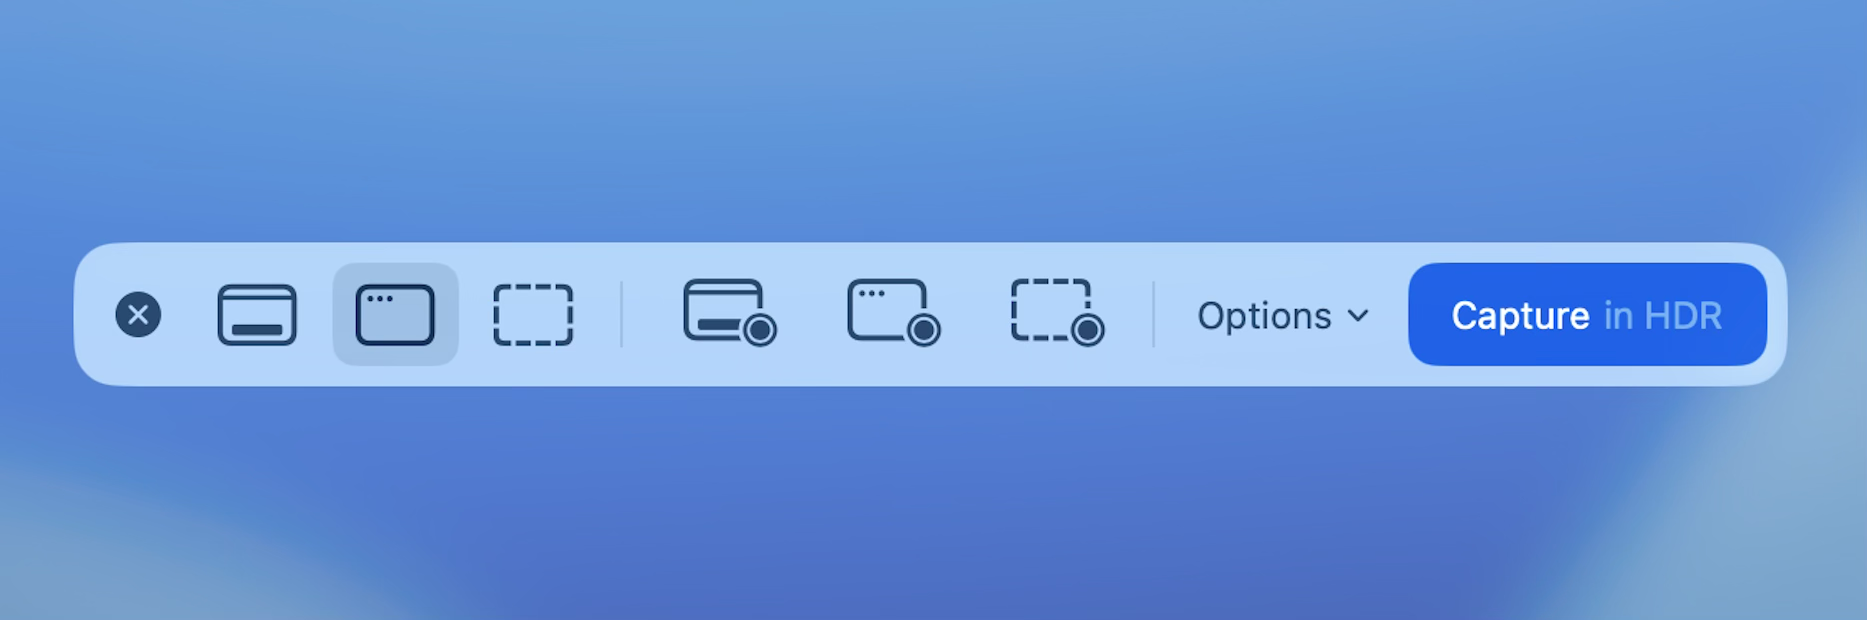
This clean desktop from macOS Sonoma is the perfect example of a distraction-free background. It keeps the focus squarely on your content.
Mastering Your Physical Space
Okay, your Mac's settings are dialed in. But what about the room you're sitting in? Your physical environment plays a massive role in both your video and audio quality.
Good lighting is non-negotiable. You don't need a Hollywood budget, either. Just facing a window so natural light hits your face can make a huge difference if you're on camera. No window? A simple ring light or even a strategically placed lamp can eliminate that grainy, low-light look.
Your microphone is arguably more important than your camera. Viewers will forgive slightly soft video, but they will click away instantly if the audio is muffled, echoey, or full of background noise.
An external microphone is one of the single best investments you can make. Even an affordable USB mic will be a night-and-day improvement over the one built into your Mac. It captures your voice with clarity while cutting down on the room echo and keyboard clatter that instantly screams "amateur." For a deeper dive, check out our guide on building a great home recording studio.
Sponsored by the makers
Tired of boring screen recordings?
Try Screen Charm.
Auto-zoom, motion blur, camera overlay, and background music. All built in. Record once, export a polished video.
See what it doesWhere the Magic Happens: Smart Editing
Great footage is your foundation, but the edit is where you really bring your video to life. This is your chance to turn a raw screen recording into a polished, professional piece of content that grabs and holds attention. On a Mac, you have some incredibly powerful tools to make this happen, letting you fix slip-ups, sharpen the visuals, and guide your viewer's eye right where you want it.
Smart editing isn't about slathering on flashy, complicated effects. It’s about being intentional. For instance, a long, static recording of a software tutorial can feel a bit... well, boring. But what if the view could automatically follow your cursor, zooming in on exactly what you’re clicking? That's what a tool like Screen Charm's auto-zoom does.
This one simple feature completely changes the dynamic. It keeps your audience focused on the action, so they’re not just passively watching a screen—they’re actively following along with you. When you reframe shots to highlight a specific menu or button, you’re essentially telling your audience, "Hey, look here. This part is important."
Adding That Professional Sheen with Color and Clarity
With your story and focus locked in, it's time to fine-tune the look and feel. Let's be honest, dull colors or weird lighting can make even the most helpful content feel a bit amateur. That's where color correction and color grading step in.
- Color Correction: Think of this as the technical fix. It’s all about getting your colors back to neutral—making sure whites are truly white, adjusting the exposure so it’s not too dark or blown out. This is the first, non-negotiable step to getting a clean, natural image.
- Color Grading: Now for the fun part. This is where your creativity comes in. You can give your footage a warm, inviting tone for a friendly tutorial or a cool, sleek blue tint for a more corporate, techy vibe. The goal is to create a consistent, intentional mood.
Once the color is dialed in, a final touch of sharpening can make a world of difference. If your original recording is just a little soft, a light sharpening filter can add that extra bit of definition that makes text and on-screen elements really pop.
Just a word of caution: it's incredibly easy to go overboard here. A touch of sharpening adds clarity, but too much creates distracting digital noise and makes your video look harsh. A little goes a long way.
Rescuing Footage That's Almost Perfect
Ever finished a recording only to find it's a bit grainy because the lighting wasn't great? Don't hit delete just yet. Most modern video editors on macOS, including iMovie and Final Cut Pro, come with built-in noise reduction tools. These features are surprisingly good at analyzing your footage and smoothing out that visual "static," potentially saving a clip you thought was a lost cause.
This is all part of a bigger shift in editing. If you're serious about transforming your footage, it's worth looking into new approaches like AI Integration in Post Production. AI is quickly becoming a game-changer in video, handling tedious tasks automatically and opening up new ways to improve quality.
This trend is only getting bigger as audience expectations for high-quality video continue to rise. In fact, the AI video upscaling software market is on track to hit USD 3.4 billion by 2035, growing at an impressive 22.3% CAGR. That growth in sectors from media to e-commerce shows just how critical these advanced tools have become.
For Mac creators, this is fantastic news. It means we can get better results without spending hours on tedious technical fixes, letting us focus on what really matters: telling a great story. If you're just getting started and need to find the right tool for the job, our guide to the best video editing software for beginners is a great place to start your search.
Choosing the Right Export Settings on Your Mac
You've spent hours recording the perfect footage and even more time editing it into a story that clicks. Don't let all that effort go to waste in the final step. Getting your export settings right on a Mac is the make-or-break moment that decides whether your video looks sharp and professional or like a pixelated artifact from the early 2000s.
This whole process can seem intimidating, with all its talk of codecs and bitrates, but it really boils down to one thing: striking the right balance between file size and visual quality. Let's walk through the key settings you'll find in any Mac video editor, from Final Cut Pro and iMovie to the export options right inside Screen Charm.
Codecs and Containers Demystified
First, let's clear up some jargon. Think of a codec as the language your computer uses to shrink (compress) your video for export and then expand (decompress) it for playback. For Mac users, two names pop up constantly: H.264 and HEVC (H.265).
- H.264 (AVC): This is the old faithful. It’s the undisputed champion of compatibility, working flawlessly on virtually every device, browser, and platform out there. You can't go wrong choosing H.264 if you want your video to play everywhere without a hitch.
- HEVC (H.265): This is the newer, more efficient kid on the block, and it's heavily optimized on Apple silicon. It delivers roughly the same visual quality as H.264 but in a file that's often up to 50% smaller. That’s a massive space-saver, especially for 4K video, but just be aware that some older devices might struggle to play it.
The container is just the file wrapper that holds your video, audio, and metadata together. On a Mac, you’ll usually see options for MP4 and MOV. While MOV is Apple's native format, MP4 is the universal standard for the web. It’s your best bet for sharing online.
For the best all-around results on platforms like YouTube or social media, your go-to combination should be the H.264 codec inside an MP4 container. It's the most reliable recipe for success.
This infographic gives a great overview of the smart editing you do before you even think about exporting—things like reframing, color grading, and sharpening that get your video looking its best.

Your export settings are all about preserving the polish and clarity you achieved during these editing steps.
Bitrate: The Secret Sauce of Video Quality
If the codec is the language, then bitrate is how much detail you put into each word. It directly controls the amount of data used for every second of video. More data (a higher bitrate) means a crisper, higher-quality image, but it also creates a much larger file. A lower bitrate keeps file sizes down but can lead to those ugly, blocky compression artifacts if you go too low.
So what’s the magic number? Well, it completely depends on where your video is headed. Different platforms have their own "sweet spots" for bitrate to ensure smooth playback for their users.
Recommended macOS Export Settings for Popular Platforms
Here’s a quick cheat sheet to help you dial in the right settings for today’s most popular video destinations.
| Platform | Recommended Codec | Resolution | Target Bitrate (Mbps) |
|---|---|---|---|
| YouTube | H.264 | 1080p | 8-12 Mbps |
| Vimeo | H.264 or HEVC | 1080p | 10-20 Mbps |
| Instagram/TikTok | H.264 | 1080p | 5-10 Mbps |
My personal rule of thumb? When in doubt, aim a little higher than the recommended bitrate. Platforms like YouTube are going to re-compress your video anyway, so giving them a high-quality source file from the start helps your video survive their processing with its quality intact.
This need for platform-specific delivery is driving massive growth across the industry. The video processing platform market is on track to jump from USD 7.50 billion in 2025 to USD 12.40 billion by 2030, fueled by the explosion of online video. As you can read in a detailed report covering video processing market growth on marketsandmarkets.com, better codecs and smarter delivery are at the heart of this trend. It’s a clear sign that getting your export right isn’t just a technical step—it’s crucial for engaging viewers.
Advanced Techniques and Common Pitfalls
Once you get the hang of recording, editing, and exporting on your Mac, you can start digging into the more advanced methods that really make a video look professional. These are the details that separate good content from truly great content, and they often come down to a mix of creative decisions and smarter workflows.
Elevating Your Visuals and Workflow
A game-changer for getting a consistent, cinematic vibe is using LUTs (Look-Up Tables). The easiest way to think of a LUT is as a powerful color preset. It maps the existing colors in your footage to a new set, instantly applying a specific color grade across your clips. This ensures every scene shares the same mood. If you're on a Mac using Final Cut Pro or DaVinci Resolve, applying LUTs is a fast pass to a high-end look without spending hours on manual color correction.
Another professional workflow, especially if you're wrestling with massive 4K files on your Mac, is editing with proxies. A proxy is just a smaller, low-resolution version of your original video file. By editing with these lightweight stand-ins, you can fly through your timeline and apply effects without your Mac's fans screaming at you. When you’re ready to export, the editing software cleverly swaps the proxies back out and applies all your changes to the original high-quality files. It’s a genuine lifesaver.
Sidestepping Quality-Killing Mistakes
Knowing the tricks of the trade is only half the story. You also have to know which common traps will tank your video quality in a heartbeat. Avoiding these mistakes is just as important as anything you do right.
Keep an eye out for these classic blunders:
- Relying on Digital Zoom: Whatever you do, don't use the digital zoom on your camera or screen recorder. It’s not a real zoom; it just crops the image and blows it up, leaving you with a blurry, pixelated mess. It's much better to use a tool like Screen Charm's auto-zoom in post-production for a crisp, clean close-up.
- Forgetting About Audio: Bad audio is the fastest way to get someone to click away. Viewers are surprisingly forgiving of slightly imperfect video, but they have zero patience for muffled, echoey sound. An external microphone is almost always a non-negotiable.
- Over-Compressing the Final File: It’s tempting to shrink your video file down as small as possible, but crushing the bitrate too much will introduce nasty visual artifacts. It’s always better to end up with a slightly larger file that actually preserves the quality you worked so hard to create.
One of the most critical mistakes happens before you even hit record: poor lighting. Badly lit footage is either too dark and grainy or completely blown out. While prevention is key, it's also worth learning some post-production techniques for correcting overexposure, as skills from other visual fields can definitely come in handy.
Frequently Asked Questions
Even when you have all the right tools, you're bound to run into a few questions while figuring out how to improve video quality. Let’s tackle some of the most common issues Mac users face so you can get back to creating.
How Can I Make My Webcam Look Better on a Mac?
One of the biggest levers you can pull for better webcam quality is lighting. It's that simple. Try to sit facing a window to get some soft, natural light, or grab an inexpensive ring light to kill any harsh shadows on your face.
Whatever you do, avoid having bright windows or lamps directly behind you. That's a surefire way to turn yourself into a dark silhouette.
Also, don't forget to dig into your Mac's software. Newer Macs with supported cameras have a great "Center Stage" feature that automatically keeps you in the frame. If you're using an older Mac or an external camera, third-party Mac apps can often unlock manual controls for exposure and white balance, giving you far better results than the default auto-settings.
Your physical environment is just as crucial as your digital one. A clean, uncluttered background instantly makes your video feel more professional. Tidying up your workspace or using a simple, non-distracting virtual background can make a huge difference.
What Is the Best Video Format for Mac?
For just about everything—especially sharing online—you can't go wrong with MP4 using the H.264 codec. This format is the gold standard because it hits the sweet spot between great quality, manageable file sizes, and universal compatibility. A video in this format will play nicely on almost any device or platform you can think of.
Now, if you're a pro who lives and breathes in the Apple ecosystem (think Final Cut Pro) and you need to preserve every last pixel of quality for heavy editing, Apple ProRes is your best bet. Just know that the files will be massive.
Why Does My Video Look Blurry After I Upload It?
Ah, the classic "it looked great on my Mac" problem. This almost always boils down to one thing: compression.
Platforms like YouTube or Instagram have to re-compress your video when you upload it. They do this to save storage space and make sure it streams smoothly for everyone. If your original video was already a bit compressed, this second round of compression can really make it look muddy.
To get ahead of this, you need to do two things:
- Export at a high bitrate. Think of this as giving the platform a really high-quality source file to work with. The more data their algorithm has, the better the final result will look.
- Upload in the right resolution. If you filmed in 1080p, upload the 1080p file. Don't send a 720p version and cross your fingers.
Nailing these two steps will give your video the best possible chance of surviving the upload process with its clarity intact.
Ready to stop worrying about complex settings and start creating stunning product demos? Screen Charm simplifies the entire process on your Mac. With intelligent auto-zoom and an intuitive editor, you can produce polished, professional-quality videos in minutes. Learn more about Screen Charm and get started today.