If you're a macOS user, you know the ecosystem is all about powerful tools that just work. While you can get by with built-in apps like QuickTime, for truly professional video, you need something more. A dedicated app like Screen Charm brings advanced features to the table—think dynamic auto-zoom and built-in editing—that let you create polished content right on your Mac without a complicated workflow.
Why Choosing the Right macOS Video Recorder is a Game-Changer
Picking a video recorder for your Mac isn't just about ticking a box; it's a strategic move. We're all creating more video than ever before for remote work, online courses, and digital marketing. The quality of that video directly shapes how people see you and your work.
A grainy, poorly-edited recording can make a fantastic presentation fall flat. On the other hand, a crisp, well-paced video can make your message resonate and keep your audience hooked.
Picture this: a corporate trainer trying to create clear, engaging modules for a new team. Or an online course creator who needs to produce tutorials that feel premium and worth the investment. Maybe it's a developer demoing a new app, where every detail needs to be sharp and easy to follow. In every one of these situations, the right tool makes all the difference.
The Surge in Demand for Better Tools
This isn't just a gut feeling; the numbers back it up. The global market for video recording software is expanding quickly, largely because of the massive shift to remote work and e-learning. Commercial tools are leading the charge, becoming essential for everything from video conferencing to creating marketing content. If you're curious, you can learn more about the industry trends and see just how big this shift is. This trend underscores a simple truth: basic screen capture just doesn't cut it anymore.
A great video recording app is an investment in your own efficiency and the quality of your work. It's the difference between spending hours fighting with post-production and creating content that actually hits the mark.
What to Look For in a macOS Video Recorder
So, how do you sift through the options and find the best app for your Mac? I always come back to three core pillars.
- Performance: The app has to be rock-solid. It needs to capture high-resolution video without turning your Mac's fans into a jet engine or causing your system to lag.
- Ease of Use: You shouldn't need a film degree to create a professional-looking video. A clean, intuitive interface is non-negotiable.
- macOS Integration: The best tools feel like they belong on a Mac. They should play nicely with the operating system, supporting features like Continuity Camera and just feeling… native.
When you focus on these fundamentals, you can see past the marketing hype and find a tool that genuinely improves how you work and what you create.
So, What Do You Actually Need to Record on macOS?
Before you dive into a sea of app features and reviews, let's take a step back. The single most important thing you can do is get crystal clear on what you need to accomplish. Finding the right video recording app for macOS isn't about snagging the one with a million bells and whistles; it's about finding the perfect tool for your job. An app loaded with features you'll never touch just gets in the way.
What you're recording changes everything.
Think about it. A marketer creating a quick, punchy social media video has completely different needs than a professor crafting a detailed lecture. A software developer documenting a bug for their team needs something else entirely. Each scenario calls for a unique set of tools.
This handy graphic really puts it into perspective, showing how your main goal—whether that's professional polish, simple sharing, or just raw speed—points you toward the right kind of app.
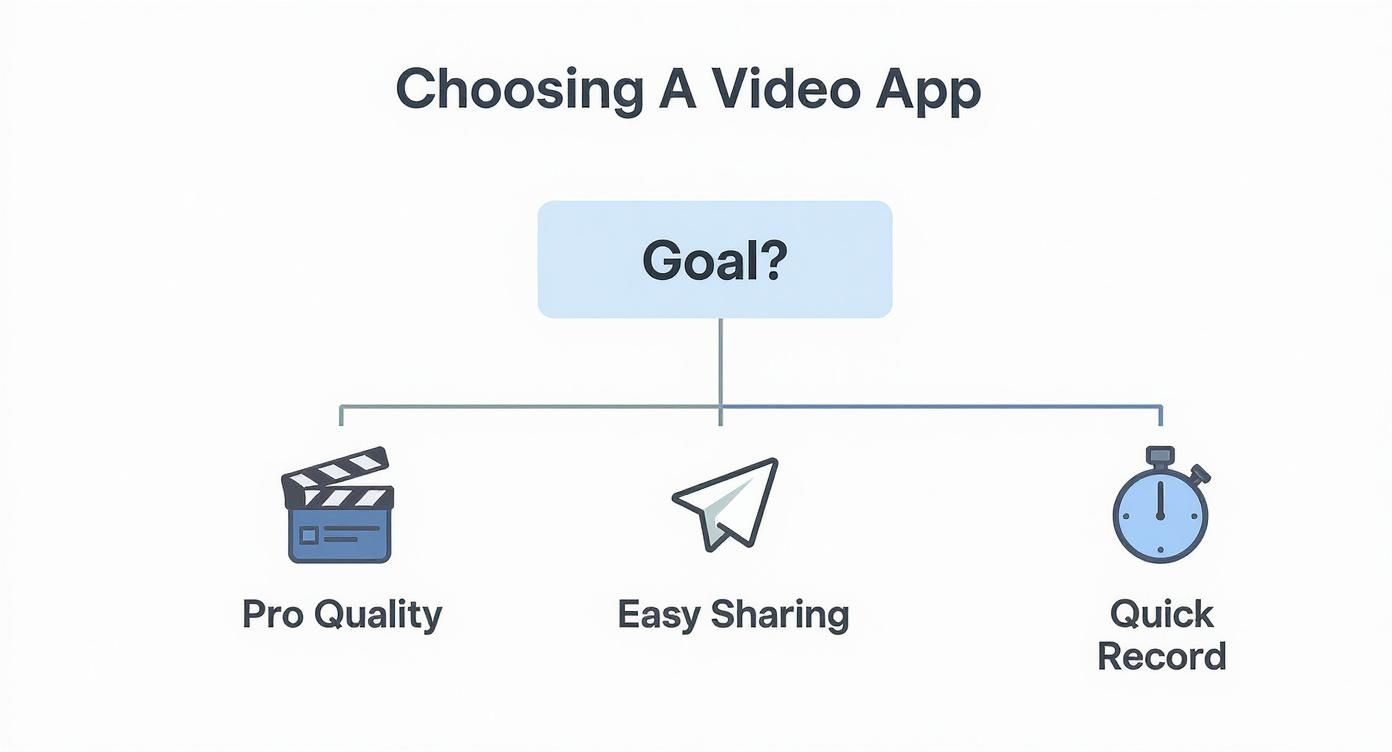
When you know your purpose from the get-go, you save yourself the headache of picking an app that's either too weak or way too complicated for what you do on your Mac every day.
Nailing Down Your "Must-Have" Features
Let's get practical and walk through a few common recording situations macOS users find themselves in. This will help you build a mental checklist of what’s truly essential for your work.
An educator, for instance, probably needs to record their screen and their webcam at the same time for that classic picture-in-picture tutorial format. A clear, highlighted cursor is also non-negotiable for them. A marketer, however, might care more about having custom virtual backgrounds to keep everything on-brand and simple tools for trimming out mistakes on the fly.
If you want to get into the nitty-gritty of the recording process itself, our guide on how to record video and audio on a Mac is a great place to start.
The real trick is to separate your "must-haves" from the "nice-to-haves." A feature is only a game-changer if it solves a problem you actually face.
Create Your Personal Feature Checklist
To make this process even easier, I've put together a checklist of common features. Think about your last few recording projects and use this table to decide what's truly critical for you.
Essential macOS Video Recording Features Checklist
| Feature | Description | Crucial For (Example Use Cases) |
|---|---|---|
| Simultaneous Screen & Webcam | Records both your screen and camera feed, often as picture-in-picture. | Product demos, software tutorials, online course lectures. |
| Cursor Highlighting/Effects | Adds a visual highlight, click animation, or spotlight to the mouse cursor. | Guiding viewers through complex software interfaces or websites. |
| Auto-Zoom on Clicks | Automatically zooms in on the area where you click, then zooms back out. | Highlighting key actions in a user interface without manual editing. |
| Virtual Backgrounds | Replaces your real-world background with an image or blurred effect. | Maintaining a professional look in any environment; branding videos. |
| Integrated Editing Tools | Basic tools to trim, split, or annotate videos within the app itself. | Quick turnarounds; users who don't want to use a separate video editor. |
| High-Resolution Recording (4K) | Captures your screen in ultra-high definition for maximum clarity. | Recording detailed design work, high-fidelity gaming, or pro presentations. |
| Easy Sharing/Export Options | One-click options to share a link or export to platforms like YouTube. | Teams needing to share feedback quickly; content creators on a schedule. |
By thinking through these features, you can create a personalized scorecard to measure every app against. This way, you're not just picking an app; you're choosing a partner for your projects.
You might even have very niche requirements, like finding specific tools for recording specific types of video calls, such as Skype. Being honest about your needs is the fastest way to make sure your final choice is the right one.
Sponsored by the makers
Tired of boring screen recordings?
Try Screen Charm.
Auto-zoom, motion blur, camera overlay, and background music. All built in. Record once, export a polished video.
See what it doesComparing the Top Video Recording Apps for macOS
Alright, now that you know what you’re looking for, let's dive into the actual tools. The macOS ecosystem is packed with options, from the simple app that's already on your computer to some seriously powerful software built for professional creators. We'll look at the big names to see where they shine and where they fall short.
This isn't just a list of features. I want to give you a real feel for how these apps work day-to-day, so you can pick the one that truly fits your process.
The Reliable Built-In Option: QuickTime Player
Every single Mac ships with QuickTime Player. It's free, it’s there, and if all you need is a basic screen capture, it works. For a quick, no-fuss recording of a window or your entire screen, you really can't beat its simplicity.
But that’s also its biggest downfall. Simplicity means no bells and whistles. You won't find any editing tools, no way to record your webcam in a picture-in-picture overlay, and definitely no annotation features. It's perfect for a one-off recording, but you'll hit a wall fast if you're trying to create a polished tutorial.
The Professional Powerhouse: Camtasia
For years, Camtasia has been the go-to for many professionals, especially in corporate training and education. Its real strength is that it's an all-in-one package—you get a heavy-duty screen recorder and a full-blown video editor rolled into one.
That power comes with a price tag and a learning curve. If you're new to video, Camtasia can feel pretty overwhelming, and it can be a resource hog, especially on older Macs. It’s a solid choice if you need an end-to-end production suite and you're prepared to invest the time and money to master it.
The Quick-Sharing Specialist: Loom
Loom completely changed the game by focusing on one thing: making it ridiculously easy to record a video and share it instantly with a link. It’s a fantastic tool for asynchronous team communication. Think sending quick feedback on a design mockup or walking a developer through a bug report.
While Loom is a champion of speed and collaboration, it’s not built for creating polished, high-quality videos. The editing tools are minimal because the focus isn't on production value—it's on communication. It’s hands-down the best choice when your main goal is to replace a long email or a quick meeting.
Choosing an app isn't just about features; it's about workflow. The best tool is the one that removes friction from your creative process, allowing you to focus on your message, not the software.
The Smart and Efficient Creator: Screen Charm
This is where Screen Charm comes in. It was built from the ground up for macOS users who need to create professional-looking demos and tutorials but don't want to get bogged down by a complex editor. It really hits that sweet spot between dead-simple and powerfully smart.
Screen Charm's standout auto-zoom feature is the perfect example. It intelligently follows your cursor, zooming in on clicks and important actions without you having to do a thing. I can't overstate how much time this saves. In any other app, creating those smooth zoom-and-pan effects is a tedious, manual process.
But it's more than just one killer feature. The whole experience is designed for modern creators:
- Integrated Editor: You can trim your clips, adjust the auto-zoom after the fact, and tweak other properties right inside the app. No need to export to another program.
- Customization: Add a custom background to match your brand and record your webcam to give your videos a personal, human touch.
- Performance: It's a native macOS app, so it runs lean and fast. You can even export in unlimited 4K UHD without bringing your system to a grinding halt.
For entrepreneurs, developers, course creators, and educators, Screen Charm is a game-changer. It automates the most boring and time-consuming parts of the editing process, letting you produce truly polished content in a fraction of the time.
Unlocking Advanced Recording Features on macOS
Once you get past the basics, you start to see what really separates a good app from the best app for video recording on a Mac. The advanced stuff is where the magic happens. These are the features that can turn a clunky, multi-step chore into a single, smooth process. They don’t just capture your screen; they help you create a better final product right from the start.
Let’s say you just finished recording a 20-minute software demo. With a simple tool, your work is just beginning. You'd have to export that huge file, then spend ages manually trimming out all the awkward pauses, ums, and ahs, and painstakingly zooming in on key details. This is where a modern app completely changes the game.
AI Tools That Save Hours of Editing
The biggest leap forward I’ve seen in years is AI-powered editing. Instead of slogging through hours of post-production, a smart app can do the heavy lifting for you.
Take Screen Charm’s automatic jump-cut tool, for example. It scans your recording and, with one click, snips out all the filler words and long silences. This isn’t just a time-saver; it produces a tighter, more professional video that keeps your audience hooked. A task that used to eat up my afternoon now literally takes seconds.
The real value here isn't just the flashy features—it's the time and creative energy you get back. When an app automates the most tedious parts of video creation, you can finally focus on what actually matters: your content.
Achieving Crystal-Clear Audio
You can have the most beautiful 4K video, but if the audio is bad, people will click away. The best recording apps for macOS get this and give you audio controls that are way more sophisticated than a simple on/off button.
Multi-track audio is a perfect example and, honestly, a lifesaver. It records your microphone and your Mac's system audio on two separate tracks. Why is this so important?
- Isolate Your Voice: You can tweak your narration without touching the sound from the app you’re showing.
- Balance Levels: It's easy to duck the system audio when you're talking, so your voice always comes through loud and clear.
- Remove Mistakes: Did a notification pop up mid-recording? No problem. Just delete that blip from the system audio track without having to re-record the whole take.
Getting the audio right is a non-negotiable for professional-quality work. If you want to get into the nitty-gritty, we have a whole guide on how to capture system audio on your Mac for truly flawless recordings.
Making Your Content More Engaging
At the end of the day, you want to hold your viewer's attention. In a world saturated with visuals, that's getting harder to do. By 2025, video is expected to account for a staggering 82% of all consumer internet traffic. And with 93% of marketers reporting a positive ROI from their video efforts, the pressure is on to create content that really stands out.
This is where features like annotation tools become your best friend. Being able to draw on your screen, add arrows, or drop in text while you're recording helps you direct your viewer's gaze. It transforms a passive screen share into an active, engaging lesson. When you pair these with dynamic tools like auto-zoom, you end up with a viewing experience that's impossible to ignore.
How to Optimize Your Recordings for Pro Results
Picking a great recording app for your Mac is a solid first step, but the software alone won't guarantee a polished result. Your recording space and a few crucial settings are what separate amateur-hour videos from genuinely professional content.
Nailing these details upfront saves you a world of headaches in the editing room. The great thing is, you don't need a high-end studio to make it happen. Just a few simple tweaks to your setup can make a massive difference, starting with what people see and hear.
Dialing In Your Recording Environment
Let's start with a hard truth: audio is more important than video. Your audience will tolerate a slightly grainy image, but they’ll click away in seconds if the sound is terrible. The built-in mic on your Mac is okay for a quick call, but for recording, an external USB microphone is a game-changer.
Once you have a decent mic, here’s how to get the best sound out of it:
- Mind the Gap: Keep the microphone about 3 to 8 inches from your mouth. This simple trick captures the richness of your voice while cutting down on that hollow, echoey room sound.
- Pop a Filter On: A pop filter is a cheap, simple screen that diffuses the harsh "p" and "b" sounds that can cause jarring pops in your audio track.
- Soften Your Space: Recording in a room with soft surfaces—think carpets, curtains, or even a few pillows—helps absorb sound and kills unwanted echo.
With audio handled, turn your attention to lighting. Good lighting is what gives your video that sharp, clean look. You don’t need a movie-set budget here. A window with soft, natural light is fantastic. If that's not an option, a basic ring light positioned in front of you works wonders. Just avoid having a bright light source behind you, or you’ll end up as a dark silhouette.
Configuring Your Software for Peak Performance
Your space is prepped, so now it’s time to tweak your app’s settings. The goal is to capture the best possible quality without making your Mac grind to a halt.
First, check your resolution and frame rate. For most tutorials and presentations, 1080p at 30 frames per second (fps) is the perfect balance of crisp detail and manageable file sizes. If you're recording something with a lot of fast motion, like a gaming session or a fluid software animation, bumping that up to 60 fps will make everything look incredibly smooth.
Pro Tip: Learn the keyboard shortcuts for your app. Being able to start, pause, and stop recording without fumbling for your mouse makes your takes cleaner and saves you from trimming awkward moments later.
Finally, before you hit that big red button, do a quick audio check. Every recording app has a visual audio meter. Speak at your normal volume and watch the levels. You want the meter to bounce comfortably in the green and yellow zones. If it’s hitting red, you’re "clipping," which creates nasty distortion that's almost impossible to fix.
Once you’ve captured your raw footage, the next step is polishing it up. If you need a tool for that, our guide to the best video editing software for beginners can point you in the right direction.
Making the Final Call: Which macOS App is Right for You?
Alright, you've done the homework. You know what you need, you've checked out the top players, and you've seen what a truly powerful recording tool can do. Now comes the moment of truth: making the final call.
Choosing the right video recording app for your Mac isn't just about ticking boxes on a feature list. It’s about finding a tool that fits so well into your workflow that you forget it’s even there.
It's All About Value, Not Just Price
Let’s be real. If all you need is a quick, one-off recording that you’ll probably delete tomorrow, a basic, free tool might get the job done. But if you’re creating content that matters—whether it's detailed tutorials, compelling product demos, or engaging online courses—you need to think bigger.
This is where a tool like Screen Charm really shines. It's designed to be a partner in your creation process, not just another piece of software you have to wrestle with.
Think about the projects you tackle most often. If you spend your days making software tutorials, a feature like automatic zoom and pan isn't just a nice-to-have; it's a game-changer. It saves you from countless hours of tedious keyframing in post-production. Suddenly, a one-time license fee doesn't look like an expense—it looks like a smart investment in getting your time back.
The market for this kind of software is exploding for a reason. Projections show the video streaming and recording software industry is on track to hit a massive $78.2 billion by 2034. This growth is fueled by people just like you who need professional tools to create high-quality digital content. You can learn more about these market trends to see how quickly this space is evolving.
The best app for you will feel like a natural extension of your creative process. It won't just capture your screen; it will anticipate what you need to do next and handle the boring stuff for you, so you can stay focused on your message.
Ultimately, the goal is to match your real-world needs with the features that will genuinely make your life easier. Once you find that fit, you'll have a recorder that you can rely on for years. Don't hesitate to take a promising app for a test drive. There's no better way to see how it clicks with your style than to get your hands on it and create something.
Got Questions? We've Got Answers
You've got questions about recording on your Mac, and we've been there. Let's tackle some of the most common ones that come up.
Is It Possible to Use My iPhone as a Webcam for My Mac?
You absolutely can, and honestly, it's a game-changer. Thanks to a nifty macOS feature called Continuity Camera, your iPhone’s powerful camera can double as a high-quality webcam for your Mac.
This is one of my favorite tricks for instantly making videos look more professional without buying a dedicated webcam. The best recording apps integrate this feature smoothly, so you just select your iPhone as the camera source and you're good to go.
What's the Real Difference Between Screen Recording and Video Capture?
It's a common point of confusion, but the distinction is pretty straightforward.
Screen recording is all about capturing what's happening on your Mac's screen. Think software tutorials, presentation walkthroughs, or gameplay videos.
Video capture, on the other hand, records from an external source—usually a webcam or another connected camera. This is for recording you.
The magic really happens when an app, like Screen Charm, lets you do both at the same time. This is how you create those engaging videos where your face is in a small circle while you're demonstrating something on your screen.
How Much Hard Drive Space Will My Mac Recordings Gobble Up?
This is the classic "it depends" answer, but I can give you some solid ballpark figures. The final file size hinges on things like resolution, frame rate, and how long you record.
As a rough guide, a 10-minute recording in 1080p could be anywhere from 100MB to over 1GB.
Pro Tip: Look for an app that gives you control over compression and quality settings. This lets you find the sweet spot between a crystal-clear video and a file size that won't bring your hard drive to its knees.
Ready to stop worrying about the technical stuff and start creating polished product demos and tutorials? Give Screen Charm a try and see just how simple professional-quality recording can be. Get started with Screen Charm.
Deciding between specific tools? See Screen Charm vs Loom or Screen Charm vs Screen Studio for detailed comparisons.