Every social media platform has its own rulebook for video, dictating the ideal aspect ratio, resolution, and duration. If you've ever uploaded a video from your Mac only to see it get weirdly cropped or look fuzzy, you know what I'm talking about. Following these guidelines is non-negotiable, especially for vertical video, which has become the standard on platforms like TikTok and Instagram Reels with its signature 9:16 aspect ratio.
Your Quick Guide to Social Media Video Specs
Trying to keep all the different video specs straight can feel like a full-time job. But getting them right is one of the most important things you can do for your content. When a video fits the platform perfectly, it doesn't just look more professional—it also gets a nice little boost from the algorithm, which means more eyeballs on your work.
Think of this section as your go-to cheat sheet. It’s built to give you the essential specs without the fluff, so you can quickly double-check your settings, avoid frustrating upload errors, and get back to creating. This is especially for you macOS creators who just need the right numbers, fast.
Here’s a snapshot of the core settings you absolutely need to nail: aspect ratio, resolution, and duration.
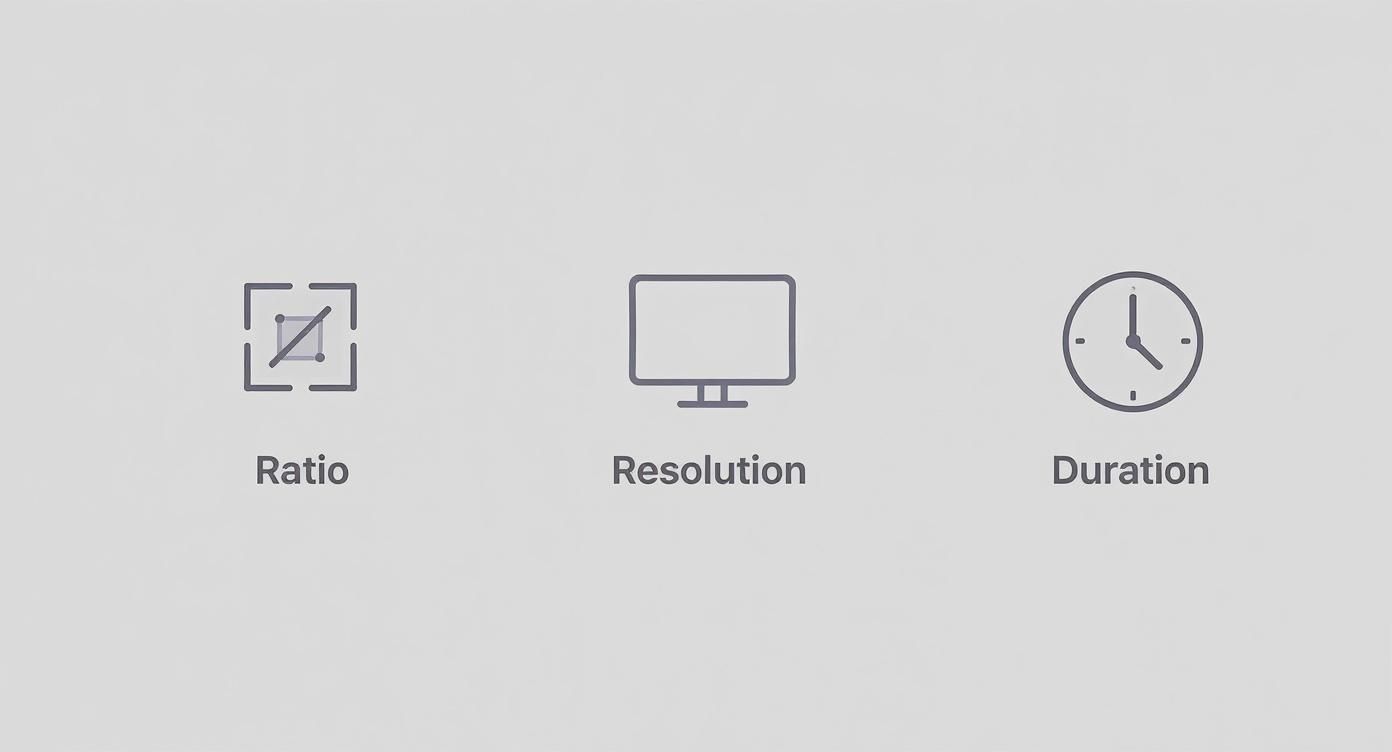
As you can see, the sweet spot for a successful video is finding the right balance of these three elements for each network you post on.
Platform Video Specs At a Glance
To make things even easier, here's a quick lookup table with the most common requirements for the major platforms. It's a great starting point before you dive into the nitty-gritty details for each one.
| Platform | Primary Format (Aspect Ratio) | Recommended Resolution | Common Duration Limit |
|---|---|---|---|
| TikTok | 9:16 (Vertical) | 1080x1920 | 10 minutes |
| Instagram Reels | 9:16 (Vertical) | 1080x1920 | 90 seconds |
| YouTube Shorts | 9:16 (Vertical) | 1080x1920 | 60 seconds |
| Facebook Feed | 4:5 (Vertical) | 1080x1350 | 240 minutes |
| X (Twitter) | 16:9 (Horizontal), 1:1 (Square) | 1920x1080 or 1080x1080 | 140 seconds |
| LinkedIn Feed | 16:9 (Horizontal), 1:1 (Square) | 1920x1080 or 1080x1080 | 10 minutes |
Remember, these are the most common formats. Each platform often supports other specs for different placements, like ads or stories, which we'll cover in more detail later.
Why Getting the Format Right Matters
It really comes down to this: adhering to the correct specs makes your content look sharp and professional on any screen. When the format is on point, you sidestep all those rookie mistakes like awkward cropping, ugly black bars, or a pixelated mess that screams "amateur." It’s the first, and maybe most important, step to creating content that people actually want to watch.
A solid technical foundation is just part of the puzzle. To see how these specs translate into real-world success, check out these social media video strategy examples for some great inspiration.
And if you ever find yourself with a video that's the wrong shape, don't sweat it. We built a free video aspect ratio converter right here at Screen Charm to help macOS users reframe their content perfectly for any social channel in just a few clicks.
Sponsored by the makers
Tired of boring screen recordings?
Try Screen Charm.
Auto-zoom, motion blur, camera overlay, and background music. All built in. Record once, export a polished video.
See what it doesUnderstanding Core Video Format Components
Before we dive into the nitty-gritty specs for each social platform, let's get on the same page about what makes a video file tick. It’s easier than it sounds, especially on macOS where many of the best settings are already defaults.
Think of your video file as a shipping box. The box itself is the container, and the stuff packed inside—your actual video and audio—has been squished down for easy delivery using a codec.
Containers, Codecs, and Quality
If you're on a Mac, you’ve probably seen MP4 and MOV files everywhere. While both are great, MP4 is the undisputed champion for social media. It hits that sweet spot of great quality and small file size, which is exactly what you need for the web. MOV is Apple’s own format, perfect for editing in Final Cut Pro, but it can sometimes cause headaches on non-Apple devices. Stick with MP4 for sharing.
Inside that MP4 container, the video data is compressed by a codec. The one you need to know is H.264 (also called AVC). It’s the industry standard for a reason: it delivers fantastic-looking video without creating massive files that take forever to upload and buffer.
These pieces all work together, but a couple of other key specs have a huge impact on how your video looks: resolution and aspect ratio.
- Resolution: This is simply the number of pixels that make up your video's frame, like 1920x1080 (Full HD). More pixels mean a sharper, clearer image.
- Aspect Ratio: This describes the shape of your video frame—the ratio of its width to its height. For example, a vertical TikTok video is 9:16.
A quick heads-up: bigger isn't always better. Chasing the highest possible resolution can backfire. Social platforms will aggressively compress massive files, which can actually make your video look worse than if you'd uploaded it at their recommended size. The goal is to find the perfect balance.
Finally, there’s bitrate. This one's a big deal. Bitrate is the amount of data used to create one second of video, and it directly controls the trade-off between quality and file size. A higher bitrate looks better but makes the file bigger. If you're looking for that perfect setting, our handy video bitrate calculator can take the guesswork out of it. It’ll help you make sure your product demos look sharp and professional without making your viewers wait for them to load.
Instagram Video Format Specifications
Instagram is a visual-first platform, and if you want your videos to perform well, they need to look like they belong there. The app has three main spots for video—Reels, Stories, and your standard in-feed posts—and each one has its own rules. Getting these specs right is the first, most crucial step to make sure your product demos don't end up looking blurry, stretched, or awkwardly cropped.

If you're creating screen recordings on your Mac with a tool like Screen Charm, your export settings are everything. Instagram’s preferred combo is an MP4 file using the H.264 codec with AAC audio. This setup just works, ensuring your video looks good on any device. While macOS defaults to MOV files in many apps, it’s always a good move to export to MP4 before you hit upload.
Reels and Stories Vertical Video Requirements
Reels and Stories are all about that full-screen, vertical experience on a phone. There’s no room for compromise here; you have to go vertical if you want your content to look native. Stick to these specs, and your video will fill the entire screen perfectly, without any weird black bars or cropping.
- Aspect Ratio: 9:16. This is non-negotiable for a true full-screen look.
- Resolution: Always aim for 1080 x 1920 pixels. Anything less, and you risk a fuzzy, low-quality video.
- Max File Size: You’ve got a generous 4 GB to work with for both formats.
- Duration: Stories are capped at 60 seconds for each clip, but Reels can now run as long as 15 minutes.
It's pretty clear that Instagram is moving beyond just short, snappy clips. The fact that Reels can be 15 minutes long shows the platform is embracing more in-depth content, which is great news for anyone making detailed demos on their Mac.
Screen Charm Pro-Tip: When you're recording your Mac's screen for a 9:16 video, keep the auto-zoom feature in mind. It's best to keep all the important UI elements you're demonstrating in the center of the frame. This creates a "safe area" and ensures Instagram's own interface—like the like, comment, and share buttons—doesn't cover up the critical parts of your demo.
In-Feed Video Best Practices
While vertical video gets all the attention, the main Instagram feed still gives you a bit more flexibility. This is a great place for more traditional product demos or company announcements. Your main goal here is to take up as much screen space as possible while someone is scrolling.
The two aspect ratios that work best are 1:1 (square) and 4:5 (vertical). A 4:5 video is my personal recommendation because it’s taller than a square or landscape video, making it that much harder to scroll past. For a complete breakdown of every possible video size, this ultimate guide to Instagram video sizes and formats is an excellent resource.
TikTok Video Format Specifications
TikTok is a video-first world. Its entire user experience and algorithm are built around a very specific video format. If you want your content to feel native, perform well, and actually stop someone mid-scroll, you absolutely have to play by its rules. Getting these specs right from the start is non-negotiable, especially when you're creating polished product demos on a Mac.

The platform is notoriously unforgiving when it comes to its vertical format. Sure, you can upload a video with a different aspect ratio, but it’ll show up with clunky black bars. That’s an immediate red flag to users that the content wasn't made for them, and they'll likely swipe away before you get a single second of watch time.
Core Technical Requirements for TikTok
Think of the following specs as your pre-flight checklist before uploading to TikTok. For those of us creating on macOS, these settings are easily accessible in most video editors, including Screen Charm, which makes exporting a perfect file a breeze.
- Aspect Ratio: This is the big one. Your video must be 9:16. No exceptions. It's the full-screen, vertical format that defines the entire TikTok experience.
- Resolution: Stick to 1080 x 1920 pixels. This ensures your video looks crisp and professional, not blurry or pixelated.
- File Container: You can use either MP4 or MOV. Since MOV is native to macOS, it's a convenient option, but MP4 is often the safer bet for universal compatibility.
- File Size: When uploading from your Mac's web browser, you get a pretty generous file size limit of 500 MB.
- Framerate: Anything between 30-60 FPS (frames per second) will look great and provide that smooth playback users expect.
- Captions: This isn't a hard technical requirement, but it might as well be. A huge number of users watch with the sound off, so adding on-screen text or closed captions is essential for getting your message across.
Evolving Trends in Video Duration
While the technical specs are pretty set in stone, user behavior is always changing. A few years ago, the secret sauce for TikTok was a short, punchy video under 30 seconds. But the platform and its audience have grown up.
An analysis of over 2 million TikTok videos revealed that content longer than 60 seconds is now pulling in more than double the views of shorter clips. You can dive deeper into the findings on social media video statistics to see how these trends can inform your own content strategy.
Key Takeaway: The sweet spot for TikTok video length has changed dramatically. While quick, viral videos still work, there's now a huge opportunity for creators to hold an audience's attention with more substantial content. TikTok now allows uploads up to 10 minutes long.
This is fantastic news if you're creating product demos or tutorials on your Mac. You no longer have to cram everything into a frantic 60-second clip. You have the breathing room to tell a proper story, show off features in detail, and deliver real value. Just remember, when recording your screen on a Mac for these longer videos, keep the important action framed in the center. This "safe area" ensures nothing critical gets covered up by TikTok's UI elements on the bottom and right side of the screen.
YouTube: The King of Long-Form and Shorts
YouTube is a beast of a platform. It's home to everything from sprawling, feature-length documentaries to snappy, 15-second viral hits. This means you can build a really dynamic channel strategy by playing with both traditional long-form content and the newer Shorts format. But to get it right, you need to know the specific rules for each.
The Nitty-Gritty on YouTube Specs
For the classic, landscape-style videos that made YouTube famous, 16:9 is your go-to aspect ratio. It’s what everyone expects on a desktop and looks great on mobile too. While you can upload in various resolutions, consider 1080p (1920 x 1080) the absolute minimum for a professional look. If you've got the footage, pushing it to 4K (3840 x 2160) will make your content incredibly sharp.
When you're ready to export from your Mac, the universal combo is an MP4 container with the H.264 codec and AAC audio. This setup gives you fantastic quality without creating a massive file, which means faster uploads and smoother playback for your viewers. YouTube is also incredibly generous with file sizes—verified accounts can upload files up to 256 GB or 12 hours long. You've got plenty of runway for those deep-dive product demos.
Then you have YouTube Shorts, their answer to the vertical video craze. The specs here are much more rigid:
- Aspect Ratio: It's got to be vertical (9:16) or square (1:1). No exceptions.
- Resolution: For that crisp vertical look, aim for 1080 x 1920 pixels.
- Duration: Keep it brief. Your video must be 60 seconds or less.
Pro-Tip for macOS Creators: If you’re recording a product demo for Shorts using a tool like Screen Charm, think vertical from the very beginning. Frame your screen capture to fit a 9:16 aspect ratio, and make sure all the important action—like UI elements and cursor clicks—stays in the center. This prevents the Shorts interface from covering up the good stuff.
The short-form video trend isn't slowing down. YouTube Shorts is now pulling in over 2 billion monthly users, generating a staggering 70 to 90 billion daily views. What's interesting is that this hasn't killed long-form content. In fact, 51% of YouTube users say they are most likely to watch brand videos that are longer than 60 seconds. This just proves there's a healthy appetite for both. You can dig into more of these evolving global audience preferences at sproutsocial.com.
LinkedIn Video Formats for Professional Content
When it comes to professional content, LinkedIn is in a league of its own. The platform has a distinctly more buttoned-up, corporate feel, and its video formats reflect that. Unlike the vertical-first worlds of TikTok and Instagram, LinkedIn’s audience still heavily engages with traditional landscape videos, making it a perfect home for the detailed product demos and company announcements you're creating on your Mac.
To make sure your content looks sharp, you’ll want to focus on two key aspect ratios: 16:9 (landscape) and 1:1 (square). A classic landscape video looks great on a desktop, while a square video is a real attention-grabber on mobile feeds, taking up more valuable screen space. For those of us on macOS exporting from Screen Charm or another editor, always stick with an MP4 container to ensure everything just works.
Technical Specifications for LinkedIn Video
To sidestep any upload headaches or weird quality drops, it’s best to stick to these core technical specs. LinkedIn is pretty forgiving, but following these guidelines will give your videos that polished, professional edge.
- Aspect Ratio: 1:2.4 to 2.4:1 (though 16:9 and 1:1 are your safest bets)
- Resolution: From 256x144 pixels all the way up to 4096x2304 pixels
- Max File Size: A very generous 5 GB
- Duration: Between 3 seconds and 10 minutes for regular native video uploads
- Frame Rate: 10 FPS to 60 FPS
Video is undeniably a powerful tool here—after all, users are 20x more likely to share a video post than any other type. But here’s a little secret: it’s not always the most engaging format on the platform.
The Surprising Power of Document Posts
Interestingly enough, the top-performing content format on LinkedIn isn't video. It’s carousels, which you upload as PDF documents. For whatever reason, these consistently get more engagement than video. This format is brilliant for breaking down complex ideas, presenting case studies, or walking people through step-by-step guides.
Recent data shows that carousel-style document posts pulled in a staggering 278% more engagement than videos on LinkedIn. That's a huge difference, making them an essential piece of any serious content strategy on the platform.
This doesn't mean you should ditch video entirely. Not at all. A balanced approach is your best bet. Use video for those dynamic product demos and big announcements, but lean on document carousels for educational content that gets people talking and sharing. If you want to dive deeper into what works best, you can find more insights on high-performing content formats at buffer.com.
Facebook Video Format Guidelines
Facebook is a beast of a platform. You've got everything from quick, disappearing Stories and attention-grabbing Reels to longer, more detailed videos that live right in the user's feed. Each of these placements has its own set of rules, and getting the technical specs right is the difference between a polished, professional demo and one that looks out of place.
For anyone on a Mac creating demos with a tool like Screen Charm, dialing in these social media video formats from the start means your content will look sharp and perform its best, no matter where it shows up. The universally safe bet for exporting is an MP4 container using the H.264 video codec and AAC audio. This combo is the sweet spot between great quality and a reasonable file size, which helps you avoid upload headaches and ensures your video plays smoothly for everyone.
Feed, Reels, and Stories Specs
When it comes to the main Facebook Feed, you have a bit more wiggle room with dimensions. But for mobile viewing, where most people will see your content, 4:5 and 1:1 aspect ratios are king. A 4:5 video, for instance, fills up much more of a phone's screen than a widescreen 16:9 video, making it significantly harder for someone to just scroll on by.
For Reels and Stories, however, there's no compromising. These formats are built for a full-screen, vertical experience. You absolutely need to use a 9:16 aspect ratio, or you’ll end up with those clunky black bars that scream "I didn't format this correctly."
Here’s a quick breakdown of the key specs for each placement:
-
Facebook Feed Videos
- Aspect Ratio: While it supports anything from 16:9 to 9:16, your best bet is 4:5 (vertical) or 1:1 (square).
- Resolution: For a 4:5 video, shoot for at least 1080 x 1350. For a 1:1 square video, use 1080 x 1080.
- Max File Size/Duration: You’ve got a lot of room here—up to 10 GB and 240 minutes.
-
Facebook Reels & Stories
- Aspect Ratio: A strict 9:16 (vertical) is required.
- Resolution: Always use 1080 x 1920 pixels.
- Max File Size/Duration: Files can be up to 4 GB. Reels can run up to 90 seconds, but individual Stories top out at 60 seconds.
Recommended Universal Export Presets for macOS
To keep your workflow efficient, especially when you're making product demos that need to go out to multiple Facebook spots, having a go-to export preset is a lifesaver. It removes the guesswork and ensures consistency.
Here’s a quick reference table with the ideal settings for exporting high-quality video from just about any macOS app.
| Setting | Recommendation | Why It Matters |
|---|---|---|
| Container | MP4 | This is the gold standard for web and social media, offering the best compatibility and solid compression. |
| Video Codec | H.264 (AVC) | It's the industry standard for a reason—it gives you high-quality video without massive file sizes. |
| Audio Codec | AAC | Delivers crisp, clear audio at a low bitrate, which is perfect for playback on mobile devices. |
| Framerate | 30 FPS | This framerate provides smooth motion that looks natural without bloating your file size. |
| Bitrate | 8-15 Mbps | For 1080p video, this is a great range that keeps your visuals sharp without taking forever to upload. |
Once you set these as a default preset in your video editor or a dedicated tool like Screen Charm, you've built a solid foundation. From there, all you need to do is tweak the resolution and aspect ratio to perfectly match the specific Facebook social media video formats you're targeting for that day's post.
Frequently Asked Questions
When you're trying to get your product demos looking sharp on social media, a few common questions always seem to pop up. Here are some straightforward answers to help you navigate the tricky world of video specs.
Why Does My Video Look Blurry After Uploading?
It’s a classic, frustrating problem: your video looks perfect on your Mac, but once it's on Instagram or Facebook, it’s a pixelated mess. The culprit is almost always compression.
Every social platform compresses your video to save storage space and help it load faster for viewers. If you export your video with a bitrate that’s too high, their automatic compression can be aggressive, wrecking the quality. The best defense is to stick to the platform's recommended bitrate from the get-go.
What Is The Difference Between MP4 and MOV On macOS?
If you're on a Mac, you've definitely seen both MP4 and MOV files. These are just containers that hold your video and audio data. MOV is Apple's own format, so it plays beautifully with apps like Final Cut Pro. MP4, on the other hand, is the universal standard.
While you can often upload MOV files without issue, MP4 is always the safer bet. It ensures your video will work perfectly everywhere, no matter if someone is watching on an iPhone, an Android device, or a Windows desktop. Think of it as the most reliable choice for broad compatibility.
How Do I Choose The Right Bitrate?
Getting the bitrate right is all about finding the sweet spot between video quality and file size. Go too high, and you get a massive file that platforms will over-compress. Go too low, and you sacrifice visual clarity from the start.
For a standard 1080p video, a good target is somewhere between 8-15 Mbps. This range delivers great quality without creating a file so large that it gets crushed by compression algorithms. If you're still ending up with huge files, it's worth learning how to reduce video file size the smart way.
Key Insight: Don't forget your audio! Always export it in AAC format with a bitrate around 128 kbps. This keeps the sound crisp and clear, which is crucial since most people will be watching on their phones.
Ready to create stunning, perfectly formatted product demos on your Mac? Screen Charm makes it simple with smart recording features and optimized export presets. Get Screen Charm today!