Once you've wrapped up a big meeting on your Mac, the next logical step is sharing the recording. The "how" really comes down to where that recording lives. You've got two main paths: sharing a link directly from the Zoom Cloud (if you're on a paid plan) or sending the local video file that's saved on your Mac.
Each method is suited for different situations, whether you need to share something in a hurry or need to lock down who can see it.
Your Guide to Sharing Zoom Recordings on macOS
So, you've got the recording, but what's the best way to get it to your team from your Mac? It all hinges on your Zoom account type.
If you're a paid subscriber, your recordings likely live in the cloud. This is great because it gives you a ton of control. You can share a simple link, but also add a password, set an expiration date, or even prevent people from downloading it.
On the other hand, if you're using a free Zoom account, your recordings are saved directly to your Mac as video files. This means you're in charge of the file itself. You'll probably need to think about compressing it or using a service like iCloud Drive or Dropbox to handle a large file.
This handy visual breaks down that first critical question: Is your recording in the cloud or on your Mac?
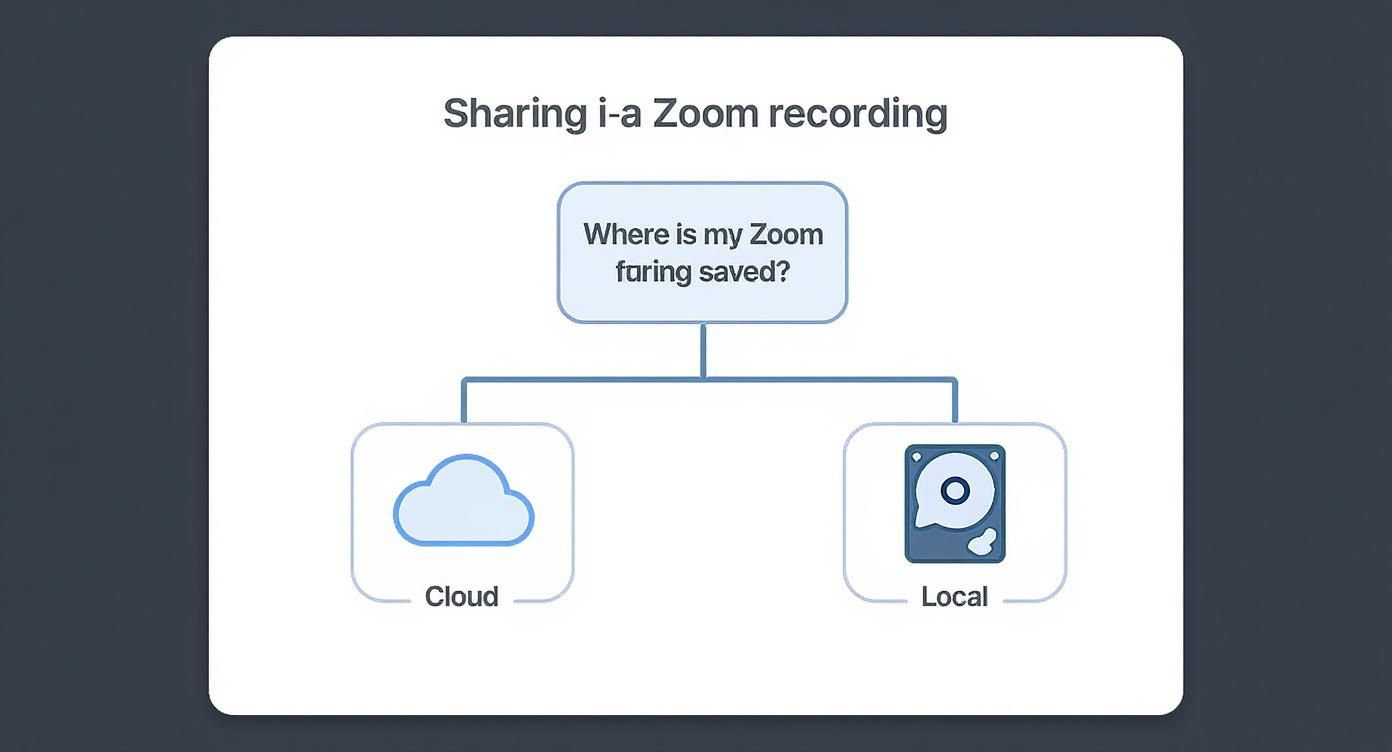
The route you take from here will change everything—how you share, what permissions you can set, and how you manage the file. Nailing this distinction from the start is the secret to getting your content shared without any fuss.
Choosing Your Sharing Strategy
Before you hit send, it's worth taking a moment to make sure the recording is clean and ready for your audience. A quick trim to cut out the pre-meeting chatter or a simple edit can make a world of difference. For a deeper dive into that, check out our guide on editing Zoom recordings to give your video a professional polish.
From here, we'll walk through the exact steps for both cloud links and local files, so you can master the sharing workflow on your Mac.
The most significant mistake people make is treating cloud and local recordings the same. Cloud sharing is about controlling access via a link, while local sharing is about managing and transferring a large data file from your Mac.
Sponsored by the makers
Tired of boring screen recordings?
Try Screen Charm.
Auto-zoom, motion blur, camera overlay, and background music. All built in. Record once, export a polished video.
See what it does2. Share a Zoom Cloud Recording From Your Mac
When you need to share a Zoom recording from your Mac, the cloud link method is almost always the best way to go. It's clean, efficient, and saves you the headache of dealing with massive video files. Instead of uploading a huge file somewhere, you're just sending a simple link. The real win, though, is the control it gives you over who sees your recording and what they can do with it.
You'll handle all of this from your browser, not the Zoom desktop app. Just head over to the Zoom web portal and sign in. This is where your cloud recordings live and where you can manage all the sharing permissions. This whole cloud recording feature has been a game-changer, especially for businesses that need to distribute training or meeting recaps globally. In fact, a lot of Zoom's growth can be tied back to how easy they made cloud storage and sharing, as highlighted in these cloud recording insights on affiliatebooster.com.
Finding Your Cloud Recordings
Once you're logged into your Zoom account online, look for the Recordings tab in the menu on the left. This is your command center for every meeting you've saved to the cloud.
The recordings are neatly listed with the newest ones right at the top. If you have a ton of them, the search bar is your friend—you can filter by the meeting's topic, its ID, or a date range to pinpoint the one you need. When you find it, you’ll see a Share button right next to it. That's where the magic starts.
Setting Up Your Share Permissions
Clicking that Share button pops up a window full of important settings. This is where you go from just sending a link to actually securing your content. Before you blindly copy and paste that URL, take a minute to get these settings right on your Mac.
The real power of cloud sharing isn't just the link itself, but the layers of protection you can wrap around it. A public link might be fine for a webinar, but a confidential client review demands stricter controls.
Let's walk through a real-world scenario. Say you need to share a project update with a client. You want them to watch it, but you absolutely don't want them downloading the video or forwarding the link to others.
Here’s how you’d lock it down:
- Who can view: You can set this to "Publicly" so the client can access it without a Zoom account, but you'll use other settings for security.
- Expiration date: This is a great tool for time-sensitive material. Set the link to expire in 7 days so the client can't come back to it a month later.
- Passcode protection: This is a must-have for anything confidential. Zoom generates a strong passcode automatically, which adds a simple but effective security layer.
- Download permission: This is the big one. Make sure the "Viewers can download" box is unchecked. This keeps your video on Zoom's servers and off of someone else's hard drive.
To give you a quick cheat sheet, here are the most common settings you'll be toggling on your Mac.
Key Cloud Recording Sharing Settings on macOS
Here's a quick reference for the essential permission settings you can configure when sharing a Zoom cloud recording.
| Setting | What It Does | Best Used For |
|---|---|---|
| Share publicly | Allows anyone with the link to view the recording. | Public-facing content like webinars or marketing videos. |
| Only authenticated users can view | Restricts access to people who are signed into a Zoom account. | Internal company meetings or training sessions for team members. |
| Add expiry date to the link | Makes the link inaccessible after a specific date. | Time-sensitive project reviews or limited-time offers. |
| Viewers can download | Allows people to save a copy of the video file to their device. | Sharing raw footage with an editor or providing resources to be kept. |
| Require passcode to view | Adds a password-protection layer to the recording link. | Confidential client meetings, sensitive financial discussions, or private coaching sessions. |
By taking a few extra seconds to configure these options, you can share your recordings with confidence, knowing they're only being seen by the right people, in the right way.
How to Find and Share Local Zoom Recordings on a Mac
While cloud sharing is handy, sometimes you just want the raw video file. Local recordings, which save directly to your Mac, give you total control. This is the default setting for free Zoom accounts and a great option if you like to manage your own files. The only catch? The files can be massive, and they aren't always easy to find in Finder.
First things first, you have to track down the recording. By default, Zoom does a pretty good job of keeping things organized on your Mac. Just open Finder and head over to your Documents folder. You should see a folder named Zoom waiting for you.
Inside that folder, each meeting gets its own subfolder, usually named with the date, time, and meeting title. This setup makes it fairly simple to find the session you're looking for, as long as you have a rough idea of when it took place.

Dealing With Large Files (and Compressing Them)
Once you click into a specific meeting's folder, you'll likely see a few different files. The one you’re after is the .mp4 video file. Be warned: a one-hour meeting can easily chew up several hundred megabytes of space, which is way too big to attach to an email.
This is where compressing the video comes in. It's a crucial step, and luckily, macOS has a built-in tool that makes it a breeze.
- Find the .mp4 file and right-click (or Control-click) on it.
- Choose Compress "[Your File Name]" from the contextual menu.
- Your Mac will get to work and create a much smaller .zip file right in the same folder.
This little trick can dramatically shrink the file size, making it far more manageable to upload or send. In some cases, you might also need to switch up the file format for better compatibility. If you run into that, you can check out this guide on how to convert MOV files to MP4.
I see people make this mistake all the time: they try to email the raw video file. Don't do it! Most email providers cap attachments at 25MB, and your Zoom recording will blow past that limit. Compressing the file isn't just a suggestion; it's essential.
Picking the Right Way to Share It from macOS
Okay, you've found the file and zipped it up. Now what? You have a few great ways to share it from your Mac, and the best one really depends on who you're sending it to.
- iCloud Drive: This is perfect if you're sharing with other Apple users. Just drop the file into your iCloud Drive and share the link right from Finder.
- Mail Drop: A neat feature for those who use the Mail app on their Mac. When you try to send a huge attachment (up to 5GB), Mail Drop automatically steps in and sends it via a temporary iCloud link instead.
- Google Drive or Dropbox: These are my go-to options for sharing with anyone, regardless of their device. Upload your file, generate a shareable link, and you can even control who can view or edit it.
- WeTransfer: For a quick, no-fuss solution, WeTransfer is fantastic. You can send files up to 2GB for free without even creating an account. Just upload, pop in an email address, and hit send.
And if you ever need to record calls that aren't on Zoom, it's worth taking a moment to learn how to screen record other video calls on your Mac. Knowing how to do this gives you a lot more freedom to create and manage your own recordings locally.
Customizing Permissions for Secure Sharing
When you share a Zoom recording, it’s rarely a one-size-fits-all situation. Real control comes from mastering the specific permission settings for your cloud recordings. These are the tools that let you decide whether to broadcast your work to the world or lock it down tight, ensuring it's only seen by the right people.
Your first big decision is who can actually watch the video. You can open it up to "Everyone with the link," which is perfect for public-facing content like a webinar recap you want to post on social media. On the flip side, you can lock it down to "Signed-in users in my account," which is ideal for internal training materials meant only for your team.
This simple choice is your first line of defense. An internal strategy meeting and a public product demo demand completely different security mindsets.
Fine-Tuning Your Security Layers
Once you’ve decided on the audience, you can add more specific safeguards right from the Zoom web portal. These settings are your best bet for preventing your recordings from ending up in the wrong hands.
One of the easiest and most effective tools is the passcode requirement. When you enable this, Zoom automatically generates a strong passcode for the recording. It's a simple step, but it stops anyone who just happens to find the link from being able to watch your content.
Another critical option is the ability to disable downloads. For anything involving intellectual property, this is a must. If you're sharing a paid workshop or a confidential client presentation, unchecking "Viewers can download" prevents people from saving the video file to their own computer and sharing it around.
Think of your permission settings as a digital bouncer. You decide who gets on the list, whether they need a secret password, and if they're allowed to take anything with them when they leave.
For an added layer of control and even some lead-gen potential, you can require registration to view the recording. This makes viewers enter their name and email before they can hit play. Now you have a clear record of who accessed your content, which is fantastic for tracking webinar leads or confirming that employees completed a mandatory training session.
By mixing and matching these settings, you get complete command over how your Zoom recordings are shared and viewed.
Troubleshooting Common Sharing Problems on macOS
You've followed all the steps, sent the link, and then you get the dreaded email: "I can't open this." It happens. Even with a straightforward process, sharing a Zoom recording can sometimes hit a snag on your Mac. Let's walk through some of the most common issues and how to fix them fast.
More often than not, the culprit is a simple permissions hiccup. If your recipient can't access a cloud link, the first thing to do is revisit your sharing settings. It's easy to overlook an expired link or forget you added a passcode. Just a quick double-check can save a lot of back-and-forth.
Another classic Mac problem is finding only an audio file (.m4a) but no video (.mp4) in your local recording folder. This almost always means Zoom is still processing the file. Longer meetings can take a surprisingly long time to convert, so a little patience is key. If it feels stuck, sometimes just restarting the Zoom app can give it the nudge it needs to finish the job.
Finding a Seemingly Lost Recording
That sinking feeling when a recording seems to have vanished is all too real. Before you panic, take a deep breath and check the default location. Zoom usually saves files in a "Zoom" folder right inside your Mac's Documents folder, which you can access from the Finder sidebar.
Not there? No problem. Open the Zoom desktop app, head to Settings > Recording, and it will show you the exact file path where it's saving everything. You can even change the location from there to something more convenient for you.
A "missing" cloud recording often comes down to account settings. If you're on a company or team account, an admin might have disabled cloud recording. It's always a good idea to check your account permissions if a feature isn't behaving as you'd expect.
Sometimes the issue isn't with Zoom at all, but with your Mac's own system permissions. If you find your screen recording is not working for other apps too, you'll likely need to dive into your Mac's System Settings under "Privacy & Security" to grant the right permissions.
By systematically working through these common trouble spots, you can usually pinpoint the problem and get your recording shared without any more delays.
Frequently Asked Questions
Got questions about sharing your Zoom recordings on a Mac? You're not alone. Let's tackle some of the most common issues people run into.
Can I Share a Recording if I Wasn't the Host?
This is a big one, and the short answer is: it all comes down to the host's settings.
By default, only the meeting host (and any co-hosts) has the power to record. If you were just a participant and need that recording, your only real move is to get in touch with the host. They can either shoot you the cloud link or send over the local file.
Key Takeaway: You can't record or share a meeting yourself unless the host has specifically granted you permission. Always check with the meeting organizer first.
How Long Does Zoom Keep Cloud Recordings?
Don't assume your cloud recordings live forever—they often don't. The lifespan of a cloud recording is entirely up to the account administrator's settings.
For many company or university accounts, there's an automatic deletion policy in place, which can be as short as 120 days. It's always a smart idea to check your specific account's rules or, better yet, download any recordings you can't afford to lose.
Thinking about when to record versus when to go live? You can explore the pros and cons of live versus pre-recorded video to get a better sense of what works for different situations.
Why Is My Recording Audio-Only?
It’s a common moment of panic: you open your local recording folder on your Mac, and all you see is a .m4a audio file, with no .mp4 video in sight.
Relax—this usually just means Zoom is still working its magic. Converting a long meeting into a video file takes time. Just give it a few minutes (or a bit longer for marathon meetings), and the video file should appear right next to the audio one once the processing is complete.
Ready to create stunning product demos and tutorials on your Mac with zero fuss? Screen Charm uses intelligent auto-zoom to guide your audience's focus, making your videos clear and professional. Ditch the complex editing software and start producing high-quality content today. Learn more at Screen Charm.