How to Convert MOV to MP4 on Mac (5 Methods, Including Free)
You’ve just wrapped up the perfect product demo using Screen Charm on your Mac. It looks sharp, the audio is crisp, but there's a problem. You send the MOV file over to a colleague on a Windows machine, and they can't open it. It's a frustratingly common scenario for Mac users.
The solution is simple: convert that MOV to an MP4 video. MP4 is the universal language of video, playing nicely on virtually any device and making your content instantly shareable.
Why You Need to Convert MOV to MP4 on Your Mac
While MOV is the native, high-quality format for the Apple ecosystem, its limitations become glaringly obvious the moment you step outside of it. For anyone on a Mac, especially professionals who rely on tools like Screen Charm, this format friction is a familiar headache.
Think about a software developer who just recorded a detailed walkthrough of a new feature on their MacBook. The MOV file is pristine, but it hits a wall when they share it with a client on an Android phone or a teammate using a Windows PC. This compatibility gap adds extra, time-wasting steps to what should be a simple process.
The Universal Advantage of MP4
This is where MP4 saves the day. It’s not just another file type; it’s the global standard for video. Making the switch from MOV to MP4 brings several immediate perks for macOS users:
- Universal Compatibility: MP4s just work. They play seamlessly on macOS, Windows, Android, smart TVs, and every major web browser. No more "file not supported" errors.
- Smaller File Sizes: Thanks to its smart compression, an MP4 is usually smaller than its MOV equivalent without a noticeable dip in quality. This means faster uploads, downloads, and streaming.
- Web-Friendly: MP4 is the go-to format for nearly every social media platform and video hosting site, from YouTube to Vimeo.
The demand for this simple conversion is huge, driving a video converter market valued at $2 billion in 2024 and projected to reach $4.23 billion by 2032. Many educators and marketers—core Screen Charm users—report their workflows are up to 40% faster just by exporting directly to MP4, dodging the compatibility snags of MOV files entirely. You can discover more insights about the video converter market growth.
The core reason to convert MOV to MP4 is simple: it removes barriers. Your focus should be on creating great content, not worrying about whether your audience can play it.
Practical Scenarios on macOS
For a marketer creating a new ad campaign or an educator producing a tutorial series on a Mac, the need to convert mov to mp4 video is a daily task. An MOV file might be the best choice for editing in Final Cut Pro, but the final version sent to clients or uploaded to a learning portal has to be an MP4.
This one conversion is a non-negotiable step for anyone on macOS serious about getting their video content in front of the widest possible audience.
MOV vs MP4: Quick Reference
| Feature | MOV (QuickTime) | MP4 (MPEG-4) |
|---|---|---|
| Primary use | High-quality editing within Apple ecosystem | Universal playback, streaming, and sharing |
| Compatibility | Excellent on Mac/iOS; needs extra software on Windows/Android | Plays natively on virtually all devices and browsers |
| File size | Larger — less compression to preserve editing quality | Smaller and more efficient for uploads and storage |
| Typical scenario | Raw footage from iPhone or camera for Final Cut/Screen Charm editing | Finished video for YouTube, Vimeo, social media, or client delivery |
Rule of thumb: edit in MOV, share as MP4.
The Easiest Way: Convert Right Inside Screen Charm
If you're already using Screen Charm to record your screen on your Mac, you're in luck. The simplest and most direct way to get a universally friendly MP4 file is already built right into your workflow. Forget about the hassle of finding, downloading, and learning a separate app just for conversion.
This is a huge time-saver. Think about it: you just finished a crucial product tutorial. Instead of exporting a MOV file and then immediately opening another program to convert it, you can create a shareable MP4 in one go. This lets you stay focused on making great content, not wrangling file formats.
Getting Your Export Settings Just Right
The secret to a perfect MP4 is all in the export settings. Once you're done editing in Screen Charm, the export screen gives you a few simple but powerful options that control the final video. It’s designed to be totally straightforward, taking the usual guesswork out of video formats.
Here’s a quick rundown to get the best result every time:
- Pick Your Format: The export menu will show a few format options. Make sure you explicitly choose MP4. This is the key to making sure your video plays nicely on any platform or device.
- Set the Resolution: Screen Charm can handle everything up to 4K UHD. If you're making a detailed product demo for a big screen, stick with the highest resolution you can. For a quick clip for social media, 1080p is usually the sweet spot between quality and file size.
- Fine-Tune the Quality: You'll also see a quality slider or some presets. For most professional work, the “High” setting is what you want. It keeps all the important details without making the file gigantic.
This direct export isn't just about convenience—it's about preserving quality. Every time you re-encode a video with a different tool, you risk introducing ugly compression artifacts that degrade the image.
By exporting directly to MP4 from within Screen Charm, you're doing a single, clean conversion. This minimizes quality loss and keeps your final video looking just as crisp as your original recording.
From Recording to Sharing in Moments
Let's walk through a common macOS scenario. You’ve just recorded a five-minute demo of a new software feature on your Mac. You know it needs to be seen by Windows users, people on their phones, and teammates in other departments.
Instead of getting bogged down in a multi-step conversion process, you just click "Export." From there, you select "MP4," choose "4K resolution," and hit "Save." In just a few moments, you have a high-quality video file that's ready to be uploaded to YouTube, embedded on your blog, or dropped right into a Slack channel.
This seamless process is a core part of what makes the tool so effective. By handling the final conversion step, it becomes an all-in-one solution, taking you from the first click of the record button to the final, shareable file. This kind of efficiency means you can spend less time managing file types and more time creating content that actually matters.
Leaning on Your Mac's Built-In Tools
Got a MOV file you need to convert? You might be surprised to learn you don't need to download a thing. Your Mac comes equipped with some seriously capable tools right out of the box, meaning you can convert mov to mp4 video for free, right now.
The two heavy hitters already on your machine are QuickTime Player and iMovie. Think of them as two different tools for two different jobs—one is built for speed, the other for precision. Knowing which one to grab will save you a ton of time.
QuickTime Player: The Go-To for Quick and Easy Conversions
When you just need to switch a file from MOV to MP4 without any fuss, QuickTime Player is your best friend. It’s perfect for those moments when you aren't looking to edit anything; you just need a universally compatible file, and you need it now.
The process is about as simple as it gets. Just open your MOV file, and it should launch in QuickTime automatically. From there, head up to the menu bar at the top of your screen, click File, and then hover over Export As.
You'll see a few resolution options pop up:
- 1080p: This is the Goldilocks setting. It delivers crisp HD quality that looks fantastic on most screens and social media feeds, without creating a massive file.
- 720p: A great choice when you need a smaller file for a speedy upload or to send over email. The quality is still perfectly fine, especially for mobile viewing.
- 480p: Pick this one only when file size is the absolute priority and you can live without HD clarity.
Select your preferred resolution, give it a name, and hit save. QuickTime does the rest, spitting out a fresh .mp4 file. It’s the fastest route from A to B when you're on a deadline.
Taking the Reins with iMovie for More Control
But what if you need more than just a simple format swap? Maybe you need to trim out that awkward pause at the beginning of a screen recording or want more say in the final quality settings. That’s exactly when you should turn to iMovie.
Tossing your MOV file into a new iMovie project opens up a simple but powerful editing timeline. It's my go-to when I've recorded a quick demo and want to chop off the first few seconds of me fumbling to hit the record button.
When you’re ready to share your masterpiece, iMovie offers much more detailed export settings. You'll find them by clicking the Share icon and choosing "File." Here, you can fine-tune things like:
- Resolution: Go all the way up to 4K if your source file supports it.
- Quality: You can choose between Low, Medium, High, and Best (ProRes). For most web content, "High" is the perfect balance of sharp visuals and reasonable file size.
- Compress: This lets you decide between a "Faster" export or "Better Quality."
Honestly, QuickTime handles 90% of my basic conversion needs on my Mac. But for that other 10%—when I need to make a quick trim for a client video or ensure the best possible quality—the extra couple of minutes in iMovie is always a worthwhile investment.
By getting comfortable with these two built-in powerhouses, you can handle just about any MOV conversion that comes your way, all without spending a dime or installing extra software on your Mac.
When the built-in Mac tools just don't cut it, and you need to get serious about your video conversions, it’s time to bring in the heavy hitters. I'm talking about macOS-friendly tools that give you granular control over every single setting.
When QuickTime Fails: Use VLC Media Player
Most people know VLC as the media player that plays anything. But tucked inside this free, open-source app is a surprisingly capable conversion engine — and it handles MOV files with codecs that QuickTime simply refuses to open.
When to use VLC: If QuickTime gives you an error or the converted file has no audio, VLC is your next move.
VLC Conversion Steps on Mac
- Open VLC, then go to File → Convert / Stream
- Drag your MOV file into the drop zone (or click Open media...)
- In the Choose Profile dropdown, select Video - H.264 + MP3 (MP4) — this is the most compatible option
- Click Save as File, then hit Browse to choose the output location and filename
- Make sure the filename ends with .mp4, then click Save and watch the progress bar
VLC is also useful for batch conversions. If you have a folder of MOV files, you can queue them all and convert in one pass — a major time-saver after a long recording session.
Fine-Tuning Conversions with HandBrake
If you're looking for professional-grade control without the price tag, HandBrake is your answer. It's a free, open-source powerhouse for macOS that has become the gold standard for anyone who wants to dive deep into the technical side of video conversion. I use it all the time when I need more than a simple "Export As" function.
The real magic of HandBrake is its ability to handle batch conversions. Imagine you have a folder packed with MOV screen recordings. Instead of converting them one by one, you can just drag the entire folder into HandBrake, apply a custom preset, and let it churn through the queue. It’s a massive time-saver for Mac users.
Getting Technical with Codecs and Bitrate
HandBrake puts you in the driver's seat, especially when it comes to codecs. You’ll mainly be choosing between two options:
- H.264 (x264): This is the trusty workhorse. It offers fantastic compatibility across almost any device or platform and strikes a great balance between video quality and file size. When in doubt, H.264 is the safe bet.
- H.265 (x265 or HEVC): As the newer, more efficient codec, H.265 can deliver the same quality as H.264 but in a much smaller file. The trade-off? It requires more processing power to encode and isn't quite as universally supported yet.
Another crucial setting you can tweak is the bitrate, which directly impacts the trade-off between quality and file size. A higher bitrate gives you a crisper image but a larger file; a lower bitrate shrinks the file size but can introduce visual imperfections if you push it too far. My advice? Play around with the Constant Quality slider—it's usually the most intuitive way to find the sweet spot for your specific video.
The widespread adoption of the MP4 format, which now holds over 50% market share in the video converter space, is largely thanks to the efficiency of the H.264 codec. It's not uncommon to see MOV file sizes shrink by up to 70% without any noticeable drop in quality—a game-changer for anyone sharing high-resolution screen demos from their Mac.
For instance, online instructors often find that MOV files create playback headaches on about 45% of non-Mac devices. A quick conversion to MP4, however, pushes that compatibility up to nearly 99%.
This flowchart can help you decide which macOS tool to reach for based on your needs.
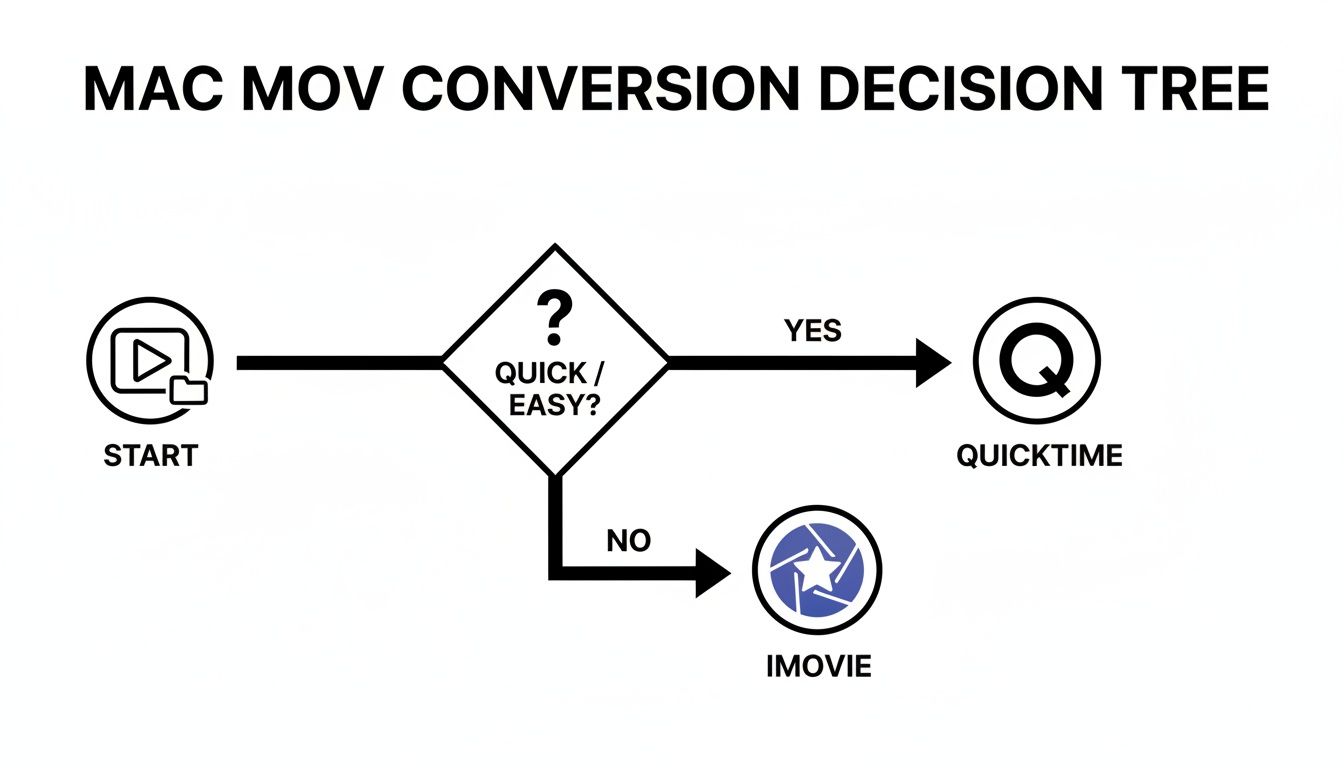
As you can see, QuickTime is perfect for a quick, no-fuss conversion, while iMovie is better when you need to make a few edits along the way. But for ultimate control, other tools are a better fit. You can see how different tools stack up in this detailed video editing software comparison.
To help you decide, here’s a quick rundown of the most common methods available on your Mac.
macOS MOV to MP4 Conversion Methods Compared
| Method | Best For | Ease of Use | Key Feature |
|---|---|---|---|
| QuickTime Player | Simple, one-off conversions with no edits needed. | Very Easy | Built directly into macOS; no install required. |
| iMovie | Converting videos that also require basic edits like trimming or titles. | Easy | Simple editing and sharing features combined. |
| VLC Media Player | MOV files with incompatible codecs that QuickTime cannot open. | Easy | Handles almost any codec; free and open-source. |
| HandBrake | Batch conversions and fine-tuning quality, size, and codecs. | Intermediate | Powerful presets and deep customization options. |
| FFmpeg | Developers and users comfortable with automating tasks via the command line. | Advanced | Unmatched speed, scriptability, and control. |
Each tool has its place, and choosing the right one simply depends on what you're trying to accomplish on your Mac.
For Developers: The FFmpeg Command Line
Rewrap vs. Transcode — Know the Difference
Before running any FFmpeg command, it helps to understand these two fundamentally different operations:
-
Rewrapping (lossless, very fast): Your video and audio streams are moved into a new MP4 container without re-encoding. If your MOV already uses H.264 video + AAC audio (typical for iPhone recordings and Screen Charm exports), a rewrap is 100% lossless and finishes in seconds.
-
Transcoding (lossy, slower): FFmpeg fully re-encodes the video. Use this when the MOV uses an incompatible codec (like Apple ProRes or HEVC) or when you want to reduce file size by lowering bitrate.
Always try a rewrap first. If the output plays fine, you preserved maximum quality. Only transcode when you have a specific reason.
If you live in the Terminal on your Mac and want the absolute fastest, most flexible way to convert mov to mp4 video, look no further than FFmpeg. It’s a command-line tool that has become a favorite among developers for its raw power and scripting capabilities.
Once you have FFmpeg installed (a quick brew install ffmpeg via Homebrew does the trick), you have two main commands depending on your situation.
Option 1 — Lightning-fast lossless rewrap (try this first):
ffmpeg -i input.mov -c:v copy -c:a copy output.mp4
This simply moves the streams into an MP4 container without touching them. If your MOV is from an iPhone or Screen Charm, this is all you need.
Option 2 — Full transcode (when rewrap won't work):
ffmpeg -i your-video-file.mov -c:v libx264 -preset slow -crf 22 -c:a aac -b:a 128k your-new-video-file.mp4
This re-encodes using H.264 + AAC — the gold standard for web content. Use crf values between 18 (high quality, larger file) and 28 (smaller file, some quality loss). CRF 22 is a solid default.
It's the ultimate way to automate your video workflow and integrate conversions directly into your scripts on macOS.
Tips for Preserving Quality and Optimizing Files
A successful conversion is more than just swapping a file extension. The real goal is to end up with an MP4 that looks just as crisp and professional as the original MOV, all while keeping the file size manageable. It's a balancing act, for sure.
The secret weapon here is the codec. For pretty much any video you're working with on a Mac, the H.264 codec is the way to go. It delivers fantastic compression without sacrificing quality and plays nice with virtually every device and platform out there.
Finding the Sweet Spot with Bitrate
Think of bitrate as the amount of data your video uses per second. A higher bitrate means more detail and a larger file; a lower one saves space but can lead to that blocky, pixelated look we all hate—what we call "compression artifacts."
So, where do you start? For a standard 1080p video, a bitrate between 5,000 and 10,000 kbps is a solid range. If you're working with 4K footage, you'll need to bump that up significantly, usually somewhere between 35,000 and 68,000 kbps, to keep all that beautiful detail intact.
The key takeaway is that you don't always need the absolute highest setting. My advice? Export a few short test clips at different bitrates. You can often find a much lower setting that still looks great, which can dramatically shrink your file size without a noticeable drop in quality.
Since it became a standard in 2003, the MP4 format has completely changed the game for video sharing. This shift away from proprietary formats like MOV really took off around 2020 with the boom in remote work. In fact, an estimated 80% of screen-recorded tutorials made with macOS apps needed to be reformatted for folks on Windows or mobile. Switching to MP4 cut upload times by as much as 50%. By exporting directly, creators can also sidestep the 20-30% quality loss that often comes with using free online converters. You can dig into the full research on the global video converter market to see how much it has grown.
Smart SEO for Your Video Files
Your work isn't done once the export finishes. The way you name your file can actually make a big difference in whether people find it. Search engines and video platforms scan filenames for clues about the content, so a descriptive name is a must.
Don't just leave it as final_cut_01.mov. Rename the MP4 to something that actually describes what's in the video.
For instance:
new-feature-demo-for-macos.mp4how-to-use-screen-charm-zoom.mp4q3-marketing-campaign-results.mp4
It’s a tiny step that helps your video show up when people are searching for those exact topics. While we're talking about video, these core ideas of balancing quality and file size are universal. You can see similar concepts at play in image optimization strategies, where performance is just as crucial.
By getting a handle on codecs, bitrates, and filenames, you can make sure every video you convert is polished and ready for its audience. If you're looking for more ways to manage file sizes, our guide on how to reduce video file size is a great next step.
Your Top Questions About MOV to MP4 Conversion, Answered
Working with different video formats always seems to stir up a few questions. When you're trying to convert mov to mp4 video on your Mac, you're probably wondering about things like quality, speed, and whether that online tool is actually safe. I've heard these questions time and again from Mac users, so I've put together some straightforward answers to help you get it right.
Let's clear up those common sticking points so you can convert your next video with confidence.
Will I Lose Video Quality When I Convert MOV to MP4?
This is easily the biggest worry for anyone working with video, and for good reason. The short answer? No, you shouldn't see any noticeable quality loss if you do it correctly on your Mac. The problem isn't the conversion itself; it's the compression settings you choose.
When you use a solid tool like Screen Charm's exporter, QuickTime, or HandBrake, and stick with the H.264 codec at a decent bitrate, the final MP4 will look virtually identical to your original MOV. The trick is to always start with the best possible source file.
Think of it like making a photocopy. If you start with a crisp, clear original and use a high-end machine, the copy looks just as good. It's the same idea here. Try to avoid re-compressing a video that's already been heavily compressed.
What's the Quickest Way to Batch Convert MOV Files on a Mac?
Staring at a folder packed with MOV files is daunting if you think you have to convert them one by one. Thankfully, you don't. For tackling a bunch of files at once, the best free tool for the job on macOS is HandBrake. Its queue feature is an absolute lifesaver.
All you have to do is drag an entire folder of videos into the app, pick a conversion preset to apply to all of them, and click "Start." HandBrake will then work its way through the entire batch automatically. You can grab a coffee and come back when it's done. If you're comfortable with the command line, an FFmpeg script can offer even more power and automation on your Mac.
Are Online MOV to MP4 Converters Safe?
The idea of a quick, browser-based conversion is appealing, but it's a path filled with trade-offs and potential risks. When you use an online tool, you're uploading your video to someone else's server. This is a huge privacy red flag, especially if you're dealing with sensitive client work or unreleased product footage.
Beyond the security issues, free online converters usually have other serious downsides:
- Harsh Compression: They often crush your video quality to save on their own bandwidth.
- Surprise Watermarks: Many will plaster their logo all over your finished video unless you upgrade to a paid plan.
- File Size Limits: You'll almost always hit a wall with file size restrictions or daily conversion caps.
For any work that matters, a desktop app is the way to go. Using QuickTime, iMovie, or HandBrake keeps everything on your Mac, so your files stay private and you have complete control over the final quality.
Ready to create stunning product demos on your Mac without the hassle of file conversions? Screen Charm lets you record, edit, and export directly to a shareable MP4 format, all in one seamless workflow. Get your one-time license and start producing professional videos today at https://screencharm.com.