Putting together a quality recording setup on your Mac is way more achievable than most people think. You don't need a massive budget to get professional-sounding results. It really boils down to getting a few key pieces right: a crisp microphone, a reliable audio interface, smart software like Screen Charm, and a bit of attention to your recording space.
This guide will walk you through exactly how to build an efficient and professional recording environment on your Mac, step-by-step.
Your macOS Recording Studio Blueprint
Before you start adding gear to your shopping cart, it helps to understand what each component actually does. For Mac users, the real magic happens when your hardware and software work together seamlessly. A well-thought-out studio means your great ideas turn into polished, professional demos without you having to fight with the technology.
The goal here isn't just to capture audio and video. It's about creating a workflow that feels completely natural on your Mac. That means picking gear that’s genuinely plug-and-play and software that’s built for the macOS environment from the ground up. This blueprint is designed specifically for creating top-notch product demos, tutorials, or any other content that mixes screen recording with voiceover on your Mac.
The Four Pillars of a Mac-Based Studio
Your whole setup is built on four fundamental pieces. If you get these right, you'll avoid 90% of the quality problems that trip up new creators.
- The Microphone: This is where your sound starts. Deciding between a USB mic or an XLR mic is one of the first, and most important, choices you'll make.
- The Audio Interface: Think of this as the translator between your microphone and your Mac. It takes the analog signal from your mic and turns it into digital data your Mac can work with.
- The Software: For product demos on macOS, you need a great screen recorder like Screen Charm. You'll also want a solid audio recording program, often called a Digital Audio Workstation (DAW).
- The Environment: The room you record in is just as important as your mic. Taming echoes and killing background noise is absolutely essential for clean audio.
I see this all the time: people will drop $1,000 on a fancy microphone but record in a noisy, echoey kitchen. The result? It still sounds terrible. A balanced approach that gives a little attention to all four pillars is how you get that truly professional sound.
To give you a quick reference, here are the core components we're talking about and why they matter for a Mac-based workflow.
Core Components for Your macOS Recording Setup
| Component | What It Does | Key Consideration for macOS |
|---|---|---|
| Microphone | Captures your voice or other audio sources. | Look for USB mics with native macOS support or XLR mics for higher quality. |
| Audio Interface | Connects XLR mics to your Mac via USB/Thunderbolt. | Prioritize interfaces known for stable Mac drivers and low latency. |
| Software (Screen Charm) | Records your screen and/or audio. | Choose software optimized for macOS for better performance and stability. |
| Acoustic Treatment | Absorbs sound reflections to reduce echo and reverb. | Simple solutions like blankets or foam panels can make a huge difference. |
Getting these essentials in place is your first big step.
The professional sound recording studios industry is a huge business, valued at around $6.2 billion worldwide. While you’re setting up a personal studio, you can learn a lot from the pros by focusing on quality control and a solid technical foundation. This is what makes content stand out. Learn more about the sound recording industry's scale and see why these principles matter. A smart, cohesive setup ensures every part of your system works together perfectly, letting you create content that truly connects with your audience.
Sponsored by the makers
Tired of boring screen recordings?
Try Screen Charm.
Auto-zoom, motion blur, camera overlay, and background music. All built in. Record once, export a polished video.
See what it doesChoosing Your Hardware for Flawless macOS Audio
Think of your hardware as the physical backbone of your recording studio. Getting this part right from the start, especially with a focus on macOS compatibility, is what separates a frustrating recording session from a smooth, creative one. A good rule of thumb is to look for gear that is "class-compliant"—this just means it works with your Mac right out of the box, no special drivers needed.
For product demos and tutorials, your voice is the main event. You'll want a condenser microphone to capture all the nuance and detail needed for a professional sound. They're far more sensitive than the dynamic mics you see on stage at concerts, which is exactly what you want for the quiet, controlled space of your studio.
USB vs. XLR: The Big Decision for Mac Users
When picking a mic, you’ll immediately run into the USB versus XLR debate. They both get the job done, but in very different ways, especially on a Mac.
-
USB Microphones: These are the essence of plug-and-play simplicity. You connect them straight to your Mac's USB port, and you’re ready to record. For anyone just starting out on macOS, a high-quality USB mic is a fantastic, straightforward choice that can produce excellent audio.
-
XLR Microphones: This is the path the pros take. XLR mics connect to your Mac through an audio interface. It's an extra piece of equipment, but it unlocks superior sound quality, gives you more hands-on control, and opens the door to upgrading your mic later without changing your whole setup.
For many Mac users, a great USB mic is the perfect starting point. But if you're playing the long game and want top-tier quality and flexibility, an XLR setup is the way to go.
The Audio Interface: Your Mac's Best Friend
So, what is an audio interface? It's a small box that acts as the crucial translator between your professional XLR mic and your Mac. It takes the analog signal from the microphone and converts it into a digital one your Mac can actually use.
Even better, a good interface has dedicated preamplifiers (preamps) that give the microphone's signal a clean, powerful boost. This results in a much richer and more detailed sound than what most USB mics can manage alone.
Interfaces also come with physical knobs for adjusting volume on the fly and a headphone jack for zero-latency monitoring. That means you can hear your voice in your headphones exactly as it's being recorded, without any delay. That tactile control is a massive workflow win.
This diagram shows you exactly how the essential hardware pieces fit together in a macOS setup.
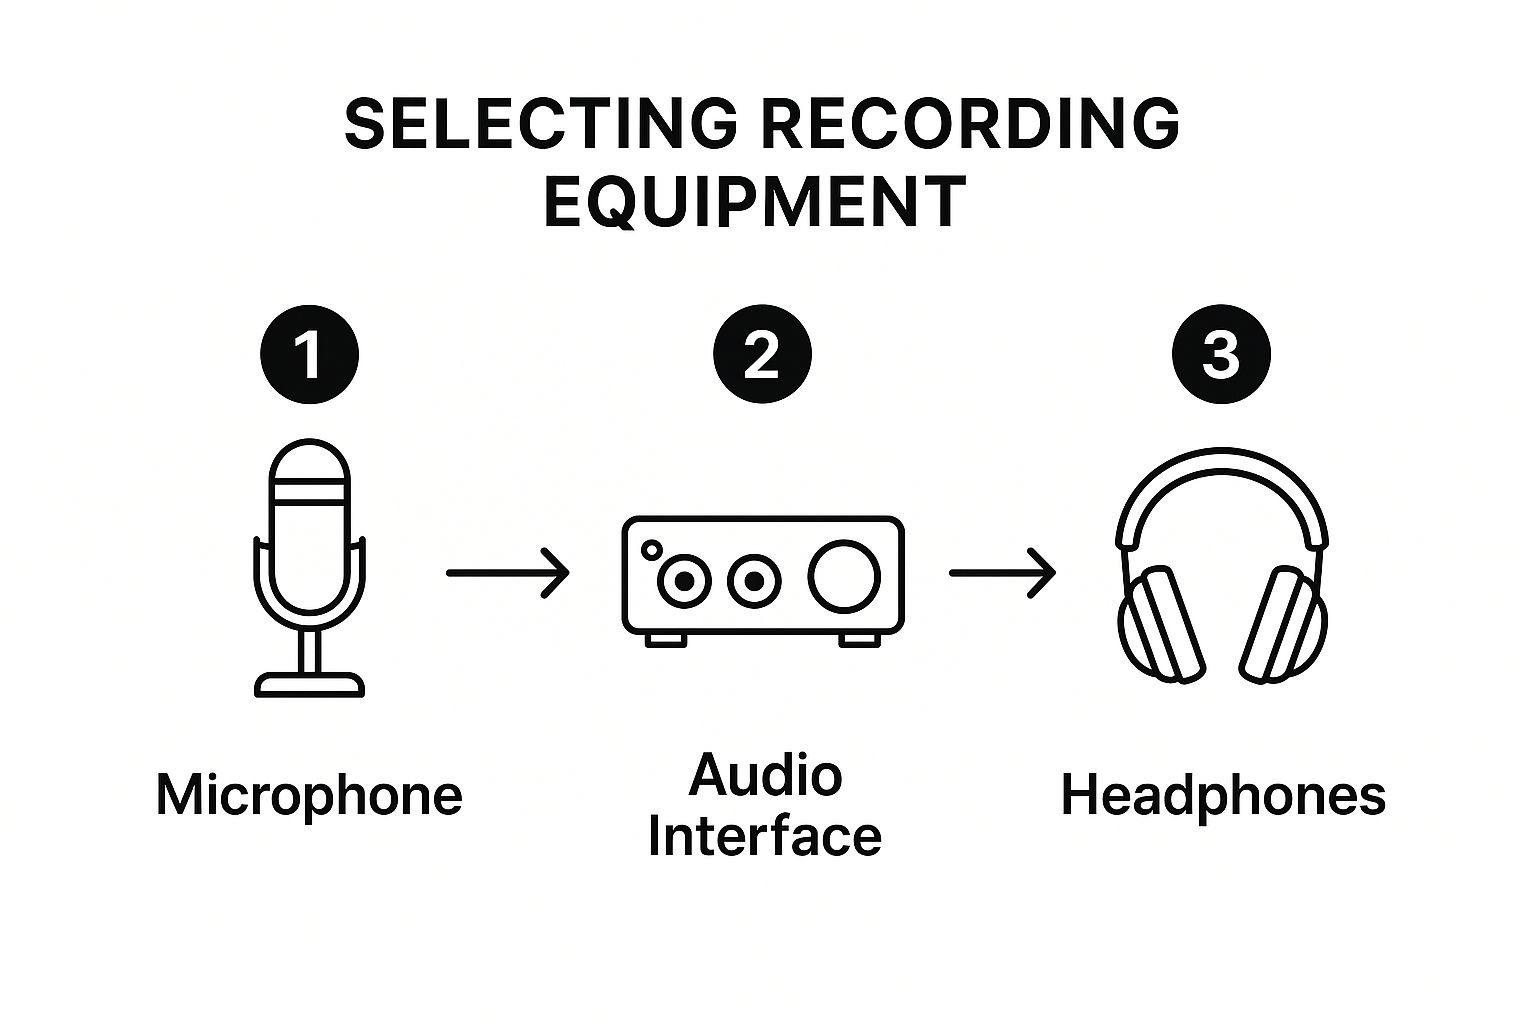
It really boils down to this core trio of recording hardware. As you can see, each piece connects to the next to create your complete audio chain.
Don't Forget the Small Stuff
Finally, don't overlook a couple of small, inexpensive accessories that can make or break your recordings. These little things have a surprisingly huge impact on your final sound quality.
A pop filter and a shock mount are non-negotiable. They solve two of the most common and distracting audio issues for a tiny fraction of your overall budget. It's the highest-return investment you can make in your entire setup.
A pop filter is that simple screen you place in front of the mic. It stops the harsh, windy sound that happens when you say "p" and "b" words (we call those "plosives"). A shock mount is the cradle that holds your mic, isolating it from any bumps or vibrations coming from your desk or mic stand. Both are absolutely essential for clean, professional audio.
Mastering Software on macOS for Screen and Sound
Now that your hardware is plugged in and ready to go, the software is where the magic really happens. This is the command center of your studio for recording, and on a Mac, you're working with an ecosystem built for stability and creativity. For a top-tier product demo, your software has a clear mission: capture your screen perfectly and record your voice with crystal clarity.
This is exactly why we built Screen Charm. It’s designed from the ground up for macOS, so it just works—no clunky, resource-hogging feel you sometimes get with cross-platform apps. It feels like a natural part of your Mac, letting you focus on delivering a great demo instead of fighting with your tools.
Capturing Your Screen with Precision on macOS
A truly effective product demo needs more than just a basic screen recording; it needs to guide your viewer's eye. Think about it: you want them to see exactly where you're clicking and what you're doing. This is where a feature like Screen Charm’s auto-zoom becomes a game-changer. It intelligently follows your cursor, automatically zooming in on menus, buttons, and other interface elements as you interact with them.
This one feature alone can save you hours of mind-numbing manual editing. Instead of meticulously creating keyframes and animating zoom effects yourself, the software handles the heavy lifting, producing a dynamic and professional-looking video that’s incredibly easy for anyone to follow.
A good product demo lives and dies on clarity. If your audience can't see what you're clicking or follow your workflow, you've lost them. Smart recording software acts as a director, ensuring their attention is always right where it needs to be.
As you get your software dialed in, don't forget your display. Learning how to calibrate your monitor for professional results is a step many people skip, but it's crucial for making sure the colors in your recordings are accurate and true-to-life.
Your Mac Is a Powerful Audio Recorder
Visuals are only half the battle. Your audio quality has to be just as polished, and for that, you'll need a Digital Audio Workstation (DAW). The great news? Every Mac comes with a surprisingly powerful one right out of the box.
- GarageBand: Don't let the "free" price tag fool you. GarageBand is a seriously capable tool for recording and editing voiceovers. You can easily select your audio interface as the input, monitor your levels, and perform edits on a professional-style timeline. It's the perfect starting point for any Mac user.
- Logic Pro: When you're ready to step up your audio game, Logic Pro is the industry-standard big brother to GarageBand. It unlocks a whole world of advanced features, from surgical audio editing and vocal tuning to a massive library of pro-level plugins and effects.
Whether you stick with GarageBand or graduate to Logic Pro, the fundamental process is the same. You'll create a new audio track, tell it to use your audio interface as the input, and then set your recording levels. This is a critical step. You're aiming for a strong, clean signal that doesn't "clip" (distort). A good rule of thumb is to have your audio meter peak between -6dB and -10dB.
If you'd like to explore more options, our guide on choosing screen recording and editing software can give you more ideas. Ultimately, the best macOS recording studio combines a specialized visual tool like Screen Charm with a solid DAW, creating a workflow that’s both powerful and wonderfully efficient.
Optimizing Your Space for Pristine Recordings
Your recording environment is just as crucial as the microphone you choose. I've seen people spend a fortune on high-end gear only to get amateur-sounding results because their room had terrible acoustics. Building a great-sounding studio for recording is all about controlling your space, and you don't need a construction budget to do it.
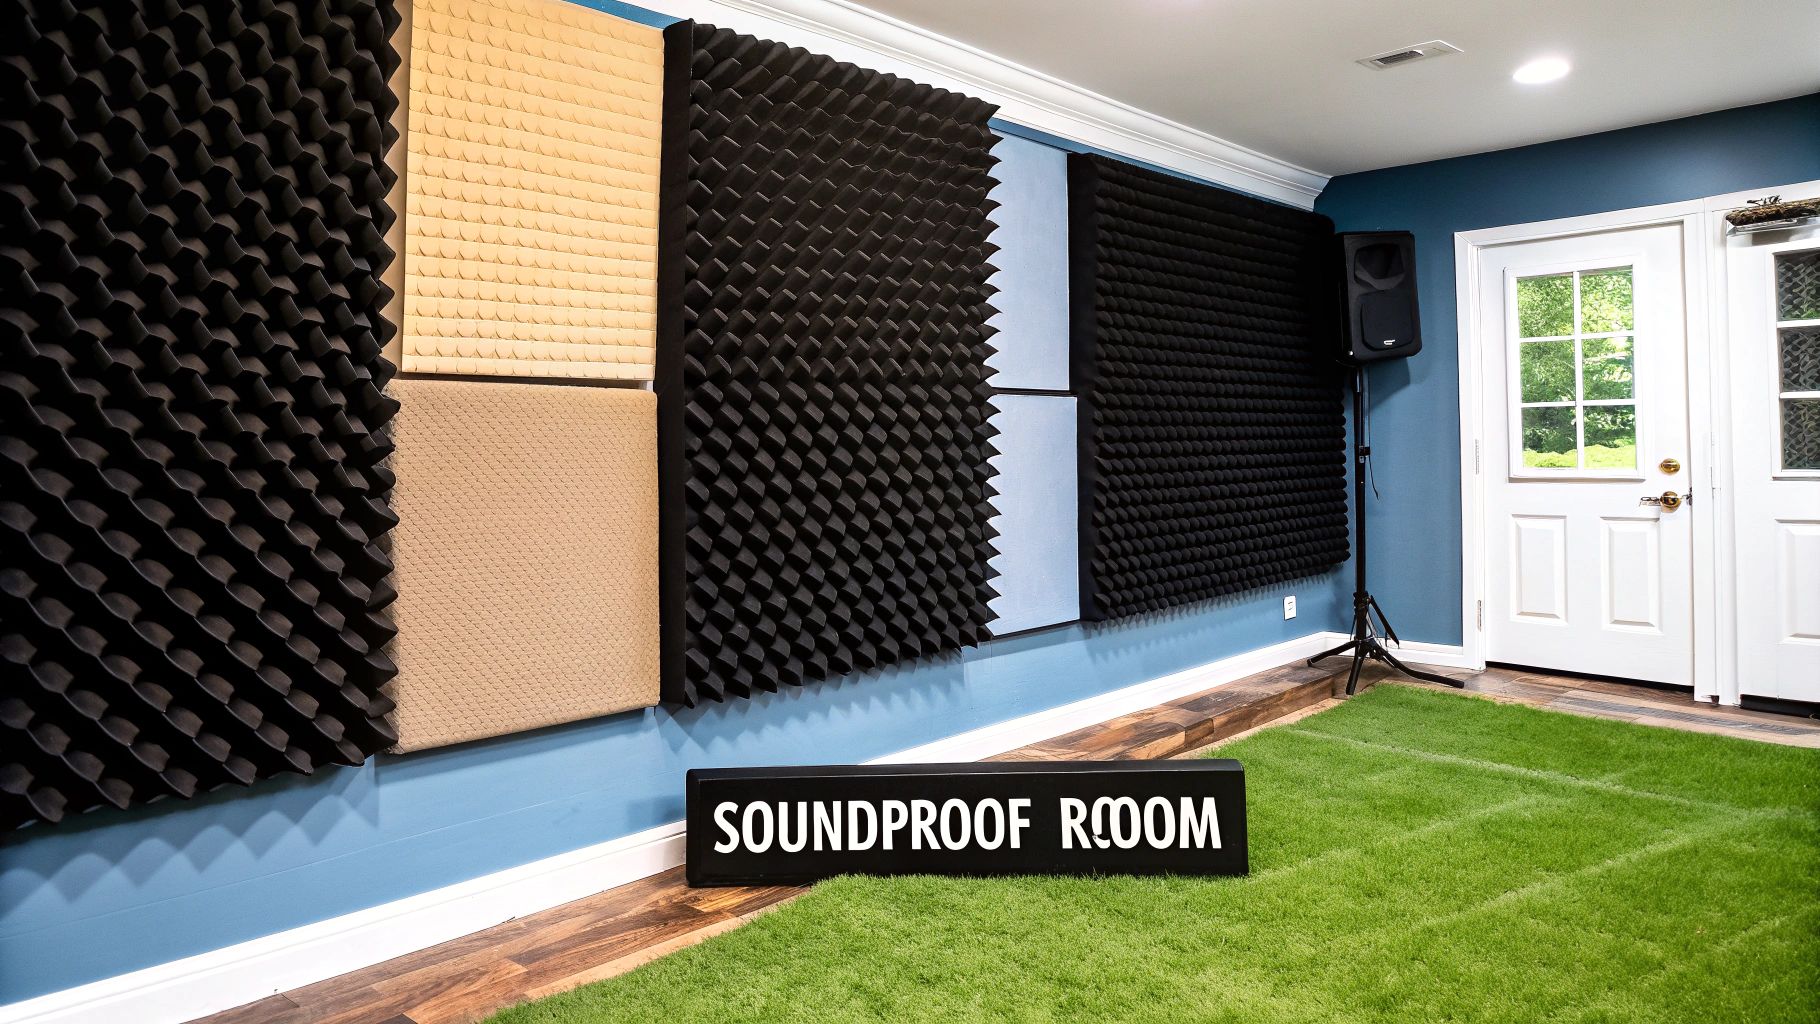
Think about what kills good audio: hard, flat surfaces. They’re your worst enemy. Sound waves bounce off them like a tennis ball off a wall, creating the echo and reverb that muddy up your recordings. Take a quick look around your room. Hardwood floors, bare walls, big windows—these are all prime culprits. The trick is to introduce soft, uneven surfaces that absorb those rogue sound waves before they can cause trouble.
The good news is you can make a huge difference with things you probably already have.
- Use furniture to your advantage: A big, plush couch or a well-stocked bookshelf is a fantastic natural sound diffuser. They don't just sit there; they actively break up reflections.
- Add soft materials: Got a hard floor? Throw down a thick rug. Use heavy blankets or drapes to cover up bare walls and windows. This is one of the quickest ways to tame echo.
These simple, no-cost tweaks can give you an incredible return on your audio quality.
Hunting Down Hidden Noises
Once you've dealt with the room's natural reflections, it's time to become a detective. You're hunting for the subtle, low-level hums and buzzes that your ears might tune out, but a sensitive condenser mic will capture with painful clarity.
In a Mac-based studio, some usual suspects include:
- The fan on your computer, even on quiet models that only spin up under load.
- The whir of an air conditioner or the rumble of a heater.
- That almost-silent buzz from fluorescent lights.
- The hum of a refrigerator in the next room.
Before you even think about hitting the record button, just sit in your chair, close your eyes, and listen. What do you hear? Turn off anything and everything that produces a constant hum. It’s a simple, foundational step that makes the difference between a clean, professional track and a noisy, frustrating one.
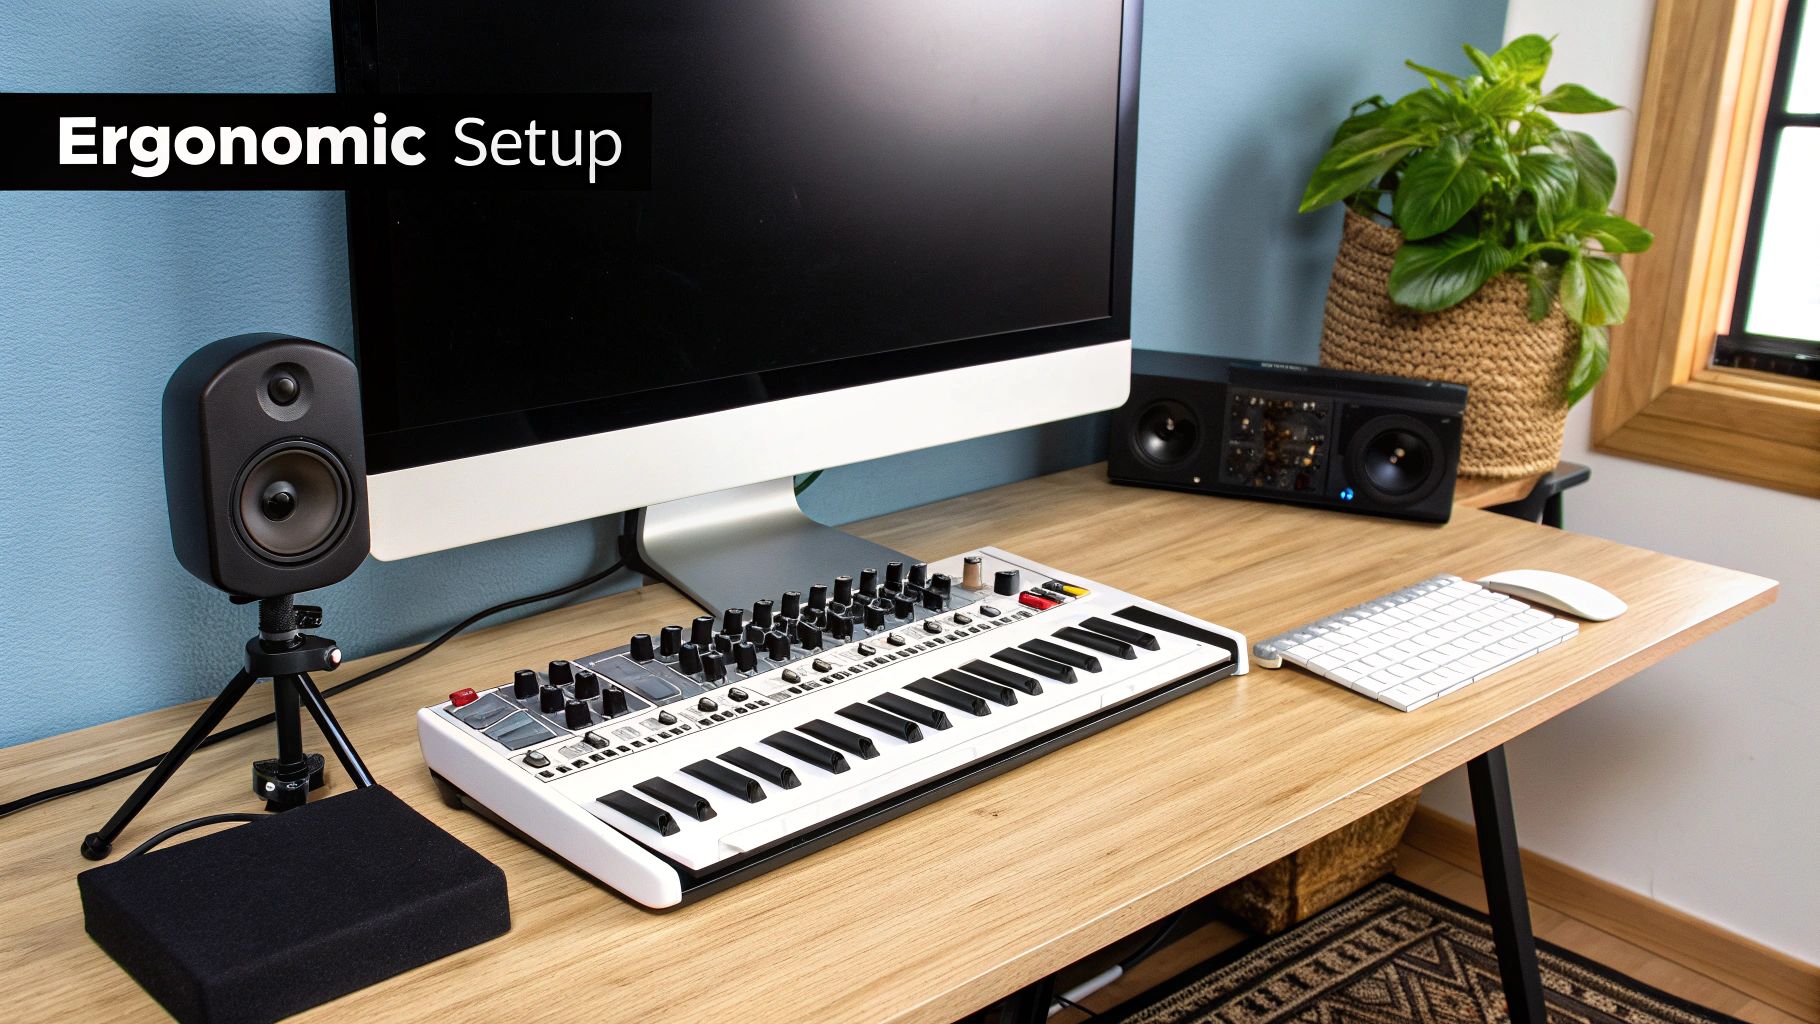
And don't forget the vibe of the room itself. An inspiring space leads to better work. Beyond just acoustics, think about refreshing your studio setup periodically to keep it feeling creative and productive.
Here’s a pro tip: Your final acoustic tool is microphone placement. Just by moving your mic a few feet away from walls and corners, you can drastically cut down on that boomy, bassy sound and bring a lot more clarity to your voice.
The demand for high-quality audio isn't just a hunch. The recorded music industry pulled in $29.6 billion globally, with streaming alone topping $20 billion for the first time. That tells you that listeners and creators alike are serious about professional sound. You can discover more insights about these global music trends to see just how high the bar is set.
At the end of the day, a quiet, controlled space is what lets your voice, and your message, really shine. If you want to dive deeper into getting that perfect vocal take on your Mac, our guide on finding a great screen recorder with voice has you covered.
Your Recording and Editing Workflow on Mac
Getting a great recording is really just the first step. The true secret to producing top-notch demos consistently—without burning out—is developing a smart, repeatable workflow. For those of us on Mac, a seamless process from hitting "record" to final export makes all the difference. Think of it this way: a well-organized workflow in your studio for recording is your most valuable asset.
If I could give just one piece of advice, it would be this: always record your audio and video on separate tracks. It's a game-changer. When your screen capture and voiceover are independent files, you have incredible editing flexibility. You can snip out an "um" or a cough from your audio without creating a jarring jump cut in the video. This separation is the bedrock of clean, professional editing on a Mac.
The Post-Production Process on Mac
With your raw files captured, the real magic begins. Post-production is where you take a solid recording and polish it into a compelling demo that truly connects with your audience. This isn't just about fixing mistakes; it's about crafting an experience.
Here’s a practical post-production checklist I follow on my Mac:
- Create the Rough Cut: The first thing I do is trim the dead air at the beginning and end of my clips. Then, I’ll do a quick pass to remove any major blunders, awkward pauses, or sections that just don't work. The goal here isn't perfection; it’s about getting the basic structure down.
- Sweeten the Audio: Next, I put my headphones on and focus solely on the voice track. I'll pull it into a DAW like GarageBand or Logic Pro to apply a noise gate (to kill background hiss), use an EQ to add warmth and clarity, and a compressor to smooth out the volume. This makes the narration so much easier to listen to.
- Layer and Sync: Once the audio is sounding crisp, I bring it back into my video editor and line it up with the screen recording. This is also when I’ll add any background music, making sure to keep the volume low enough that it supports, not overpowers, my voice.
A critical part of this is ensuring perfect synchronization between your audio and video. Even a slight mismatch can make the entire presentation feel off. Play back key sections at full screen to ensure your voice matches the on-screen action precisely.
Getting these steps right just takes a bit of practice. Once your macOS recording studio is set up, it's really helpful to see how it fits into the bigger picture. For a wider view on managing your content from concept to completion, it's worth exploring guides on a complete video production workflow.
Exporting for Maximum Quality on Mac
After all that hard work, the final export is what delivers your polished demo to the world. Using the right settings is crucial to make sure it looks and sounds fantastic wherever it’s viewed. A great tool can help you nail this step. For a closer look at how to capture your screen effectively on macOS, check out our insights on using a video screen grabber for Mac.
The demand for high-quality recorded content is undeniable. The global music recording market is currently valued at $60.73 billion and is projected to grow at a compound annual rate of 7.8%. This growth reflects a universal appreciation for polished, professional productions. When you’re ready to export, always aim for quality. A high-bitrate H.264 MP4 file is usually a reliable, high-quality choice that works almost anywhere.
Answering Your Top macOS Recording Questions
As you start putting together your recording setup, a few questions always seem to pop up. I've been there. Let's tackle some of the most common ones I hear from people setting up their Mac studios, so you can sidestep the usual mistakes and build a workflow that actually works.
Getting these things straight from the get-go saves a ton of headaches (and money) down the line.
Do I Really Need an Audio Interface for My Mac?
Look, you can start with a simple USB microphone plugged directly into your Mac. It works. But if you're serious about your sound, an audio interface is one of the most significant upgrades you can make.
Think of it this way: a USB mic is a jack-of-all-trades, but an audio interface is a master of one. Its sole purpose is to take the analog signal from a high-quality microphone and convert it into a pristine digital signal for your Mac. The preamps are just plain better, giving you a much cleaner and richer sound.
Plus, you get physical knobs for on-the-fly adjustments and the freedom to use professional XLR microphones—the industry standard. For anyone chasing that top-tier audio quality on a Mac, an interface isn't just nice to have; it's a game-changer.
What’s the Biggest Audio Mistake Mac Users Make?
This one is easy. The most common mistake I see is people dropping hundreds, or even thousands, on fancy gear while completely ignoring their recording space. A $1,000 microphone in a room with bare walls, a hardwood floor, and a whirring fan will sound echoey, thin, and unprofessional. Every time.
Your room is part of your sound. Its acoustics are foundational.
Before you even think about buying a new microphone, deal with your recording environment. Simple things like adding rugs, closing the door, and shutting off noisy appliances will improve your audio quality more dramatically than any piece of gear.
Is GarageBand Good Enough for Product Demo Audio?
Absolutely, 100%. GarageBand comes free with every Mac, and it is a surprisingly powerful tool that’s more than capable of producing professional-grade audio for your demos. Don't let the "free" price tag fool you; it has all the core tools you need.
Here’s what you can easily do in GarageBand:
- Record crystal-clear audio from your interface or USB mic.
- Slice out mistakes and awkward pauses with simple editing tools.
- Mix in background music or sound effects and get the levels just right.
- Apply essential effects like EQ and compression to make your voice sound full and polished.
Sure, pros might eventually graduate to Logic Pro for its advanced bells and whistles, but you can create fantastic-sounding product demos with GarageBand without spending another dime on software.
Ready to create stunning product demos with ease? Screen Charm simplifies the entire process on your Mac with its intelligent auto-zoom and intuitive editor. Get Screen Charm today and start producing polished, professional videos in minutes.