Picking the right screen recording software for YouTube on your Mac is the very first, and arguably most important, decision you'll make for your channel. The goal isn't just to find a tool with the longest feature list, but one with the right features for what you're trying to create—whether that's a simple tutorial, a polished product demo, or a complex, multi-layered gaming video.
Quick Picks for YouTube Screen Recording on Mac
| YouTube workflow | Best tool | Why |
|---|---|---|
| Free recording with full control | OBS Studio | No watermark, no limits, scenes, webcam, and high-bitrate export |
| Premium polished tutorials and demos | Screen Studio | Auto-zoom, motion blur, style presets, and polished exports |
| Polished Mac tutorials without a subscription | Screen Charm | Auto-zoom, motion blur, background music, webcam, system audio, 4K export, and one-time pricing |
| Traditional tutorial editing | ScreenFlow | Mac-native timeline editor with callouts and annotations |
| Corporate training videos | Camtasia | Templates, annotations, quizzes, and a full editor |
| Quick async explainers | Loom | Fast record-and-share links with comments and summaries |
For macOS creators, Screen Studio is strongest when you want style presets, GIF export, iOS recording, and deeper visual control for public-facing YouTube demos. Screen Charm is strongest when you want a simpler Mac screen recorder with automatic zoom, motion blur, background music, and one-time pricing. For SaaS walkthroughs, see the Mac screen recorder for SaaS product demos page.
Sponsored by the makers
Tired of boring screen recordings?
Try Screen Charm.
Auto-zoom, motion blur, camera overlay, and background music. All built in. Record once, export a polished video.
See what it doesChoosing Your YouTube Screen Recorder on macOS
Finding the perfect screen recording software on a Mac is a lot like a chef picking their favorite knife. Sure, plenty of knives can cut, but the right one feels like a natural extension of your hand, making the entire process feel effortless and precise. As a Mac user, you’re not just looking for a program that captures pixels; you’re looking for a creative partner that feels at home in the Apple ecosystem.
What you plan to create will dictate your choice. A software developer making a quick demo has totally different needs than a gamer streaming fast-paced action. The trick is to line up the software's strengths with your creative goals.
Core Factors for Mac-Based Creators
When you start comparing options, a few non-negotiable features should be at the top of your list. These are the building blocks for creating high-quality YouTube content on your Mac.
-
Recording Quality (HD/4K): Your audience expects sharp, clear video. Software that reliably records your Mac's screen in 1080p or 4K is a must-have to look professional and compete on the platform.
-
Integrated Editing Tools: Having to jump between different Mac apps just to trim a mistake or add an annotation is a massive time sink. An all-in-one recorder and editor keeps your workflow moving fast.
-
Ease of Use: A clunky, confusing interface is a creativity killer. You want an intuitive, Mac-native design that lets you focus on your content, not on figuring out settings.
-
YouTube-Specific Export Options: Your tool should simplify the final step by offering presets for YouTube, like MPEG-4 with a 16:9 aspect ratio, so your video looks perfect right after uploading.
When you're shopping for screen recording software for your Mac, you're looking for something that just works. Here's a quick rundown of the most critical features and why they matter for your YouTube channel.
Key Features in YouTube Screen Recording Software for macOS
| Feature | Why It's Critical for YouTube | Ideal Specification |
|---|---|---|
| High-Resolution Recording | Viewers expect crisp, professional quality. Anything less looks amateur. | 1080p (minimum), 4K (ideal for future-proofing) |
| Integrated Video Editor | Drastically reduces production time by eliminating the need for a separate app. | Basic trimming, splitting, annotations, and overlays. |
| Webcam & Mic Recording | Connects you with your audience by showing your face and capturing clear audio. | Simultaneous recording of screen, webcam, and system/mic audio. |
| Cursor Highlighting/Zoom | Directs viewer attention and makes tutorials or demos much easier to follow. | Customizable cursor effects, auto-zoom on clicks or movement. |
| Direct YouTube Export | Simplifies the upload process and ensures optimal formatting and compression. | One-click export preset with MPEG-4 (H.264) codec. |
Ultimately, a tool that integrates smoothly into your macOS workflow will always be the best choice.
For macOS users, the best software feels like it was made for the system. It should be responsive, powerful, and take advantage of what makes a Mac a Mac, creating a seamless recording and editing experience.
This is exactly where focused Mac tools make a name for themselves. Screen Studio is built for premium visual polish and deeper style controls, while Screen Charm is built for a simpler all-in-one workflow with automatic zoom, motion blur, background music, webcam overlays, system audio, and 4K export. Both are better fits for polished YouTube tutorials than a raw QuickTime recording.
Must-Have Features for YouTube Creators on Mac
If you're serious about creating YouTube videos on your Mac, you know it takes more than just hitting the record button. The real difference between an amateur screencast and a polished, professional video often boils down to the software you use. Choosing the right screen recording software for YouTube is the first, and arguably most important, step in building content that actually hooks your audience.
This isn't just a hunch; the market backs it up. The global screen recording software market hit a value of $9.58 billion in 2024 and is expected to climb to $10.84 billion by 2025. That explosion in growth, tracked in The Business Research Company's global market report, shows just how critical these tools have become for meeting audience expectations.
High-Resolution Recording for a Crisp Image
Let's face it: we live in an HD world. Your viewers are watching on everything from giant 4K monitors to pixel-dense iPhone screens. They expect clarity. A fuzzy, pixelated video is a surefire way to get them to click away.
This is why the ability to record in high resolution isn't just a nice-to-have; it's a must. You should be looking for software that captures your Mac’s screen in at least 1080p (Full HD). If you really want to deliver a top-tier viewing experience and future-proof your content, 4K UHD recording is the way to go. It ensures every detail in your software tutorial or gameplay footage is crystal clear and easy for anyone to follow.
Simultaneous Audio and Webcam Recording
A screen recording is only half the story. The audio and your personal connection with the audience are what bring it to life. Software that only captures video with no sound is basically useless for a modern YouTuber.
The best screen recorders let you capture your microphone narration and your Mac's system audio at the same time. This is non-negotiable for explaining what's on screen while letting your audience hear the sounds from the app or game you're showcasing.
On top of that, showing your face with a webcam overlay is a game-changer for building trust and rapport. It turns a sterile recording into a personal presentation. The right tool will let you seamlessly add your webcam feed, letting you resize and position it on the fly without wrestling with a separate program. If you've ever struggled with this, check out our guide on how to capture system audio on a Mac.
Annotation Tools and Cursor Effects
Ever watch a tutorial and completely lose track of where the host is clicking? It’s frustrating. Guiding your viewer's eye is crucial for making your content easy to follow, and that's where annotations and cursor effects come in.
Your Mac screen recorder should absolutely include:
- Annotation Tools: The power to draw shapes, drop in text, or use arrows to highlight exactly what you're talking about.
- Cursor Highlighting: A simple colored circle around your cursor that makes it impossible to miss.
- Click Effects: A subtle visual or sound effect when you click, so viewers know precisely when an action is taken.
- Auto-Zoom: This is a fantastic feature that dynamically zooms in on your cursor's location, keeping the focus squarely on the important details.
These aren't just bells and whistles. They're what transform a passive viewing experience into an active, engaging lesson. They make sure your point gets across, loud and clear.
Mastering Your Recording Workflow on macOS
A killer YouTube video isn’t born in the editing suite—it starts with a flawless recording. Nailing down a clean, efficient workflow on your Mac is the real secret to capturing footage that’s a dream to edit and looks fantastic. Think of it like prepping your kitchen before you start cooking; a little organization upfront saves you from a massive headache later.
This process is all about turning a potentially chaotic recording session into a smooth, controlled one, ensuring your final product is as polished as it can be. And it all begins with setting the stage on your macOS desktop.
This infographic gives you a great visual breakdown of what goes into a successful YouTube screen recording.
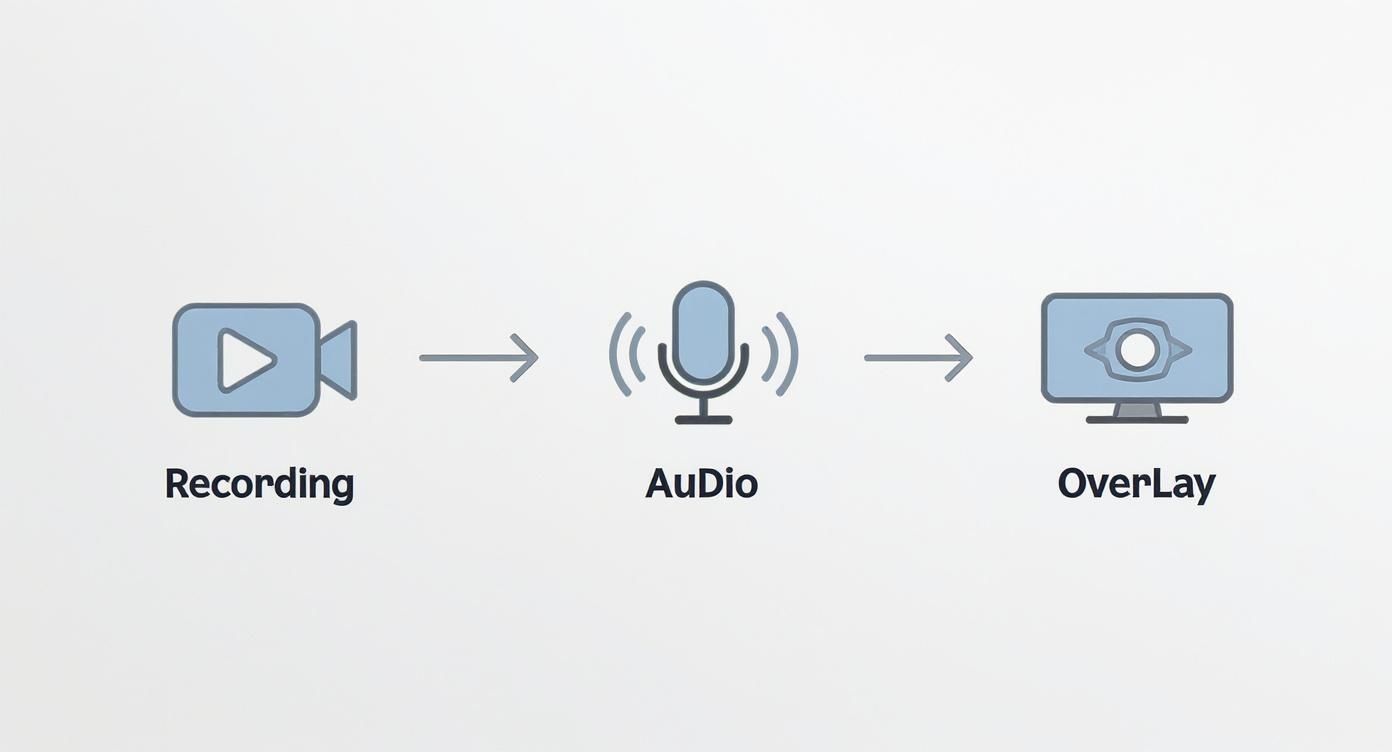
As you can see, it's about getting your video capture, audio input, and webcam overlay to play nicely together to create a single, engaging piece of content.
Preparing Your Mac for Recording
Before your cursor even gets near that record button, take a minute to prep your digital workspace. A cluttered desktop or a rogue notification can instantly torpedo an otherwise perfect take.
First things first, close any apps and browser tabs you don't absolutely need. Tidy up your desktop by hiding files or using macOS’s Stacks feature. And here's the most important tip: flip on "Do Not Disturb" mode in your Control Center. Trust me, you don't want your Slack notifications popping up mid-recording.
Next up, let's talk audio. An external USB microphone will give you a night-and-day improvement over your Mac's built-in mic. Position it a few inches from your mouth and just a little to the side—this trick helps you avoid those harsh "p" and "b" sounds. A quick test recording is all it takes to make sure your volume levels are strong and clear.
Configuring Your Software Settings
With your workspace ready, it's time to dive into your screen recording software for YouTube. The first big decision is what part of the screen you're actually going to capture. In a tool like Screen Charm, you've got a few straightforward choices:
- Full Screen: This is your go-to for showing off workflows that jump between different applications or when you need to show the full context of what you're doing.
- Specific Window: Perfect for zeroing in on a single app. It keeps your viewers' attention exactly where you want it and hides everything else.
- Custom Region: This lets you draw a box around the precise area you want to record, giving you total control over what's in the frame.
Once you’ve picked your recording area, you need to set the frame rate. For most tutorials on your Mac, 30 frames per second (fps) hits the sweet spot—it looks smooth and professional without creating gigantic file sizes. But if you’re recording something fast-paced, like a video game or a UI animation, you'll want to bump it up to 60 fps to capture that fluid motion without any choppiness.
The whole point of this pre-recording setup is to eliminate surprises. By creating a controlled environment on your Mac, you can stop worrying about the tech and focus entirely on delivering great content.
Of course, recording is just one part of the puzzle. For product-style YouTube videos, also see our guide to how to make product demo videos on Mac.
Staying on Track During Recording
Once you hit that red button, the name of the game is focus and efficiency. This is where learning your keyboard shortcuts becomes a total game-changer. Instead of fumbling with your mouse to start, pause, or stop, you can use hotkeys to control everything without missing a beat.
And don't be afraid to use the pause button! If you lose your train of thought or need a moment to set up the next part of your demo, just hit pause. It’s so much easier to resume a paused recording than it is to slice out long, awkward silences in the edit. This one little trick will keep your raw footage clean and tight.
Saving and Organizing Your Footage
When you’ve nailed the take, the last step in your workflow is saving and organizing your files. A messy folder filled with clips named Untitled.mov is a recipe for a truly frustrating editing session.
Get into the habit of using a consistent naming system right away. A simple format like [ProjectName]_Clip_01_YYYY-MM-DD works wonders for finding what you need later. For example, Screen Charm prompts you to name your project the moment you stop recording, which helps you stay organized from the get-go. This simple habit makes the handoff to the editing phase a breeze, setting you up to turn that raw footage into a polished YouTube video.
Turning Raw Footage into Polished YouTube Videos
Hitting "record" is just the start. The real work—the part that turns a decent screen recording into a great YouTube video—happens in the editing room. This is where you transform that raw, rambling footage into something sharp, engaging, and professional. And for Mac users, this doesn't have to mean juggling a bunch of complicated apps.
Editing is where you find the story. It’s your chance to trim the fat, fix mistakes, and add a layer of polish that keeps people watching. When you have the right screen recording software for YouTube, this whole process feels less like a chore and more like a natural part of creating.
From Raw Clips to a Cohesive Story
First things first: you’ve got to clean up your footage. Think of yourself as a sculptor chipping away at a block of marble. Your job is to remove everything that doesn't belong to reveal the masterpiece inside.
You’ll want to focus on a few key things right away:
- Trimming Dead Air: Snip off those awkward moments at the beginning and end where you’re fumbling to start or stop the recording.
- Cutting Out Mistakes: We all do it—stumble over a word, click the wrong thing, or pause to remember what to say next. Get rid of it.
- Stitching Clips Together: If you recorded in chunks, now is the time to assemble them on your timeline so they flow together into one seamless story.
These aren't just suggestions; they're essential steps for making a video that respects your audience's time and keeps the energy up.
Adding Professional Polish and Flair
With the basic structure in place, it’s time for the fun part: adding those little touches that make a video feel truly professional. A simple cross-fade transition, for instance, can guide your viewer from one idea to the next without a jarring jump cut.
A subtle background music track can completely change the vibe, making your tutorial feel more energetic or your walkthrough more relaxed. Even simple color correction—just a slight bump in contrast or saturation—can make your screen recording pop. For a closer look at the tools that make this happen, check out our guide on the best screen recording and editing software.
Post-production isn't about throwing in flashy effects. It's about using smart editing to make your message clearer, keep your viewers hooked, and deliver your content as effectively as possible.
Perfecting Your Audio for a Professional Sound
I’ve said it before, and I’ll say it again: viewers will forgive shaky video, but they will click away instantly for bad audio. Clear, crisp sound is non-negotiable. Your editing software needs to give you the power to make your voiceover sound clean and professional.
Start by using a noise reduction filter to kill any background hum from your computer fan or A/C unit. Next, normalize the audio levels across the entire video. This ensures there are no jarring jumps in volume, which makes for a much more pleasant listening experience.
Exporting Your Video for YouTube on Mac
The last hurdle is exporting your masterpiece. This is where you package everything up into a single file optimized for YouTube. Getting these settings right ensures your video looks and sounds exactly how you want it to on the platform, without creating a gigantic file that takes forever to upload from your Mac.
For YouTube, these are the go-to export settings on a Mac:
- Format: MPEG-4 (.mp4) is the universal standard. YouTube loves it, and it gives you a great balance of quality and file size.
- Resolution: Always export in the same resolution you recorded. If you captured your screen in 1080p, export in 1080p.
- Bitrate: For 1080p footage at 30fps, aim for a bitrate between 8-12 Mbps. This will keep the quality high without bloating the file.
- Audio Codec: Stick with AAC-LC (Advanced Audio Codec) for the best sound quality.
Screen Studio vs Screen Charm for YouTube
Choose Screen Studio if your YouTube content needs deeper style presets, GIF export, iOS recording, and more visual control over polished screen recordings.
Choose Screen Charm if you want a faster Mac workflow for tutorials and product demos: record screen, webcam, microphone, and system audio together, let auto-zoom and motion blur guide attention, add background music, then export in 4K or share a link. For a detailed head-to-head, see Screen Charm vs Screen Studio.
How Your Recordings Impact YouTube SEO
Making a great video is one thing, but getting people to actually find it is a whole different ball game. You might be surprised to learn that the connection between your recording process and the YouTube algorithm is incredibly tight. The screen recording software for YouTube you choose has a direct line to how your videos perform, shaping the very metrics YouTube watches to rank and recommend content.
It all boils down to quality. YouTube’s algorithm is obsessed with how long people stick around to watch. A high-quality recording—I’m talking crisp visuals and clean, balanced audio—is a massive driver of audience retention. If your viewers aren't squinting at a blurry screen or struggling to hear you, they’ll naturally watch for longer.
This sends a clear, powerful signal to YouTube: "Hey, people like this!" And that makes the algorithm much more likely to push your video out to new viewers.
From Screen Capture to Click-Through Rate
Your recording workflow is also a secret weapon for crafting killer custom thumbnails. As you record, you’re capturing thousands of high-resolution moments. Later, you can scrub through that raw footage to find that one perfect, engaging frame that screams, "Click me!"
A great thumbnail is probably the single biggest factor in boosting your click-through rate (CTR). A high CTR tells YouTube that your video’s packaging is doing its job and grabbing attention—another vital signal for the recommendation engine. Honestly, a simple, clean screen grab from high-quality footage often works better than some over-the-top graphic because it gives viewers an honest preview of what they're about to see.
Think of your recording session as an SEO brainstorming session. The footage you capture isn't just for the final video; it's a goldmine of material for your title, description, tags, and especially your thumbnail.
Mining Your Recording for SEO Gold
When you’re reviewing your raw footage, pay close attention to the specific language and topics you cover. This isn't just about editing; it's a crucial step for building a metadata strategy that perfectly matches what people are searching for.
Listen for those "aha!" moments and key phrases. These little nuggets can become the building blocks for your entire SEO strategy:
- Your Video Title: Did you say something that perfectly summarizes the video's main point? That’s your title.
- Your Description: You can use timestamps to point viewers directly to the key moments you identified during your review.
- Your Tags: Pull out the core ideas and keywords you discussed and turn them into relevant tags.
Weaving SEO into your post-recording review makes sure your metadata is an authentic reflection of what's in the video. And don't stop there. Learning how to transcribe your YouTube video to text is a game-changer for both accessibility and SEO, giving you captions that Google can crawl.
It's no surprise that North America leads this market, holding a massive 49% share. This is largely driven by a heavy focus on video marketing and a ton of tech innovation. The U.S., in particular, is a major hub, with its strong IT backbone fueling the growth of these tools. For anyone interested in diving deeper, you can find a full analysis from Fortune Business Insights.
And if you want to get into the technical weeds of exporting your video, our video bitrate calculator can give you the exact settings you need. By looking at your recording process through an SEO lens from the very start, you’re not just creating a well-made video—you’re setting it up for success.
Got Questions About Recording YouTube Videos on Your Mac?
If you're just getting started with creating content on a Mac, you're not alone. A handful of questions always seem to surface as people navigate the process. Getting straight answers is the fastest way to improve your videos and build a workflow that actually works with your chosen screen recording software for YouTube.
Let's break down some of the most common hurdles Mac-based YouTubers run into. Nailing these details will make your final video look far more professional and help it meet the technical specs YouTube prefers.
What's the Best Resolution and Frame Rate for YouTube?
For most screen recordings, like tutorials or walkthroughs, 1080p (1920x1080) at 30 frames per second (fps) is your go-to setting. It's the perfect balance. The video looks crisp and clear on just about any screen, but the file sizes won't cripple your hard drive, making for much quicker edits and uploads.
But what if you're recording something with a lot of movement? For fast-paced gaming or slick UI animations, you'll want to bump that up to 60 fps. That's how you get that silky-smooth motion that viewers love. You can also record in 4K to make your channel more future-proof, but be warned: the files are massive, and they'll demand a lot more from your Mac and take forever to process on YouTube.
Key Takeaway: Stick with 1080p at 30fps for most videos. Only switch to 60fps for high-action content or 4K if you've got the horsepower and storage to back it up.
How Can I Record My Mac's Audio and My Microphone at the Same Time?
Ah, the classic Mac recording problem. This used to be a real headache, but thankfully, dedicated screen recorders like Screen Charm have this figured out. Inside the app, you just tick the boxes for "System Audio" and your microphone. That's it. It captures both at once, no workarounds needed.
If your software doesn't have this built-in, you’ll need a free tool like BlackHole. The setup is a bit more involved: you set BlackHole as your Mac's main sound output, then tell your recording app to capture audio from both BlackHole and your mic. It works, but it’s definitely an extra step.
What Are the Biggest Rookie Mistakes to Avoid?
A few common slip-ups can turn a great video concept into something that looks unprofessional. Steer clear of these, and you'll be miles ahead of the competition.
- Terrible Audio: Relying on your MacBook's built-in mic is the fastest way to signal low quality. A simple external USB microphone is a game-changer and probably the single best investment you can make.
- Cluttered Screen: Nobody wants to see your messy desktop, personal folders, or a flood of notifications popping up mid-video. Clean everything up and turn on "Do Not Disturb" before you even think about hitting record.
- Uploading the Raw File: Never, ever upload your raw footage. Your audience doesn't have time for your "ums," long pauses, or fumbled sentences. Editing isn't just about fixing mistakes; it's about respecting your viewer's time.
What Export Settings Give the Best Quality on YouTube?
YouTube re-compresses every upload. Starting with a higher-quality source file minimises the damage. A few settings worth knowing:
- Upload at 4K even if you recorded in 1080p. When YouTube receives a 4K file, it uses the VP9 codec instead of AVC1 — producing noticeably sharper video at the same resolution. This is one of the most impactful but least-known tricks for YouTube quality.
- Codec: H.264 (AVC) is the safest choice for compatibility. HEVC (H.265) produces smaller files with the same quality — useful for faster uploads.
- Bitrate: For 4K at 30fps, aim for 35–45 Mbps. For 1080p at 30fps, 8–12 Mbps is the sweet spot.
- Frame rate: 30fps is fine for tutorials and demos. Use 60fps only if you're recording fast motion (games, animations) — it doubles file size for most content with minimal visible benefit.
My Recording Keeps Stuttering — How Do I Fix It?
Choppy, dropped frames almost always mean your Mac is under load. Before recording:
- Quit everything non-essential — browsers, Slack, Spotify, Dropbox. Every background process competes for CPU.
- Check Activity Monitor — look at the CPU tab. If anything is eating more than 20–30%, close it.
- Drop to 30fps if you're recording at 60fps. For screen content, the quality difference is minimal and the CPU saving is significant.
My Audio and Video Are Out of Sync — What Causes It?
Sync drift appears when your Mac is struggling to maintain consistent timing across multiple recording streams. The best fix is using a single app (like Screen Charm) that manages screen, mic, and webcam capture together — it locks all streams to the same clock. If you're seeing drift despite that, check that your audio driver is fully installed and restart your Mac before long recording sessions.
Ready to create polished, professional YouTube videos on your Mac without the steep learning curve? Screen Charm gives you the essentials for software tutorials and product demos: dynamic cursor zoom, webcam recording, system audio, shareable links, and integrated editing in one intuitive app. Start creating stunning tutorials and demos today.
Comparing specific tools? Screen Charm vs Loom | Screen Charm vs Screen Studio | Screen Charm vs OBS