Your Guide to Video Screen Grabber Mac Tools
Nov 24, 2025
Ever tried to record the audio from a YouTube video or a browser tab on your Mac and just... couldn't? You're not alone. It seems like it should be simple, but the truth is, macOS intentionally isolates its audio channels as a core security feature. It's a design choice that prevents apps from snooping on each other, but it also creates a headache for anyone trying to record internal system sound.
So, Why Is Capturing Mac Audio Such a Pain?
If you’ve ever attempted to record a webinar or save a piece of audio from a streaming service on your Mac, you've probably hit a brick wall. Unlike other operating systems, macOS doesn't have a simple, built-in "what you hear" audio output that you can just select as a recording source. This isn't a bug—it’s a feature, courtesy of Apple.
This security-first approach is all about protecting your privacy. By sandboxing applications and their audio streams, macOS makes it incredibly difficult for malicious software to secretly record sensitive information from a video call or media player.
The Technical Hurdle You're Facing
The real issue is baked into macOS's audio architecture. Every app essentially lives in its own little world with its own audio stream. There's no default "master mix" that bundles everything together before it heads to your speakers or headphones.
To successfully capture audio from your computer on a Mac, you need to build a virtual bridge. This bridge's job is to grab the audio output from one app (like Safari or Spotify) and reroute it into another app (like QuickTime or OBS) as if it were a microphone input.
This is exactly where third-party software comes in. These tools create virtual audio devices that pop up in your Mac’s sound settings, giving you the power to create those necessary audio pathways. Our complete guide on how to capture system audio on Mac walks you through several of the best methods.
This intentional complexity is precisely why a whole ecosystem of powerful audio software exists for macOS. It creates a real need for specialized tools that can work around these default limitations for creative and professional projects.
The market for this kind of software is huge. The global audio-recording software market is estimated to be worth around USD 2.5 billion, and the macOS slice of that pie is expected to hit a significant 48.9% market share by 2035. This shows just how many audio pros prefer Macs for their stability, even if it means using workarounds, a common topic you'll find in Mac audio discussions on Apple's community forum.
The Free Method: Pairing BlackHole with QuickTime
If you’re looking to capture your Mac's audio without spending a cent, the classic combo of BlackHole and QuickTime Player is a fantastic, rock-solid solution. BlackHole is a free, open-source virtual audio driver that brilliantly works around macOS's built-in limitations.
Think of it as an invisible audio cable inside your Mac. It lets you pipe audio out from one application (like Safari or Spotify) and route it directly into another (like QuickTime), something macOS doesn't normally allow. This is my go-to recommendation for anyone needing to record a lecture, save a clip from a webinar, or just grab some system sounds on their Mac.
By default, macOS intentionally blocks apps from "listening" to each other for security and privacy reasons. BlackHole creates a safe, virtual pathway to bypass this.
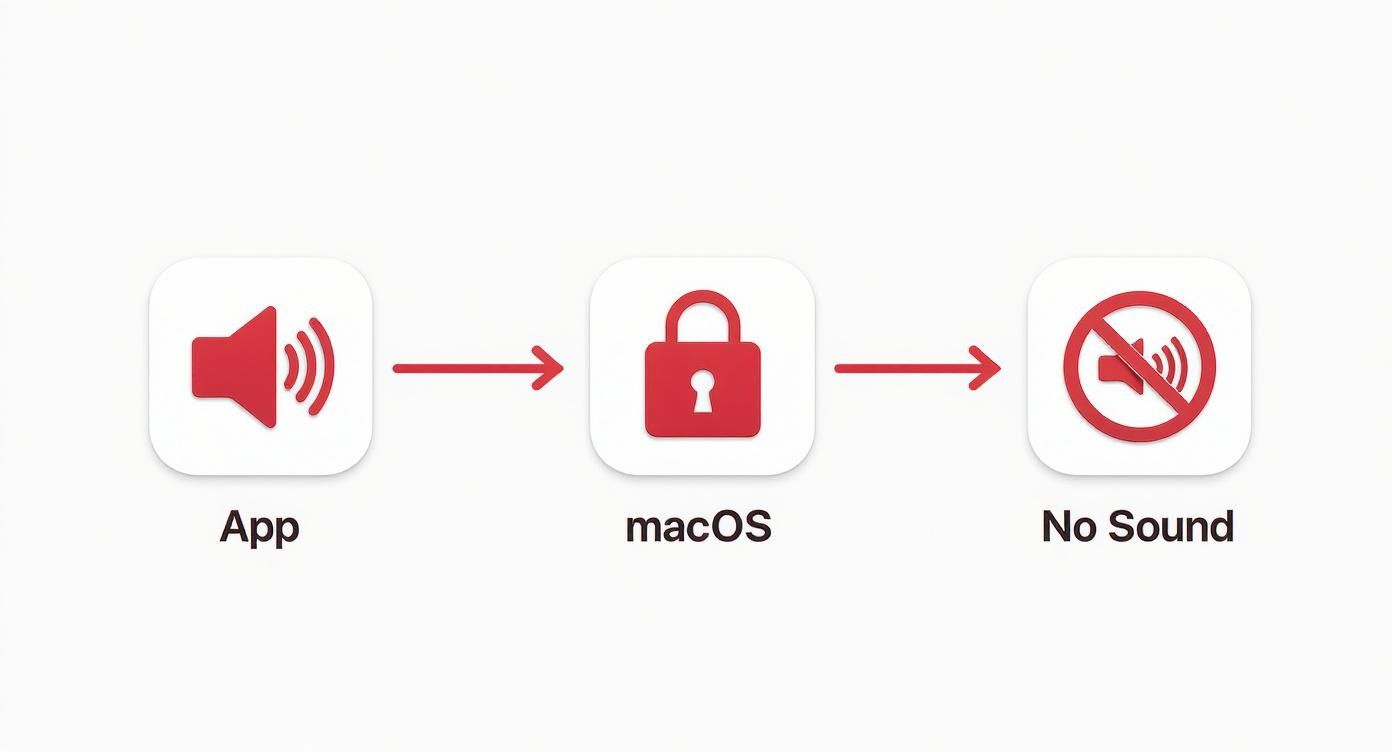
This diagram shows the exact problem we're solving: the audio stream from an app hits a wall put up by macOS security, preventing another app from capturing it.
Setting Up Your Virtual Audio Bridge
The setup takes a few minutes, but once it’s done, you're set. First, head over to the developer's website, Existential Audio, to download and install BlackHole. Just make sure you grab the right installer for your Mac’s processor (Intel or Apple Silicon).
With BlackHole installed, it's time to dive into a little-known but powerful macOS utility: Audio MIDI Setup. The quickest way to find it is with Spotlight (Cmd + Space). This app is the command center for every audio device connected to your Mac, both physical and virtual.
Here, we'll create a special device that lets you hear what you’re recording in real-time. Without this step, you’d be recording in complete silence.
Open Audio MIDI Setup (it’s in your Applications/Utilities folder).
Look for the "+" button in the bottom-left corner and click it, then choose "Create Multi-Output Device."
A new panel will appear. Check the boxes for both "BlackHole 2ch" (or 16ch, depending on the version you installed) and your main speakers or headphones (e.g., "MacBook Pro Speakers").
Crucially, set your speakers or headphones as the "Master Device" and check the "Drift Correction" box for BlackHole.
This "Multi-Output Device" is the secret sauce. It cleverly splits the audio signal, sending one copy to BlackHole for your recording software to grab and the other copy to your headphones so you can actually hear it.
Recording Your Mac's Audio with QuickTime
Now for the easy part. With our virtual audio plumbing in place, we just need to tell macOS to use it.
Head to System Settings > Sound. Under the "Output" section, select the "Multi-Output Device" you just created. From this point on, all audio from your Mac will flow to both your speakers and the BlackHole driver simultaneously.
Next, fire up QuickTime Player and go to File > New Audio Recording. A small recording window will pop up. Click the little dropdown arrow next to the red record button and choose "BlackHole 2ch" as the input source.
You’ll know it’s working when you see the volume meter in QuickTime start bouncing along with your Mac’s system sounds. Try playing a YouTube video; if the meter moves, you're good to go.
Hit the red button to start, and QuickTime will capture everything perfectly. When you're done, just stop the recording and save your file. This free combination provides a robust way to mac capture audio from computer, making it a staple for podcasters, educators, and content creators everywhere.
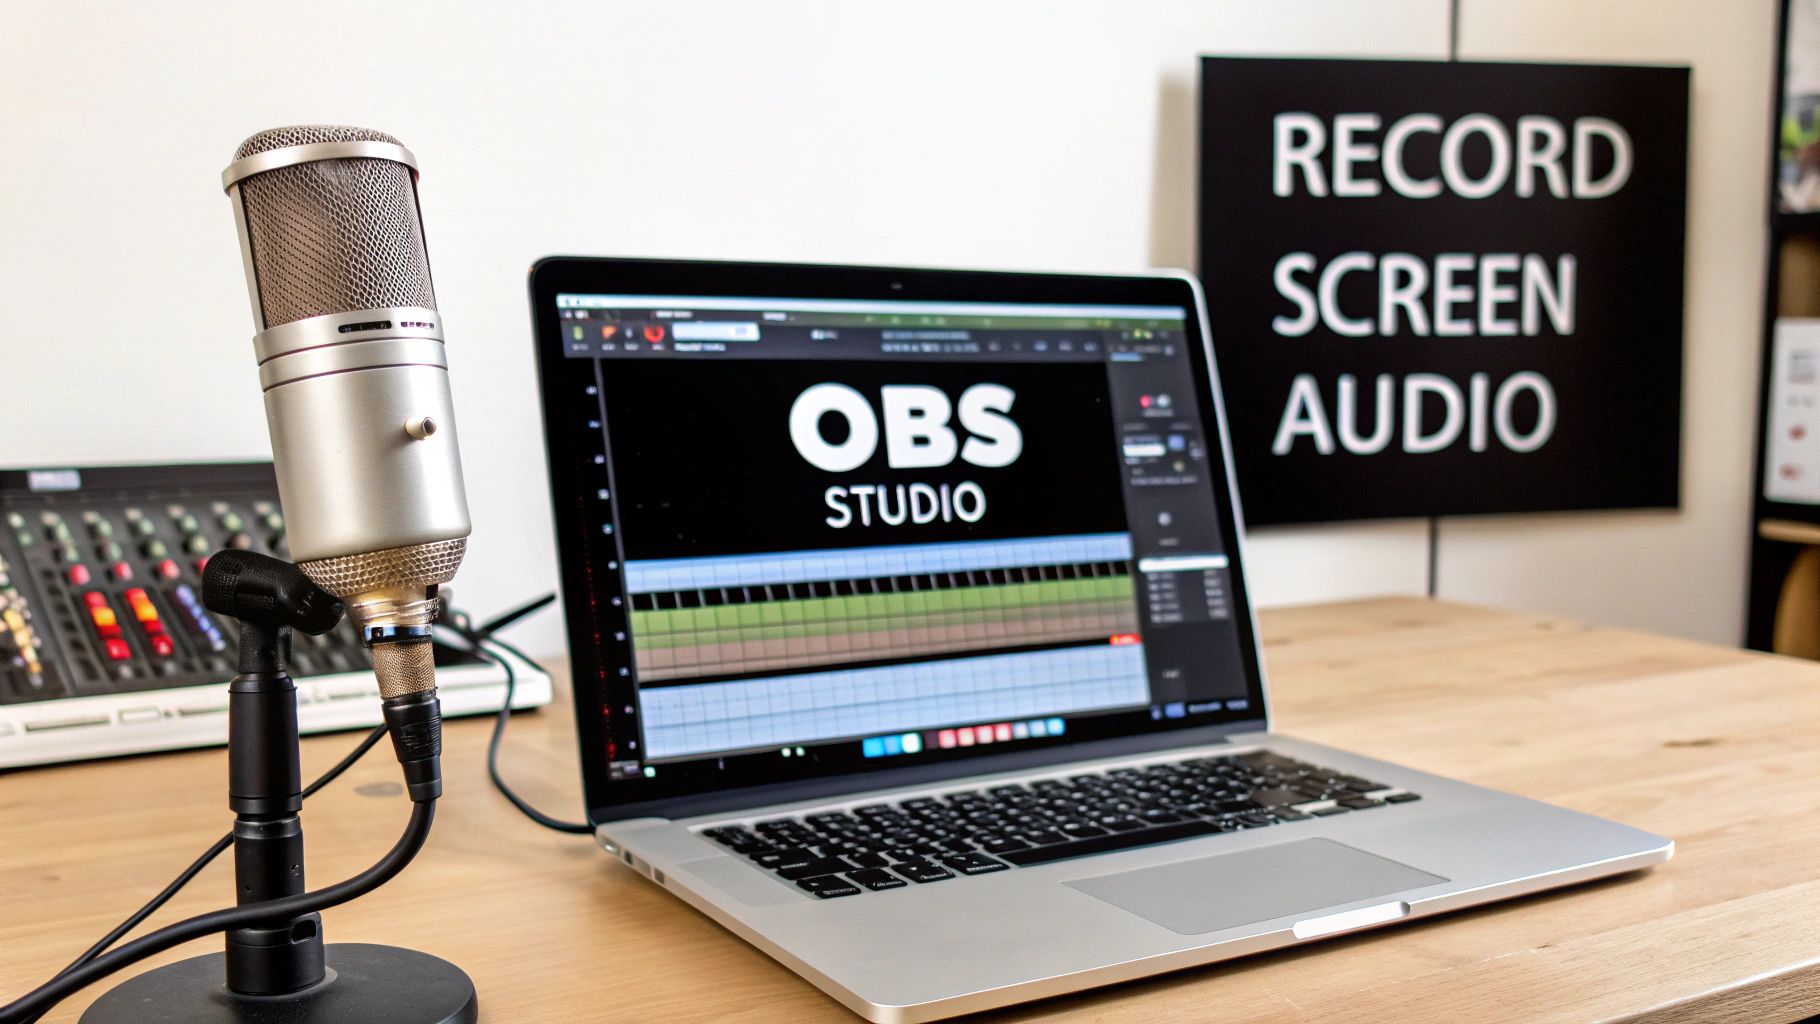
Recording Video and Audio Together With OBS Studio
When your project needs more than just a simple audio grab, OBS Studio is the go-to free solution for Mac users. This powerful, open-source software is what streamers, tutorial makers, and basically anyone serious about recording their screen and multiple audio sources uses. It completely blows the simple QuickTime method out of the water by offering a full-on production suite.
By building on the BlackHole setup we already covered, OBS lets you treat your Mac's system sound as just another input, right alongside your microphone. This is exactly what you need for recording gameplay with live commentary, narrating a software demo, or capturing a presentation with a clear voiceover. For a free tool, the level of control you get is pretty amazing.
The ability to capture your Mac's audio—from system alerts to application sounds—while simultaneously recording your microphone is a core skill for modern content creators. It's thanks to third-party tools like BlackHole that we can work around macOS's limitations, routing internal audio so we can produce high-quality tutorials, podcasts, and more.
Configuring Your Audio Sources in OBS
Getting up and running in OBS starts with adding your audio sources to what it calls a "Scene." You can think of a Scene as a complete layout for your recording—everything the viewer will see and hear.
First, let's get your Mac's system audio piped in. Look for the "Sources" panel at the bottom of the OBS window, click the "+" button, and choose "Audio Input Capture." Give it a name you'll remember, like "System Audio." In the properties window that pops up, you'll want to select "BlackHole 2ch" from the device dropdown menu.
Now for your microphone. You'll do the exact same thing: click the "+" in the Sources panel, select "Audio Input Capture," but this time name it "Mic" or something similar. For the device, pick your actual microphone—whether that's the built-in "MacBook Pro Microphone" or an external USB mic.
The OBS interface gives you a central command post for all your video and audio feeds. The key to getting great sound is the Audio Mixer, which is where you'll balance the levels between your voice and the computer's audio to get that polished, professional result.
Mastering the Audio Mixer
Once you've added both sources, you'll see them appear in the "Audio Mixer" panel. This is where the magic really happens. You should see two separate volume sliders: one for "System Audio" and one for your "Mic."
Having these as separate channels is a game-changer. For example, if you're recording a software tutorial, your voice needs to be front and center, not drowned out by application sounds. You can easily achieve this by sliding the "System Audio" level down while keeping your "Mic" level nice and high.
Pro Tip: As a rule of thumb, watch the levels as you talk. Aim for your voice (Mic) to consistently peak in the yellow area of the meter, around -10dB to -5dB. Your system audio should be much lower, hovering around -20dB, to serve as background. This creates a clean, balanced mix that's easy for your audience to listen to.
Mastering these techniques is fundamental if you want to create effective video training that actually keeps people engaged. If OBS feels like overkill and you're just looking for a simpler tool, our guide on how to record video and audio on Mac walks through some other excellent options.
The Pro Solution: Flawless Control With Loopback
When you absolutely need bulletproof control over your Mac's audio, the conversation usually starts and ends with Loopback. It's the go-to tool for professionals and serious creators on macOS for a reason. While the free options get the job done, Loopback takes all the fiddly, manual setup from Audio MIDI Setup and replaces it with a dead-simple, visual interface.
It’s a paid tool, yes, but for anyone deep in podcasting, music production, or professional streaming on a Mac, the time and headaches it saves make it a fantastic investment.
https://www.youtube.com/embed/S-jOOUdWdW3A8
Instead of wrestling with aggregate and multi-output devices, Loopback lets you literally draw a map of your audio. You just drag and drop sources like specific apps, microphones, or even browser tabs, and connect them to virtual outputs. It feels like magic, and you can build a custom audio device in seconds. This is a level of granular control you just can't get with other methods.
The demand for tools like this is soaring. The global digital audio workstation (DAW) market was valued at USD 3.16 billion in 2023 and is expected to more than double by 2032. Much of that growth is driven by macOS users, who have long favored the platform for professional audio work. You can read more about the DAW market trends on snsinsider.com for a deeper dive.
Building a Custom Audio Device
Let’s take a classic podcasting problem. You're recording a guest on Zoom, playing some intro music from Spotify, and you want to capture both—but you absolutely cannot have your Slack notifications popping up in the final recording.
With Loopback, solving this on your Mac is almost trivial.
You just create a new virtual device. Then, you drag the Zoom and Spotify app icons into the "Sources" column. That’s it. You've just made a brand-new audio device that contains only the audio from those two apps, completely isolated from everything else.
The visual interface makes it incredibly clear what’s happening, as you can see how different apps and mics are combined into a single, clean input.
The real power move is creating these self-contained audio streams that you can then pick as your microphone in any recording app, whether it's Logic Pro, Audacity, or OBS.
A Practical Example In Action
Let's follow through with that podcasting scenario.
You've built your "Podcast Mix" device in Loopback with Zoom and Spotify as your sources. Now what?
Fire up your recording software, like Adobe Audition.
Jump into the audio input settings or preferences.
Instead of your microphone, select "Podcast Mix (Loopback)" as your input device.
When you hit record, Audition will capture a perfect blend of your guest's voice and your background music. All those pesky email dings and system alerts? They're completely ignored.
This ability to mac capture audio from computer with such surgical precision is what makes Loopback the definitive tool for creators who can't leave their audio quality to chance. It just works, turning what used to be a complex routing nightmare into a simple, visual drag-and-drop task.
Choosing the Right Mac Audio Capture Method
So, you've seen a few ways to capture audio from your Mac, but which one is right for you? Honestly, the "best" choice really depends on what you're trying to accomplish, how much you want to spend, and your comfort level with a little technical tinkering.
Each method strikes a different balance between power, ease of use, and cost. Let's walk through the common scenarios to help you pick the perfect tool for the job.
Matching the Tool to the Task
For those quick, no-fuss jobs—like recording a lecture or snagging a quick audio clip from a video—the BlackHole and QuickTime combo is a fantastic, free starting point. It does require a one-time setup in your Mac's Audio MIDI Setup utility, but once that's done, you have a reliable way to capture system audio without any extra bells and whistles. Think of it as your trusty workhorse for basic recordings.
Now, if you're working with video, things get a bit more interesting. For projects like software tutorials, online course creation, or streaming gameplay, OBS Studio is an absolute powerhouse for Mac—and it's completely free. It builds on the BlackHole foundation but gives you a full-blown audio mixer. This lets you balance your microphone and system audio on separate channels, which is crucial for creating professional-sounding videos where every sound source is crystal clear.
For the pros, podcasters, and anyone on macOS who needs a dead-simple, ultra-powerful solution, Loopback is in a league of its own. It’s a paid tool, but its drag-and-drop interface is a game-changer. You can visually route audio from specific applications without ever touching your system's complicated settings. It’s a serious investment for serious work, perfect when you need precision and reliability. Of course, great audio isn't just about software; for podcasters, choosing the best microphones for podcast recording is just as important.
The core decision comes down to this: are you doing a simple audio grab, a video production with mixed audio, or professional-grade audio routing on your Mac? Your answer directly points to the right tool.
To make it even clearer, let's break down the options in a quick comparison.
Mac Audio Capture Method Comparison
Here’s a quick-glance comparison of the most popular methods for recording system audio on macOS, helping you choose the best fit for your needs.
Method | Cost | Best For | Ease of Use |
|---|---|---|---|
BlackHole + QuickTime | Free | Simple, audio-only recordings and screen captures. | Medium |
OBS Studio | Free | Recording screen video with mixed audio sources. | Advanced |
Loopback | Paid | Professional podcasting, streaming, and complex routing. | Easy |
Ultimately, whether you go with a free, slightly more technical setup or a paid, streamlined app, you now have the knowledge to capture high-quality system audio on your Mac.
Solving Common Audio Recording Problems
Even with a perfect setup, sometimes things just go sideways when you try to mac capture audio from computer. We’ve all been there: you hit record, finish a perfect take, and discover the final file is full of distortion or, even worse, dead silent. It’s frustrating, but don’t worry—these hiccups are common and usually have a simple fix.
More often than not, the root of the problem is a minor misconfiguration. Your Mac is constantly juggling different audio inputs and outputs, and it only takes one setting to get bumped out of place. Before you start pulling your hair out, just take a breath and run through the basics.
Quick Troubleshooting Checklist
If you're getting no sound at all, the first place to look is your Mac's permissions. Head over to System Settings > Privacy & Security > Microphone and check that your recording app is actually allowed to listen in. I've seen macOS or app updates reset these permissions without any warning, so it’s always my first stop.
Another classic mistake is simply selecting the wrong device in one of the many places you have to set it. Make sure you’ve got the right device selected in all three key spots:
System Settings > Sound: Is your Multi-Output Device set as your Mac's main output? If not, you won't hear anything while you record.
Audio MIDI Setup: Take a peek here. Are your aggregate and multi-output devices set up correctly? Is drift correction checked for the right devices?
Your Recording App: This one gets people all the time. Did you remember to choose BlackHole (or whatever virtual device you're using) as the input source inside the app itself?
If you're still stuck with a silent video, we have a more in-depth guide that dives into advanced solutions for fixing screen recordings with no audio.
Pro Tip: Always, and I mean always, wear headphones when you're recording system audio and your microphone at the same time. This is non-negotiable. It stops the sound from your speakers from bleeding into your mic, which is what causes that awful echo or feedback loop. Keeping your audio sources clean and separate is the secret to a professional-sounding recording.
Common Questions About Recording Audio on a Mac
Getting your Mac to record its own internal audio can feel a bit like a puzzle at first. Let's tackle some of the most common questions and roadblocks you might run into.
Can I Really Not Record My Mac’s Audio Natively?
That's right. For security and privacy reasons, macOS intentionally prevents you from directly recording the sound coming out of your speakers. There’s no built-in feature for this. You’ll always need some kind of go-between, like a virtual audio driver such as BlackHole or a more robust tool like Loopback, to create a virtual "cable" that routes the audio where you need it to go.
Why Does My Recording Sound Garbled or Robotic?
This is almost always a sample rate mismatch. Think of it like two gears that aren't quite lining up. Your virtual device (like BlackHole) might be set to 44.1 kHz, but your recording software or microphone is running at 48 kHz. That small difference is enough to create clicks, pops, and that dreaded robotic distortion.
The Fix: Head into your Mac's Audio MIDI Setup app. Take a look at every single device involved in your recording—your microphone, your virtual driver, and your aggregate device if you made one. You need to make absolutely sure they are all set to the exact same sample rate. The most common ones are 44100 Hz and 48000 Hz.
Is It Legal to Record Audio from Any Source?
This is a big one. Just because you can record something doesn't always mean you should. The legality comes down to copyright law and the terms of service for whatever you're recording.
For instance, capturing a copyrighted song from a streaming service for your own commercial video is a definite no-go. Always make sure you have the rights to record the audio for what you plan to do with it, particularly if it's for anything more than personal use.
If you're looking for a way to skip the complicated setups and just create polished product demos or tutorials, give Screen Charm a look. It handles all the complex audio and video recording behind the scenes, so you can just focus on making great content. You can learn more at https://screencharm.com.
