Creating a product demo video on your Mac isn't just about recording your screen. It’s about crafting a narrative that shows off your app’s real value. You'll record the key features in action and then polish the footage to make it pop. With a tool like Screen Charm, you can produce a professional-looking demo that directs the viewer's eye exactly where you want it, all without needing to be a video editing wizard.
If you are recording a software walkthrough, Screen Charm also has a focused guide for creating SaaS product demos on Mac with automatic zoom, cursor effects, webcam, audio, and 4K export.
Pre-Production Checklist
Before scripting a single word, run through this checklist. Skipping it is the most common reason recordings need to be re-done.
| Phase | Action | Why It Matters |
|---|---|---|
| Strategy | Define one clear CTA (sign up, start trial, book demo) | Prevents a meandering video with no purpose |
| Audience | Identify the specific pain point you're solving | Makes the demo resonate instead of feeling generic |
| Environment | Clean desktop, hide menu bar icons, enable Do Not Disturb | Avoids distractions that undermine professionalism |
| Technical | Set resolution to 1920×1080 (or another 16:9 ratio) | Guarantees clean output on any platform |
| Audio | Test mic, check input levels, find a quiet room | Bad audio kills demos faster than anything else |
Why Demo Videos Are a Game-Changer for macOS Apps
Before you even think about hitting record, let's talk about why a great demo video is so powerful, especially for macOS software. A well-made demo does more than list features; it turns a potential user's curiosity into a confident purchase by showing them exactly what your product can do for them. It’s the closest they can get to a hands-on test drive without actually downloading anything.
Think about it: videos are fantastic at making complex ideas simple. Instead of wading through a long list of functionalities, a user can see a feature work seamlessly within the familiar macOS environment. This visual approach builds instant trust and helps them picture themselves using your app to solve their own headaches.
In today's market, video isn't just a nice-to-have—it's what people expect. Video marketing has become a cornerstone for most businesses, with 89% of companies now using it as a primary tool. Product demos, in particular, are incredibly effective. A recent study found that 62% of consumers learn about new products through demos, reviews, and unboxings. This data, highlighted in SundaySky's 2025 video marketing trends, confirms that a compelling demo is a direct line to your audience.
Building Trust and Boosting Conversions
Your product demo is a sales tool that never sleeps. Unlike a live sales call, a recorded demo lets people explore your app whenever and wherever they want, entirely at their own pace. This empowers them, giving them a sense of ownership before they’ve even committed to buying.
Here's what a strong demo video really delivers:
- Clarifies Value: It instantly shows how your app solves a specific problem, which is always more impactful than just telling.
- Builds Credibility: A polished, clear demonstration silently communicates the quality of your software and your commitment to a great user experience on macOS.
- Increases Sales: By answering questions and handling potential objections right away, a good demo can seriously shorten the sales cycle and improve conversion rates.
A great product demo is more than a tutorial. Think of it as your app's Oscar-winning biopic—it tells a compelling story that moves a broader audience to action.
Once you have a solid plan and the right tools—like a dedicated product demo video maker for macOS—you'll have everything you need to get started.
Sponsored by the makers
Tired of boring screen recordings?
Try Screen Charm.
Auto-zoom, motion blur, camera overlay, and background music. All built in. Record once, export a polished video.
See what it doesScripting a Demo That Connects and Converts
Let's be honest: the best product demos feel spontaneous, but they’re anything but. Winging it is the fastest way to create a rambling, confusing video that loses your audience. A solid script is your secret weapon—it's the blueprint that ensures every moment on screen has a purpose and guides your viewer to a clear, compelling conclusion.

Before you even think about the narrative, I always recommend starting with the groundwork by writing a strong creative brief. Nailing down your goals and who you're talking to first makes the actual scripting a thousand times easier. Your script needs to do more than just list what your app does; it has to resonate with your target macOS user.
And the stakes are high. People's expectations for quality video have skyrocketed—live video streaming is on track to become a $184 billion market by 2025. This is a huge opportunity for macOS app creators, especially when you consider that 90% of marketers already see a positive ROI from video. It’s clear this is where you need to be.
Find Your Core Story
Every memorable demo tells a story, and every story has a beginning, a middle, and an end. Frame your script this way, with your app as the hero that solves your customer’s problem. What's that one frustrating, nagging issue your ideal user deals with day in and day out on their Mac? That’s your starting point.
A simple storytelling arc works wonders here:
- The Problem: Kick things off by highlighting a pain point that macOS users immediately recognize.
- The Solution: This is where you introduce your app as the perfect answer to that problem.
- The Transformation: Show them what life looks like on the other side—their new, improved, and more productive workflow on their Mac.
This approach transforms a dry feature tour into something people actually remember. You’re not selling features; you’re selling a better way of doing things.
A great script doesn't just show what your app does. It shows your macOS audience why they should care, painting a clear picture of how their life will improve after using it.
Build Your Script for Maximum Impact
With your core story in place, it's time to structure it. A well-organized script is what keeps viewers hooked from the opening line to your final call to action. The key is to always speak in terms of benefits, not just technical specs.
To help you get started, I've put together a table breaking down the essential parts of a high-impact demo script. This framework ensures your message is tight, focused, and gets the job done.
Essential Demo Script Components
| Component | Objective | Example for a macOS To-Do App |
|---|---|---|
| The Hook | Grab attention in the first 3-5 seconds. Hit them with a problem they know all too well. | "Tired of juggling sticky notes and reminders that just get lost on your Mac?" |
| Introduce the Solution | Briefly present your app as the answer they've been looking for. | "Meet TaskFlow, the macOS app that brings all your tasks into one beautiful, streamlined interface." |
| Show Off Key Features | Demo just 2-3 core features, always connecting them directly back to a real user benefit. | "With Smart Sort, your tasks organize themselves by priority, so you always know what to focus on." |
| Call-to-Action | Tell the viewer exactly what to do next. Be direct and make it easy. | "Download your free trial from the Mac App Store and start organizing your life today." |
Following this kind of structure is the difference between a demo that gets clicks and one that gets ignored. By scripting first, you create a polished, professional video that respects your viewer's time and makes your app’s value crystal clear.
Hook Your Audience in the First 10 Seconds
You have a short window before viewers leave. Skip the intro — lead immediately with a pain point they recognise.
Don't: "Hi, I'm from Acme Apps, and today I'll show you our new organisation tool."
Do: "Is your Mac's desktop a chaotic mess of old screenshots and random files? What if you could clean it all up with just one click?"
The second version earns the next 90 seconds. The first loses viewers before the demo begins.
The 90-Second Rule for the Core Demo
Once you have your hook, get to the "aha!" moment fast. The problem-to-solution sequence should run under 90 seconds:
- Problem: Show the screen in its inefficient state
- Action: Demonstrate the one thing that fixes it
- Result: Show the clean outcome
Resist the urge to tour every feature. Zero in on one powerful workflow and make it undeniable.
Write for the Ear, Not the Eye
Demo scripts need to sound natural spoken aloud. Read every line out loud as you write it. Short sentences, simple language, no jargon. Questions help: "Ever wonder how to...?" makes demos feel personal rather than like a pitch.
Use a Two-Column Script
For precise timing between narration and on-screen action, plan with a two-column format:
| Visual (what is on screen) | Voiceover (what you say) |
|---|---|
| Show Finder with a cluttered Downloads folder | "We all know this feeling — a Downloads folder that is completely out of control." |
| Click the app icon, show the clean interface | "With one click, TaskFlow pulls it all into a single organised view." |
| Demonstrate the Smart Sort feature | "Smart Sort automatically prioritises what needs your attention first." |
This prevents the most common mistake: narration that runs ahead of or behind the visuals.
Recording Your Screen and Voice on macOS
Once you’ve nailed down your script, it’s time for the fun part: production. This is where all your careful planning comes to life, starting with a clean screen recording and a crisp, clear voiceover. The quality of what you capture here sets the foundation for your entire demo.
Before you even think about hitting that record button, you need to prepare your digital workspace on your Mac. A cluttered desktop or a stream of unexpected notifications is the fastest way to derail a great demo and make your product look unprofessional.
Preparing Your Digital Stage
Think of your Mac's screen as your stage—everything your audience sees needs to be deliberate. A clean, focused setup keeps their attention exactly where you want it: on your app's features and your voice.
First, tidy up that desktop. Hide any unrelated files and folders. My go-to trick is to create a new folder, drag everything messy into it, and stash it away until I'm finished. You'll also want to quit any apps that aren't part of the demo. This isn't just about avoiding distracting pop-ups; it also frees up precious system resources, leading to a much smoother recording on your Mac.
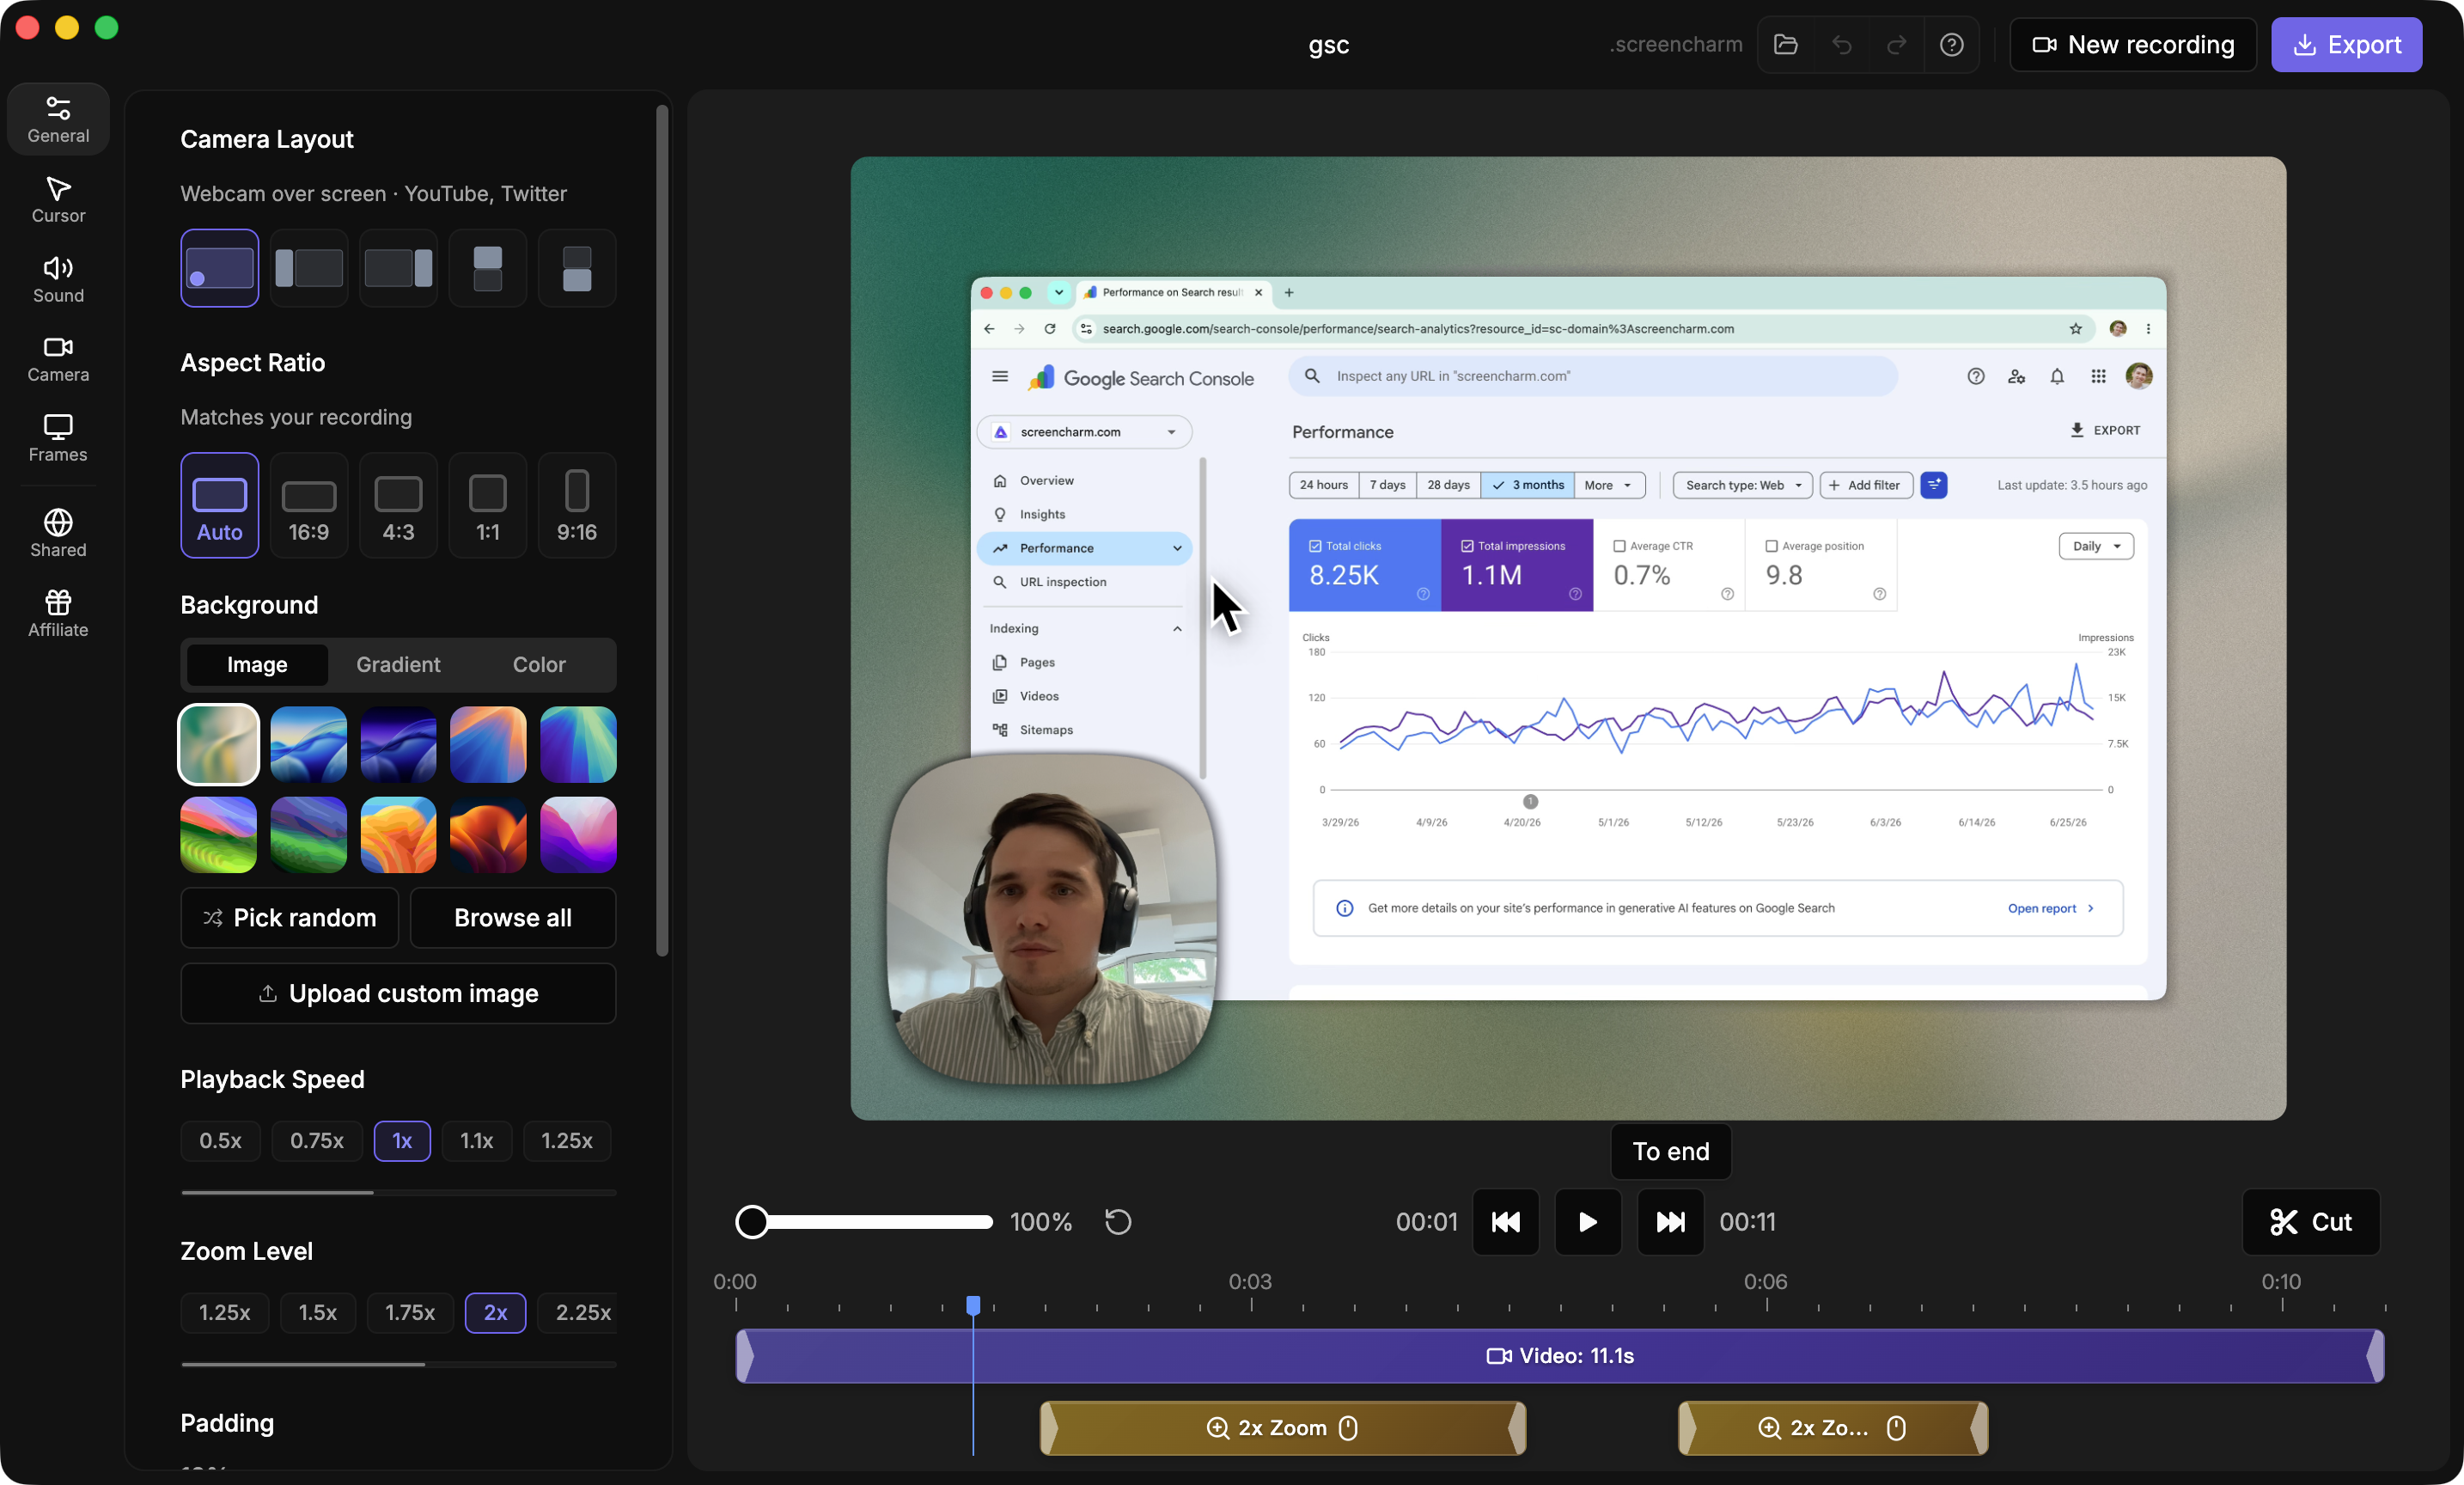
Next up is your display resolution. To make sure your video looks polished on platforms like YouTube without those ugly black bars, stick to a standard 16:9 aspect ratio. Common resolutions like 1920x1080 (HD) or 3840x2160 (4K) are perfect. Fortunately, Screen Charm is built for macOS and gives you total control, letting you select a specific window or a custom area to record, so you can frame your shot perfectly.
Your recording environment is every bit as important as your script. A clean desktop, the right resolution, and zero distractions are non-negotiable for a demo that screams quality and professionalism from the very first second.
This entire process, from initial planning to the final cut, follows a logical flow. Keeping these key stages in mind helps keep your project on track.
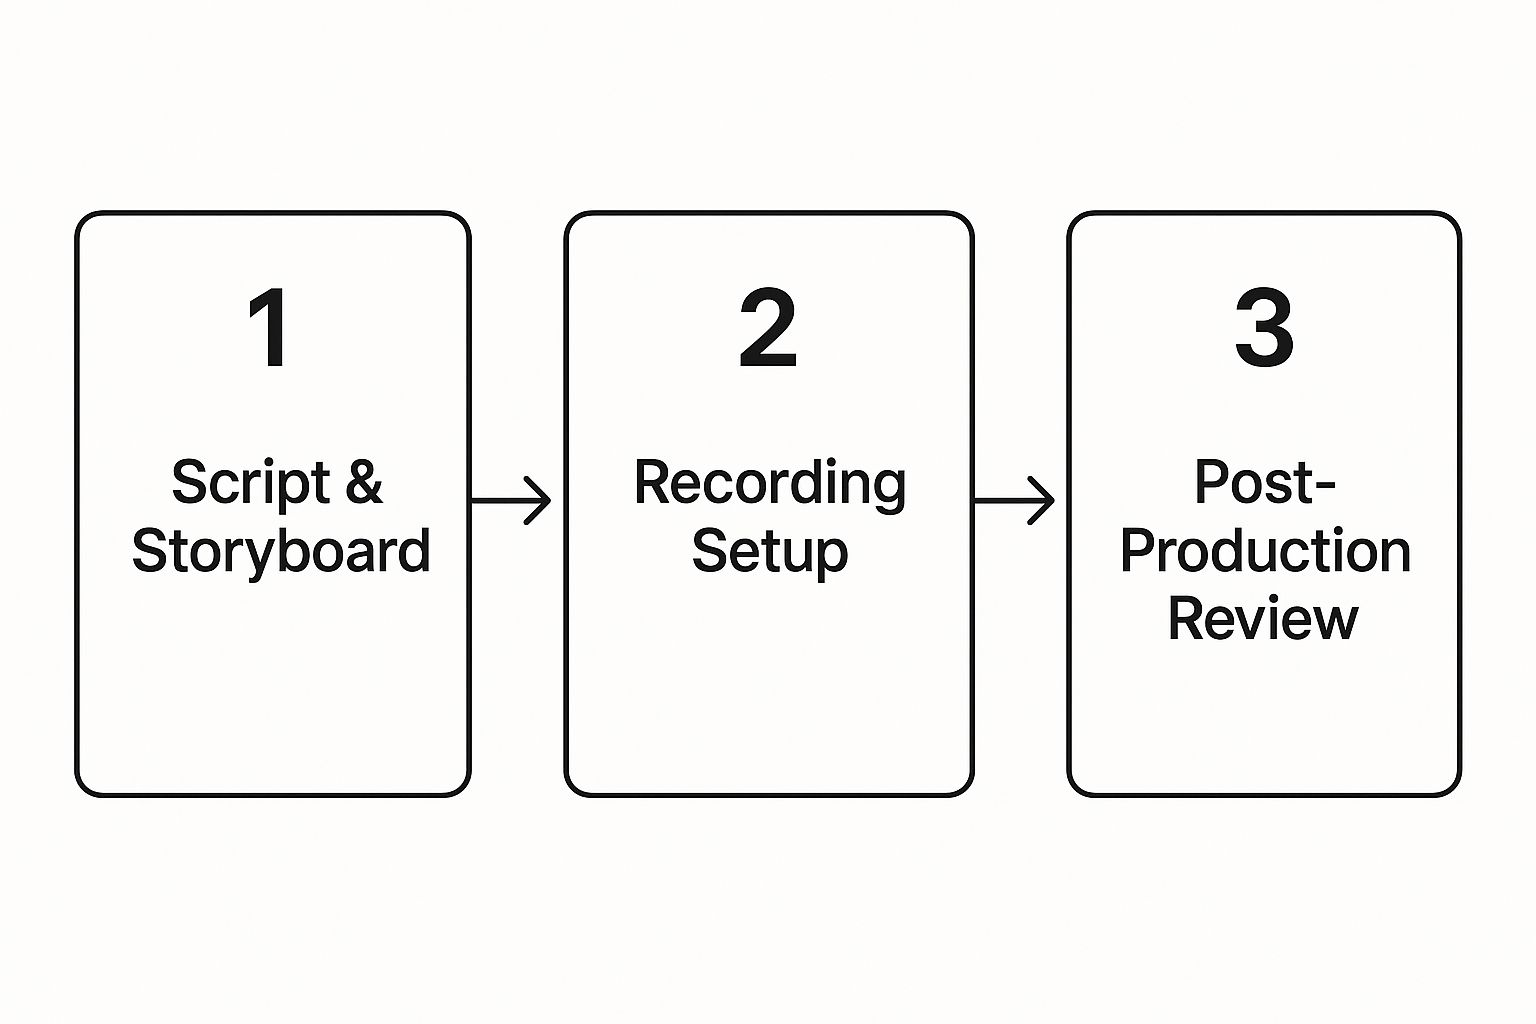
As you can see, the recording setup is the bridge connecting your strategy and your final, polished video. It's the hands-on step that makes it all real.
Capturing Flawless Audio
Your voice is what builds a genuine connection with your audience. You can have the most beautiful visuals in the world, but poor audio will sink your video fast. Remember, 94% of customers say videos build their confidence in a purchase—and fuzzy, distorted audio completely shatters that confidence.
To get that professional sound, here are a few things that have always worked for me:
- Use an External Microphone: Your Mac’s built-in mic will do in a pinch, but a dedicated USB microphone is a game-changer. It provides far better clarity and cuts down on that hollow, echoey room sound.
- Find a Quiet Space: This one’s obvious but often overlooked. Record in a room with as little background noise as possible. That means closing doors, shutting windows, and turning off that rumbling air conditioner.
- Do a Sound Check: Always, always record a quick test clip. Check your volume levels to make sure you’re coming through loud and clear, but not so loud that the audio "peaks" and distorts.
Screen Charm makes this part easy by letting you choose your preferred microphone right from the macOS menu bar and even record system audio at the same time. This is perfect for capturing your narration alongside any important in-app sounds.
Speaking with Confidence and Clarity
Alright, it's showtime. Your goal isn't just to read your script; you need to perform it.
Try speaking just a touch slower than you would in a normal conversation. It feels a little strange at first, but it gives your audience time to process what you're showing them. Don't forget to pause after you make a key point. That silence gives your message room to land.
Most importantly, let your enthusiasm shine through. If you're excited about your product, your audience will be, too. A flat, monotone delivery can make even the most groundbreaking feature sound boring. And if you trip over a word? Don't sweat it. Just pause, take a breath, and say the line again. It’s an easy fix in editing.
Screen Charm Pre-Recording Checklist
Before hitting record, confirm these settings inside Screen Charm:
| Setting | Recommended | Why |
|---|---|---|
| Microphone | External USB mic (not built-in) | Crisp voice-over, less ambient noise |
| Webcam | Best available camera | Looks polished if using picture-in-picture |
| Audio levels | Run a 10-second test first | Catch clipping or low volume before a full take |
| Recording area | App window only (not full screen) | Keeps focus on your product, hides everything else |
| Auto-zoom | On | Automatically highlights menus and buttons as you click |
Directing the Viewer with Cursor and Background
Two quick settings that dramatically improve how watchable your demo is:
- Cursor highlight: Add a coloured halo or spotlight around the cursor. Viewers often lose track of where to look — a highlighted cursor guides them effortlessly.
- Background replacement: Swap your real desktop for a clean branded background in Screen Charm. No green screen, no distracting files visible, just your app front and centre.
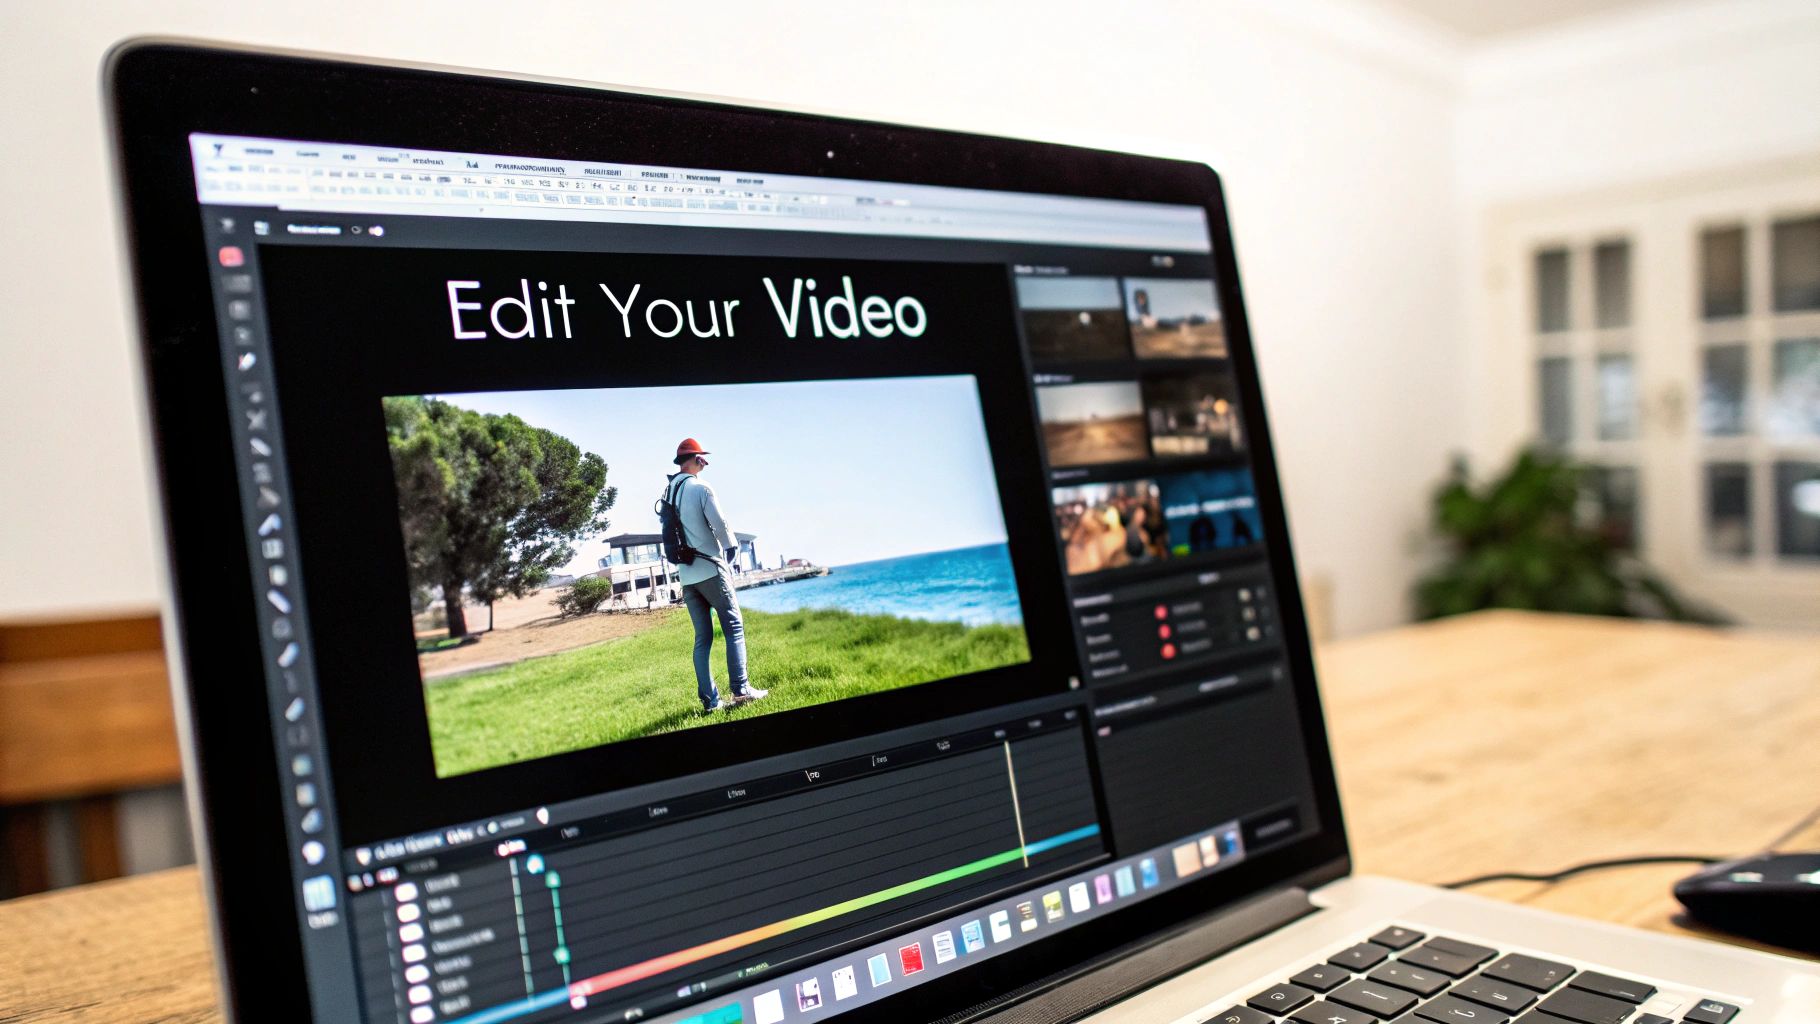
Giving Your Footage a Professional Polish
Okay, you've captured your screen recording. That raw footage? It’s just the starting point. Now comes the fun part: editing. This is where you'll weave that simple recording into a compelling story that truly grabs your audience's attention and doesn't let go.
For those of us on macOS, we have some incredible tools right at our fingertips to make our product demos shine.

This post-production stage is absolutely critical. It’s not just about snipping out the "ums" and "ahs." It's about shaping the entire narrative, controlling the video's pace, and making sure every single second on screen has a purpose. A slick, well-edited video feels effortless to the viewer, guiding their focus exactly where you want it.
Think of it as decluttering a room. You’re clearing out all the distractions so the most important features of your product can really stand out and make an impact.
Refining Your Core Narrative
Your first pass in the editing timeline is all about tightening things up. This is your chance to get rid of any awkward pauses, stumbles, or moments where you clicked the wrong thing. Seriously, don't be afraid to be a little ruthless here. A concise video is always more effective.
Here's what I focus on first:
- Trimming the fat: Snip out any dead air at the beginning or end of your clips. Shaving off those silent moments instantly boosts the energy and shows you respect your viewer's time.
- Cleaning up mistakes: Did you have to repeat a sentence or backtrack after a misclick? Now's the time to make it disappear. The final version should look like you performed it perfectly in one take.
- Nailing the pacing: Watch the whole thing through. Does any section feel like it's dragging? If so, you might need to shorten it or add a visual effect to break it up and keep the momentum going.
Consider this: video content is expected to make up a staggering 82% of all internet traffic by 2025. And with 70% of YouTube viewing happening on mobile phones, a tight, fast-paced edit is non-negotiable for keeping people engaged on those smaller screens.
Adding Dynamic Visual Elements
Once your timeline is clean and tight, you can start layering in the polish. These are the visual and audio enhancements that take a basic screen capture and turn it into a pro-level presentation. This is where a tool like Screen Charm really comes into its own for Mac users.
A great edit doesn't just show what you did; it directs the viewer's eye to what matters most. Use effects like zooms and highlights to control the narrative and emphasize value.
These dynamic elements are your secret weapon for keeping viewers hooked.
- Zoom and Pan: Use these to zero in on specific buttons, menus, or features you're talking about. When you mention a key function, zoom right in on it. When walking through a process, pan across the screen to follow the cursor's path.
- Text Overlays: A simple text callout can be incredibly powerful. Add a short phrase to reinforce a key benefit or provide a bit of extra context that makes a feature's value undeniable.
- Smooth Transitions: Stick to simple cuts or cross-dissolves when moving between scenes. Overly flashy or complex transitions can be distracting and take away from your message.
By blending these techniques, you can guide your audience through your product's story with real clarity and confidence. If you're still hunting for the perfect tool, our guide on screen recording editing software has some excellent recommendations specifically for Mac.
Getting Your Finished Demo Ready for the World
Alright, you've done the hard work of recording and editing. Now for the final push: getting your video out there. Exporting might sound like a technical afterthought, but getting it right is what ensures your polished demo looks just as sharp on a potential customer's screen as it does on yours.
This is all about striking the right balance. You want fantastic quality, but you can't have a file so huge that it takes forever to load on your website or YouTube. A slow-loading video is a surefire way to lose someone's attention. On the flip side, compressing it too much results in a blurry, pixelated mess that just looks unprofessional.
Luckily, you don't need to be a video engineer to nail this.
The Best Export Settings for Web Video
Whether you're exporting directly from Screen Charm or using another editor on your Mac, the go-to settings for online video are pretty standard. My advice is to stick with what works for nearly every platform out there.
- Format: Go with MP4 (using the H.264 codec). It’s the universal language of web video. You can’t go wrong with it, as it works everywhere and keeps file sizes reasonable.
- Resolution: 1920x1080 (or 1080p) is your best bet. It’s the high-definition standard that provides a crisp, clear picture on any device, from a big desktop monitor to a tiny phone screen.
- Frame Rate: For a screen recording, 30 frames per second (fps) is perfect. It delivers smooth, natural-looking motion without making your file unnecessarily large.
Think of your export settings as the final quality check. The right combination ensures that the sharp, polished video you see on your Mac is exactly what your audience sees, no matter where they're watching.
Make Your Demo Easy to Find
Once you have that perfect MP4 file, the job isn't quite done. You need to package it in a way that helps people find it and makes them want to click play. The title, description, and thumbnail are just as important as the video content itself.
Start with a title that actually tells people what they're about to see. "App Demo" is useless. Something like "How to Organize Projects with TaskFlow for Mac" is specific, descriptive, and great for search.
Next, write a solid description. Briefly explain the key features you're showing off and, most importantly, include a clear link back to your product page so they can take the next step.
Finally, put some effort into your thumbnail. It’s the billboard for your video. A compelling thumbnail—maybe a clean screenshot from a key moment in the demo with some bold, readable text overlaid—can make a massive difference in how many people actually watch your video.
If you find yourself needing more advanced options for this final stage, we've put together a guide on the best video editing software for beginners, and many of those tools offer powerful features for exporting and sharing on macOS.
Common Questions About Creating Demo Videos on a Mac
Even with the best tools and a solid game plan, a few questions always come up when you're diving into making product demo videos. Getting these sorted out early helps you sidestep common roadblocks and keeps your project moving smoothly.
Let's tackle some of the most frequent questions we hear from folks creating demos on their Mac.
How Long Should My Demo Video Be?
This is probably the number one question, and the answer is almost always: shorter than you think.
For a general overview video—the kind you’d put on your homepage or share on social media—you absolutely need to keep it under two minutes. That's the sweet spot for grabbing and holding attention.
If you're making a more in-depth tutorial for people who are already signed up or deep in the evaluation process, you have a bit more runway. Even then, try to cap it at five minutes. Break longer topics into a series of shorter, focused videos.
Is My Mac's Built-In Mic Good Enough?
Honestly? It'll do in a pinch, but you can do so much better. Investing in a quality external USB microphone is single-handedly the best upgrade you can make for your demo videos.
Clear, crisp audio isn’t just a nice-to-have; it's essential for building trust. Think about it: 94% of customers report that videos give them more confidence in a purchase. Muffled, echoey sound instantly erodes that confidence.
What's the Best Screen Resolution to Record?
This is a great technical question. To ensure your video looks sharp and professional on any platform—without those dreaded black bars on the sides—you'll want to stick to a 16:9 aspect ratio.
The gold standard here is recording in 1920x1080, also known as 1080p. It delivers fantastic quality without creating gigantic files that are a pain to upload and store. Screen Charm simplifies this by letting you record a specific app window or drag a custom recording area that snaps to the right dimensions on your Mac's screen.
What If I Mess Up While Recording?
First, don't panic! The absolute worst thing you can do is stop and start over from the beginning. It's a massive time-waster.
Instead, just pause for a beat, take a breath, and simply re-do the sentence or section you flubbed. You can easily snip out the mistake later in the editing process. A simple cut makes it look like you nailed it in one perfect take.
The goal isn't a flawless live performance; it's a polished final product. Embrace the power of editing to fix mistakes and tighten your narrative. This is where a simple tool on your Mac becomes your biggest asset.
If you’re looking for a broader perspective on strategy and planning that goes beyond just the Mac-specific tools, you can find more great tips in comprehensive guides on how to make a product demo video.
Ready to create stunning product demos on your Mac without the steep learning curve? With its automatic zoom and intuitive editor, Screen Charm gives you everything you need to produce professional, engaging videos in minutes. Download Screen Charm today and see the difference for yourself!
Comparing tools before you decide? See Best Product Demo Video Maker for Mac for a side-by-side of Screen Charm, Loom, Camtasia, ScreenFlow, Vidyard, and OBS. Or jump straight to Screen Charm vs Loom if you're deciding between those two.