Before you even think about hitting the record button on your Mac, the real work begins. Great video content isn't an accident; it's the result of a solid plan. It all starts with defining who you're talking to, brainstorming topics they actually care about, and then structuring it all into a narrative that hooks them from the very first second.
Planning Content That Captivates Your Audience

Honestly, the most critical part of making a great video happens long before you open your recording software on your Mac. It’s all in the prep work. And that prep work starts with a simple, yet crucial, question: who are you actually trying to reach?
We have to think beyond basic demographics here. Instead of a generic label like "Mac users aged 25-40," get specific about their problems. Are you talking to macOS developers wrestling with Xcode? Or maybe marketers who need to create better product demos on their MacBooks? Getting a clear picture of their specific goals and pain points is the secret sauce to creating content they'll stop scrolling to watch.
Define Your Ideal Viewer
To make a real connection, you need to know what keeps your audience up at night. The aim is to create a video that feels like a direct answer to a question they were just about to type into Safari.
A great way to start is by building a simple persona. For instance, if you're making a tutorial for a new macOS design tool, your ideal viewer might be "Alex, a freelance graphic designer who needs to learn new software quickly to stay competitive." Just that little bit of detail completely changes your perspective. You stop creating content for a crowd and start creating it for a person.
This focus on relatability isn't just a nice-to-have; it's essential. The creator economy is already valued at over $250 billion and is on track to hit $480 billion by 2027. A huge driver of that growth is authenticity—in fact, consumers are 54% more likely to buy from creators they find relatable.
Brainstorm Topics with Purpose
Once you've nailed down your "who," you can finally figure out the "what." Your brainstorming sessions should flow directly from your audience's needs. Stop thinking about what you want to show off and start thinking about what they genuinely need to learn on their Mac.
Here are a few ways I generate ideas that deliver real value:
- Solve a hyper-specific problem. Instead of a vague "How to Use Our App," try something like "How to Export High-Quality Video for Social Media in Under 5 Minutes on a Mac." See the difference?
- Answer common questions. Dive into macOS forums like Reddit, scroll through social media comments, or even check your own customer support tickets. These are absolute goldmines for content ideas.
- Showcase a transformation. People love a good before-and-after. Frame your video around how your macOS tool or process takes someone from a state of frustration to a state of success.
The most powerful content doesn't just inform; it empowers. Your goal is to give your viewer a new skill or a new perspective they can immediately apply on their Mac.
To make sure all this effort pays off, it helps to have a bigger plan in place. A well-defined content marketing strategy will act as your north star, guiding your brainstorming and ensuring every video aligns with your overarching goals. A huge piece of that puzzle is learning how to tell a good story visually. If you want to go deeper on this, check out our guide on what is visual storytelling — it'll help you structure your plan into a narrative that grabs and holds attention.
Sponsored by the makers
Tired of boring screen recordings?
Try Screen Charm.
Auto-zoom, motion blur, camera overlay, and background music. All built in. Record once, export a polished video.
See what it doesCrafting a Script That Sounds Human
With a solid plan in place, it's time to translate your ideas into words. A brilliant concept can fall completely flat if the delivery sounds stiff or robotic. The secret is to write for the ear, not the eye—you're aiming for a script that feels like a genuine conversation.
So, ditch the corporate jargon and overly formal language. You want to sound like you're talking to a friend over coffee, not delivering a lecture.
Use contractions like "it's" and "you'll." Ask your audience questions directly. Most importantly, read every line out loud. If a sentence feels clunky or awkward to say, it's guaranteed to sound even worse on camera.
Start with a Powerful Hook
You’ve got just a few seconds to earn a viewer's attention. That means your opening needs to hit hard and fast. Forget the standard "Hello and welcome to my video" intro and jump straight into the good stuff.
Here are a few hook formulas I’ve seen work wonders:
- Ask a relatable question: "Are you tired of spending hours editing your macOS screen recordings?"
- State a surprising fact: "Did you know that most viewers decide if they'll watch your video in the first eight seconds?"
- Promise a quick solution: "I'm going to show you how to create a polished product demo on your Mac in under 10 minutes."
A strong hook immediately sets the tone and makes a clear promise, giving your audience a compelling reason to keep watching.
Keep the Body Lean and Focused
Once you have their attention, the body of your script needs to deliver on that promise without wasting any time. This is where a lot of creators stumble—they pack in too much fluff, and viewers start dropping off.
Stick to your outline like glue. Focus only on the absolute essentials your audience needs to know to get value from your video.
Your script isn't a rigid document you have to memorize word-for-word. Instead, think of it as a strong framework—a set of key talking points that gives you the confidence to speak clearly and naturally. This approach is fundamental to building better on-screen presence. For more on this, check out our guide on how to improve presentation skills.
Finally, every good script tells the viewer what to do next. Your call-to-action (CTA) shouldn't feel like a pushy sales pitch. Try weaving it into the conversation naturally.
You could say something like, "If you found this helpful, download the app from the Mac App Store to try it yourself," or "What's your biggest challenge with video creation on macOS? Let me know in the comments." A natural CTA keeps the conversation going and encourages your audience to engage.
Recording Professional Content on Your Mac
Once your plan and script are locked in, it’s time to bring that vision to life. The good news? You don't need a fancy studio to create polished content on your Mac. A few small tweaks to your environment can make a massive difference.
Before you even think about hitting that record button, take a look at your workspace. Find a quiet room to cut down on background noise—trust me, clean audio is often more crucial than perfect video. When it comes to lighting, try to face a window. Natural light is way more flattering and softer than those harsh overhead lights.
Elevate Your Visuals with Dynamic Recording Tools for macOS
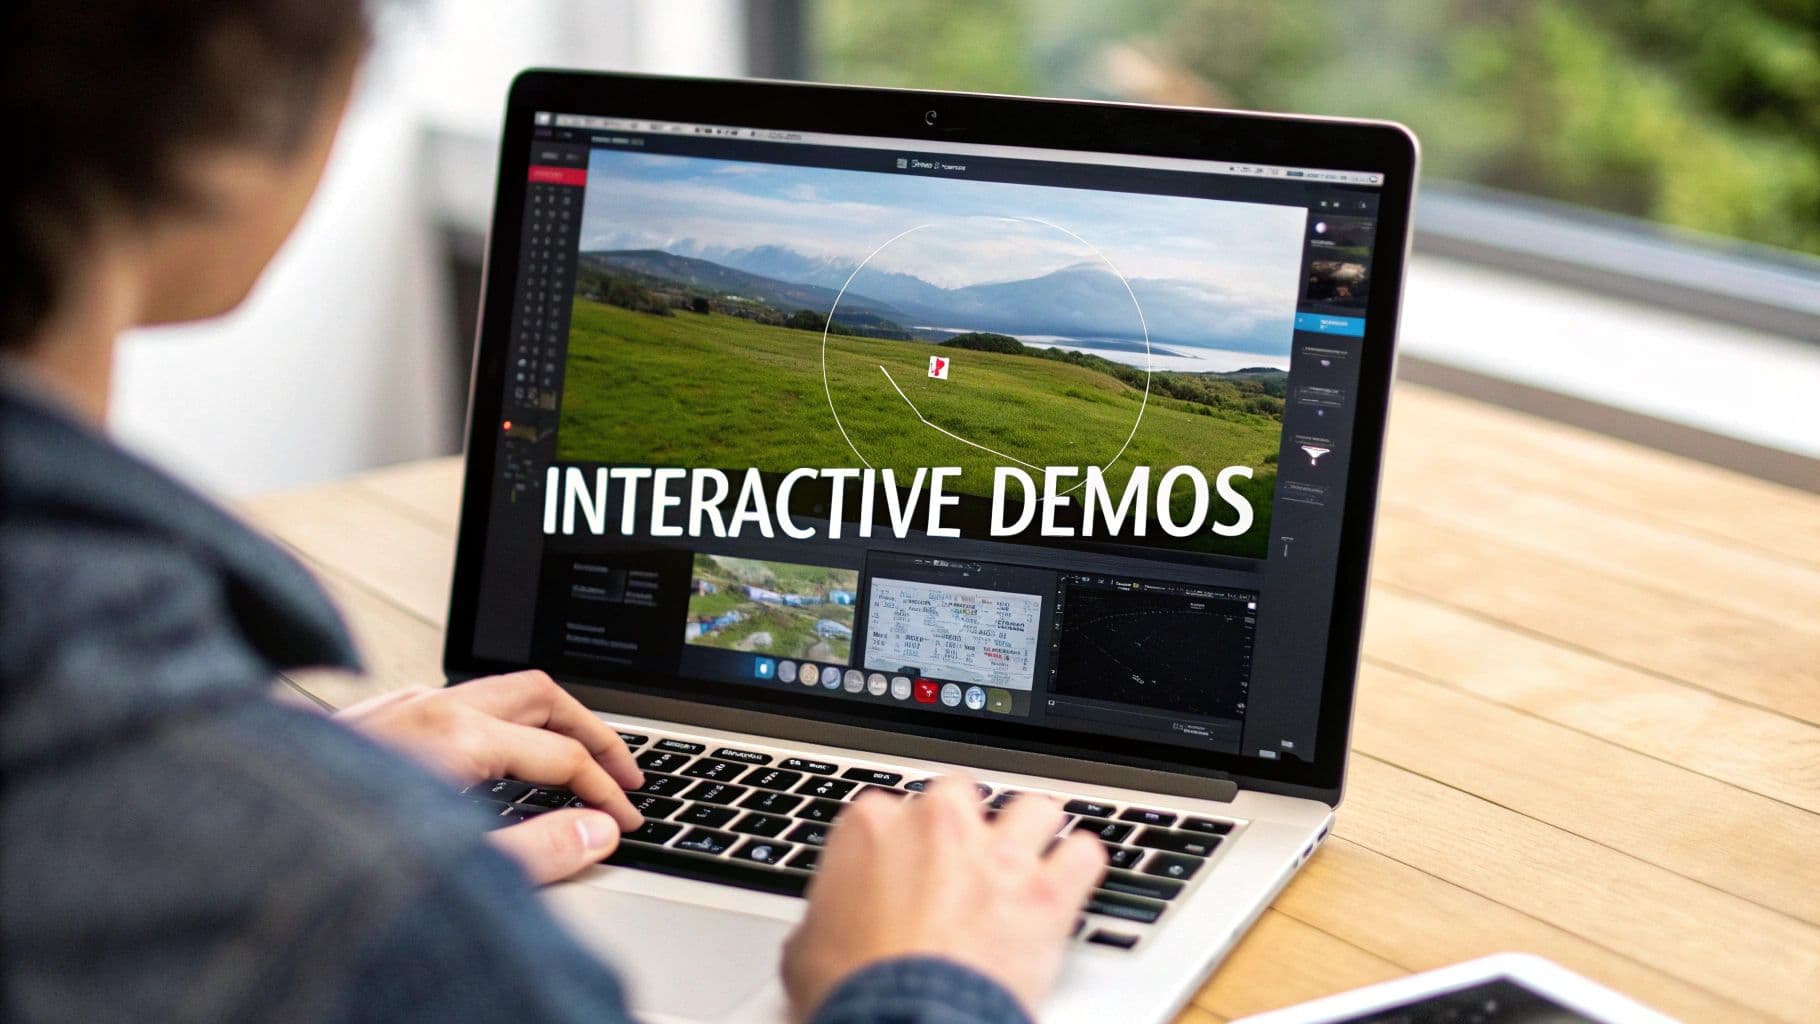
Let's be honest, standard screen recordings made with QuickTime can feel a bit flat and impersonal. It’s easy for a viewer’s attention to drift. This is exactly where using the right tools on your Mac can turn a boring screen share into something that genuinely holds attention.
Screen Charm was built from the ground up to solve this problem for macOS users. It gives you the power to guide your audience's eyes and put a spotlight on exactly what you want them to see, transforming a simple recording into a dynamic and clear tutorial.
This simple infographic visualizes the core structure of an engaging script, from the initial hook to the final call to action.
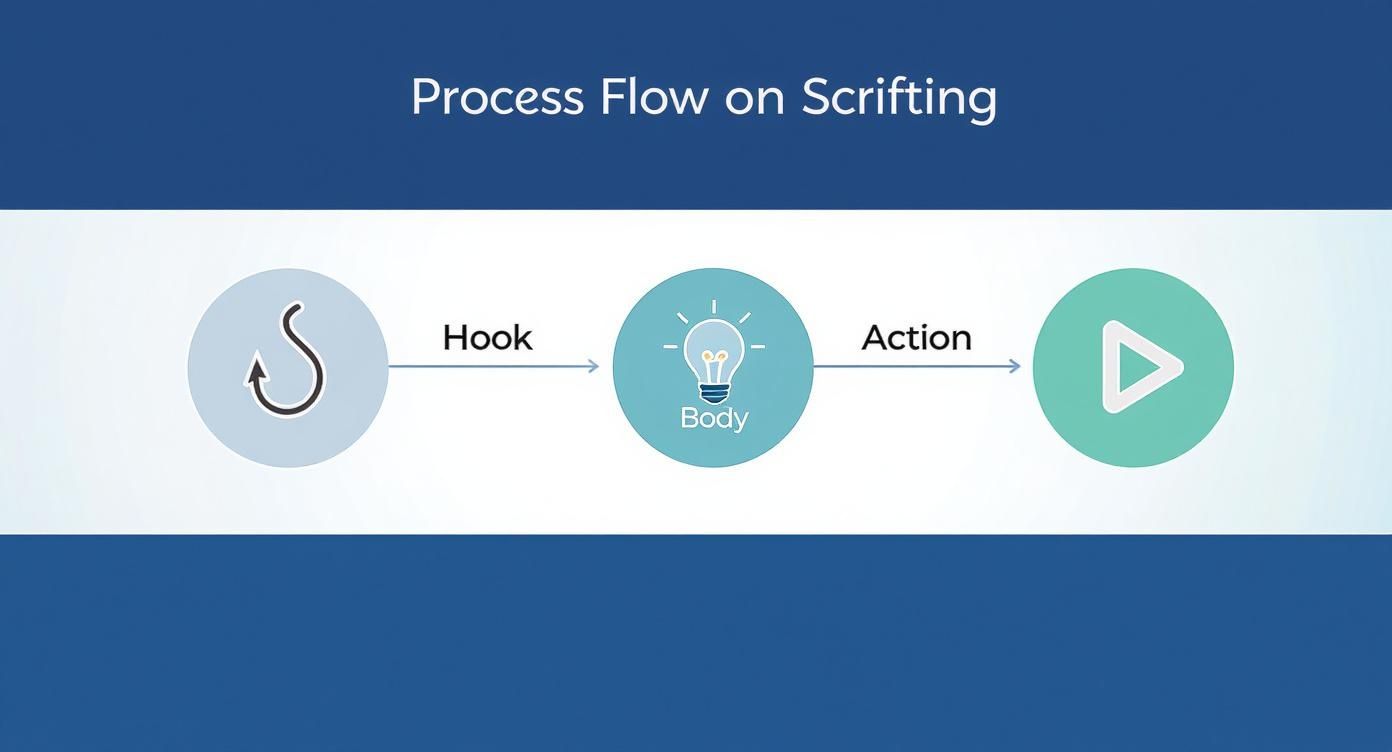
As you can see, every part of your content—from the first few seconds to your final sign-off—needs to be intentionally crafted to keep your audience engaged.
Spotlight Key Actions with Auto-Zoom and Cursor Effects
One of the best ways to keep viewers glued to your screen is by actively directing their focus. When you're demoing software or explaining a complicated process in macOS, it’s all too easy for your audience to get lost in the details.
Screen Charm’s auto-zoom feature is a game-changer here. It automatically follows your cursor, smoothly zooming in on whatever you're clicking or pointing to. This movement not only adds a professional, cinematic touch but also makes it incredibly simple for people to follow along without getting overwhelmed by a cluttered interface. It’s a subtle way of saying, "Pay attention to this."
You can also customize your cursor to make it impossible to miss. These small adjustments add a ton of clarity:
- Highlighting the Cursor: Adding a colored circle around your pointer makes it pop, even on a busy macOS screen.
- Click Effects: A visual cue for every click shows your audience precisely when and where you’re taking action.
These tools are what separate a passive screen share from an active, guided lesson.
The goal isn't just to show your screen; it's to tell a clear, visual story. By dynamically guiding your viewer's attention, you eliminate confusion and create a much more polished and understandable final product.
The table below breaks down how these specific tools help make your videos more engaging.
Screen Charm Features for Boosting Engagement
| Feature | What It Does | Engagement Benefit |
|---|---|---|
| Auto-Zoom | Automatically and smoothly zooms in on your cursor's movement and clicks. | Directs viewer focus to the most important on-screen actions, preventing confusion and keeping them locked in. |
| Cursor Highlight | Adds a customizable colored circle or spotlight effect around the cursor. | Makes the pointer instantly visible on any background, ensuring the audience never loses track of where you are. |
| Click Effects | Creates a visual animation (like a ripple or circle) every time you click. | Provides clear, immediate feedback for every action, making complex workflows much easier to follow. |
| Drawing Tools | Allows you to draw shapes, arrows, or text directly on the screen during a recording. | Emphasizes specific areas or adds quick annotations without needing post-production, adding another layer of clarity. |
Using a combination of these features ensures your content is not just seen, but understood.
For a complete walkthrough, our guide on how to record video and audio on Mac offers even more tips for getting that perfect take. When you combine a clean recording setup with these dynamic on-screen tools, your content will look and feel professional, which directly leads to higher viewer engagement and better comprehension.
Editing Your Video for Maximum Impact
https://www.youtube.com/embed/F6hjTqXWLsg
The raw footage you've just recorded on your Mac is a great start, but the real magic happens in the editing room. This is your chance to turn good content into a fantastic video that grabs your audience's attention and, more importantly, keeps it. A polished, professional feel is what separates the amateur videos from the truly engaging ones.
Many folks on macOS assume they need to drop a ton of money on complicated editing software like Final Cut Pro, but honestly, the most effective edits are usually the simplest ones. It all starts with cleaning up your timeline.
Trim the Fat and Maintain Momentum
Your first pass at editing should be all about cutting out anything that doesn't absolutely need to be there. Get rid of the awkward silence at the beginning and end, chop out any stumbles or "ums" and "ahs," and slice away any dead air where you might have paused to think.
Every single second your viewer spends watching something that isn't adding value is a second they might decide to click away. You have to be ruthless. The goal is to create a tight, clean edit that flows seamlessly, never giving your audience an excuse to get bored.
The best editing is often invisible. It doesn't scream for attention with flashy effects. Instead, it subtly guides the viewer's experience, making the content clearer and much more enjoyable.
This is especially true for video. Research shows that 78% of consumers would rather learn about a new product from a short, punchy video. And in a world with nearly 5.42 billion social media users, making your content easy to consume is a must. Platforms like Instagram are leading the pack, with 69% of users calling it their go-to for brand content—and many of them want to see even more. If you're curious about what makes people tick on social media, Sprout Social has some fantastic insights.
Add Polish with Simple Enhancements
Once your core footage is trimmed down and looking sharp, it's time to add a few simple layers that can dramatically improve the final product. These small touches are what take a video from a raw recording to a polished, professional piece of content.
Here are a few essential additions that make a world of difference:
- Text Overlays: Use simple text on the screen to emphasize key points, show a URL, or introduce a new topic. This visual reinforcement really helps your message stick.
- Subtle Transitions: A quick cross-dissolve or a clean, straight cut between scenes is usually all you need. Steer clear of cheesy, over-the-top transitions that can make your video feel dated.
- Background Music: A simple instrumental track playing at a low volume can do wonders for setting the mood and filling the auditory space without overpowering your voice.
For example, if you're demonstrating something in Screen Charm, you could pop up a text overlay that says "Pro Tip" right before you reveal a time-saving keyboard shortcut. It’s a simple visual cue that signals to the viewer that something important is coming up. These little refinements are what shape the viewing experience and make your content memorable.
Sharing Your Content Where It Will Be Seen
You’ve made a great video on your Mac. That’s a huge win, but the job’s not quite finished. Even the most polished, helpful content on the planet won't make an impact if it's sitting on your hard drive.
Now, it’s time to switch gears from creator to promoter. This is all about getting your hard work in front of the right eyeballs through smart, strategic distribution.
Get Your Video Ready for Clicks
Before you even think about uploading, put yourself in your audience's shoes. What makes you click on a video? It almost always comes down to two things: the thumbnail and the title.
Your thumbnail is your video's billboard—it’s the very first impression. You can easily grab an interesting frame right from your video on your Mac using QuickTime or Preview, or you can jump into a tool like Canva to design something custom. My advice? Make it bright, clear, and intriguing. Show the final result or a moment of peak action to create curiosity.
Next up is the title. You need something that’s both compelling and easy to find. It should include your main keywords without sounding like it was written by a robot.
For instance, "Screen Charm Tutorial" is okay, but "Create a Polished Product Demo on Your Mac in 10 Minutes" is so much better. It promises a specific, valuable outcome and sets clear expectations.
Don't sleep on the description box! It’s your chance to expand on the title with more keywords and a quick summary of what the video covers. This extra text gives platforms like YouTube more context, which can seriously boost your video’s chances of being recommended.
Spread the Word Where It Matters
With your video polished and primed, it's time to share it. Don't just post it once and cross your fingers. You need a plan to meet your audience where they already are.
- Social Media: This is a no-brainer. Think about posting the full video to YouTube, a one-minute teaser clip on Instagram, and a link with a key insight on LinkedIn. Tailor the format to the platform.
- Email Newsletters: Your email list is gold. These are people who have already opted in to hear from you, so send that new video straight to their inboxes.
- Online Communities: Find relevant subreddits (like r/macapps), Facebook groups, or Slack channels where your content would actually be helpful. Just make sure you read the rules first—be a genuine member of the community, not just a link-dropper.
This kind of authentic distribution, often called creator marketing, is incredibly powerful. Investment in this space has exploded by 143% in just the last four years, with some companies now spending over $1.7 million a year on it. Why? Because creator-led content feels personal and trustworthy. If you want to dive deeper, these creator marketing statistics from Social Native are pretty eye-opening.
At the end of the day, creating engaging content is a full-circle process. It begins with a solid plan and ends when your finished video finds the people it was made for.
Still Have Questions About Making Engaging Content?
Even with a solid plan in hand, you're bound to run into a few questions when you start creating content that actually connects with people. It's totally normal. Let's walk through some of the most common hurdles I see macOS creators face, from picking the right tools to figuring out what "engagement" really means. The idea is to get you from a place of uncertainty to having a clear, repeatable process for making killer videos.
"What Software Do I Actually Need on My Mac?"
This one comes up all the time. With a sea of options out there, it's easy to get overwhelmed. But the answer is simpler than you might think: you don't need a massive, complicated software suite to get started.
Instead of looking for an all-in-one behemoth, find a tool that solves a specific, nagging problem really well. If you're making tutorials or demos on a Mac, your biggest challenge is often just guiding your viewer's attention. Think about it—how do you make sure they're looking where you need them to look? That's where a dedicated app like Screen Charm comes in. It was built for macOS and handles all the heavy lifting of zooming and highlighting, which is a seriously tedious process to do manually in a general-purpose video editor.
"What Does Engagement Really Mean, Anyway?"
Another big question is what to even look for when measuring engagement. It’s definitely not just about likes and views. Real engagement is about connection and, most importantly, action.
Are people leaving thoughtful comments and questions? Are they sharing your video with their friends or colleagues? Did they actually click the link you put in the description? These are the metrics that tell a much more interesting story than a simple view count. For example, if you're making a tutorial for a macOS app, a huge win would be seeing how many people downloaded a trial after watching your video.
Your goal shouldn’t be to go viral. It should be to create genuine value for a specific group of people. When you focus on helping them solve a real problem, the shares, comments, and clicks will follow. That's the secret to creating engaging content that builds a real community.
"How Long Should My Videos Be?"
Ah, the classic question of video length. Creators stress about this constantly, but there’s no magic number. The "right" length is whatever it takes to cover your topic for your audience. A quick tip video for a macOS shortcut might only need 90 seconds, while a comprehensive, deep-dive tutorial could easily be 15 minutes or more.
Here’s a simple framework I always come back to:
- Be as long as necessary, but as short as possible. Get to the point, cover the topic thoroughly, and cut out every ounce of fluff.
- Respect your viewer's time. This is huge. Edit ruthlessly. Get rid of those awkward pauses, "ums," and mistakes.
- Let the data guide you. Dive into your analytics and see where people are dropping off. That data is gold for figuring out the sweet spot for your audience.
At the end of the day, engaging content is all about providing clear value, being easy to follow, and respecting the person on the other side of the screen.
Ready to create tutorials and demos on macOS that actually hold people's attention? Screen Charm gives you all the tools you need—from automatic zoom to custom cursor effects—to produce polished, professional videos without the headache. Start creating content that stands out by visiting screencharm.com today.
Related guides: How to make tutorial videos | Best screen recording software for Mac