Long before you ever open up Keynote, the real work of a great presentation begins. It’s not about flashy animations or fancy templates; it’s about having a crystal-clear message for a specific audience, wrapped in a story that sticks. Nail this planning phase, and you'll find your confidence on presentation day goes way up.
Plan Your Presentation With Purpose
Forget about your slides for a moment. A presentation that actually lands with an audience is built on a solid foundation of purpose and clarity.
This isn’t just a nice-to-have skill anymore. With remote and hybrid work becoming the norm, we're all presenting more than ever. In fact, over 50% of professionals now build a presentation at least once a week—a huge leap from the monthly average back in 2021. This means your ability to plan and deliver a clear message is a critical part of your job.
First, Nail Down Your Core Message
What is the one single thing you need your audience to walk away remembering? Seriously, write it down in one sentence. This isn't your title or your agenda; it’s the takeaway.
For instance, instead of a vague topic like "Q3 Sales Performance," your core message might be: "Our new sales strategy is bringing in bigger clients, but our clunky onboarding is putting those new accounts at risk."
That sentence is now your filter. As you start outlining, every single story, chart, or slide you consider has to pass a simple test: Does this directly support my core message? If it doesn't, it's just noise. Ditch it.
This simple flow chart really drives home how critical the planning stage is.
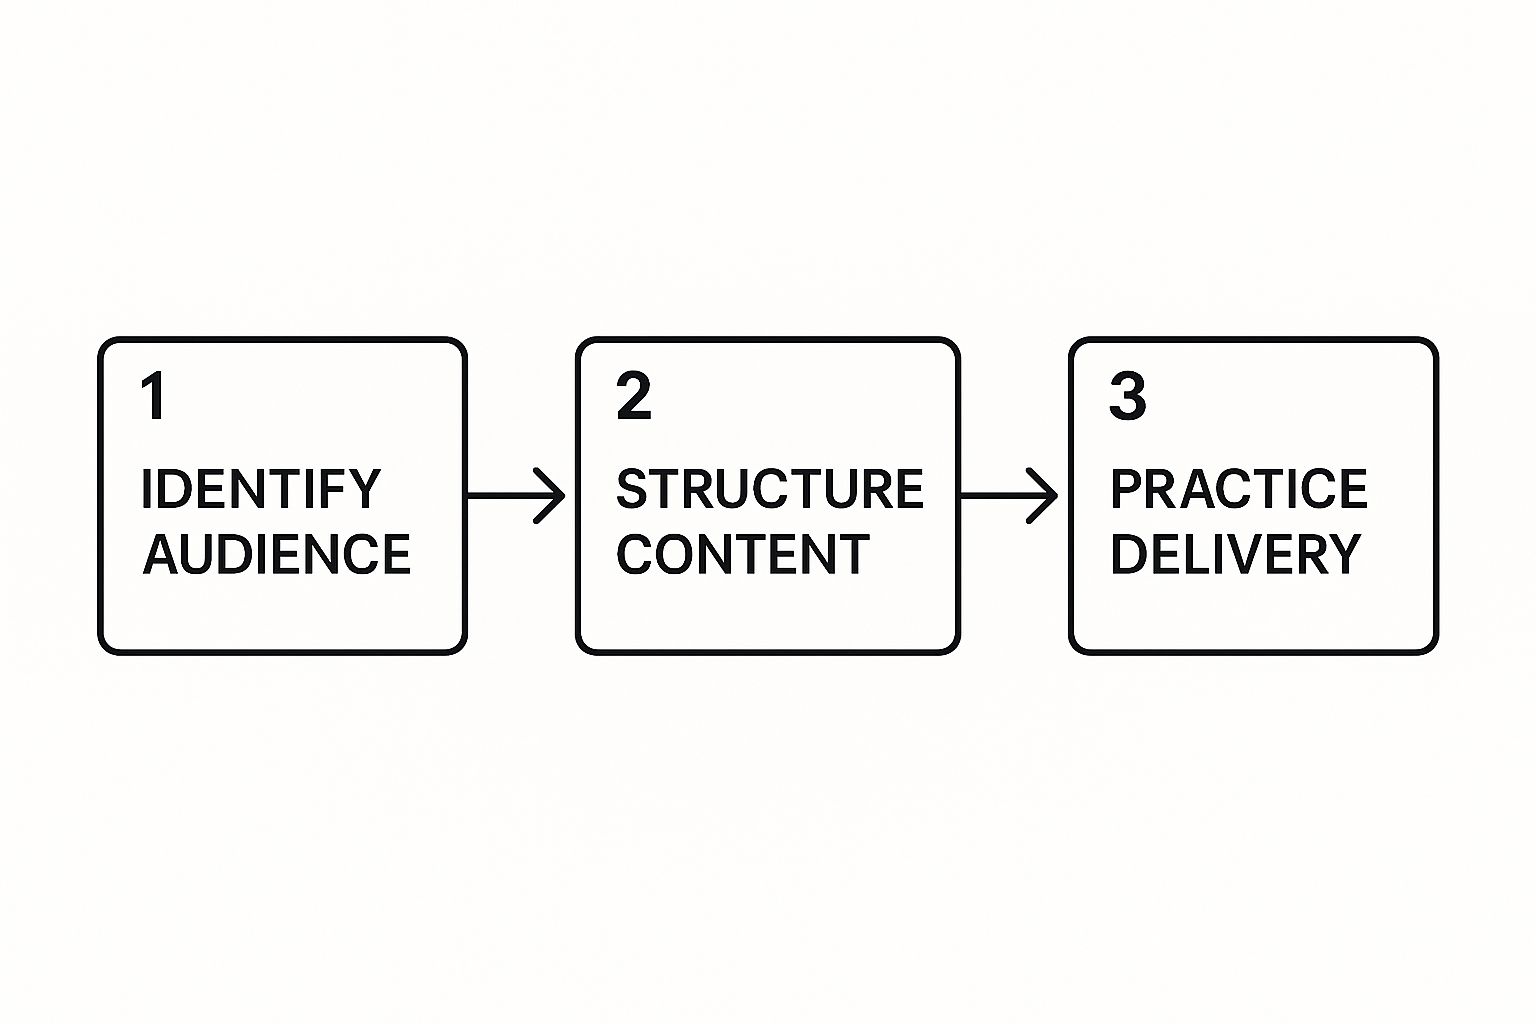
As you can see, you can't even think about creating your content or practicing your delivery until you know who you’re talking to and what you’re trying to say.
Before you dive into the nitty-gritty of slide creation, running through a quick checklist on your Mac can ensure you've covered all your strategic bases.
Core Presentation Planning Checklist for macOS
This is a quick reference for the essential planning steps to complete before you even think about building your slides.
| Planning Step | Key Objective | Recommended macOS Tool |
|---|---|---|
| Audience Profile | Identify who you're speaking to—their needs, knowledge, and potential objections. | Notes or Freeform |
| Core Message | Distill your main takeaway into a single, concise sentence. | TextEdit or Stickies |
| Goal Definition | Define what you want the audience to do, think, or feel after your talk. | Reminders |
| Narrative Outline | Structure your story using a framework like Problem-Solution-Benefit. | MindNode or Pages |
| Data & Evidence | Gather all necessary stats, quotes, and visuals to support your points. | Numbers and Finder |
Completing these steps first will make the rest of the process—from slide design to final delivery—infinitely smoother and more effective.
Frame Your Narrative for Maximum Impact
With your core message locked in, you need a structure to hang it on. One of the most effective storytelling frameworks I've ever used is the classic Problem-Solution-Benefit model. It just works.
- Problem: Kick things off by describing a challenge or frustration your audience knows all too well. This gets them on your side immediately because it shows you understand their world.
- Solution: This is where you introduce your idea, your product, or your proposed strategy as the clear answer to that problem you just outlined.
- Benefit: Finally, you paint a picture of the positive outcome. What’s in it for them? Show them the tangible value they'll get by buying into your solution.
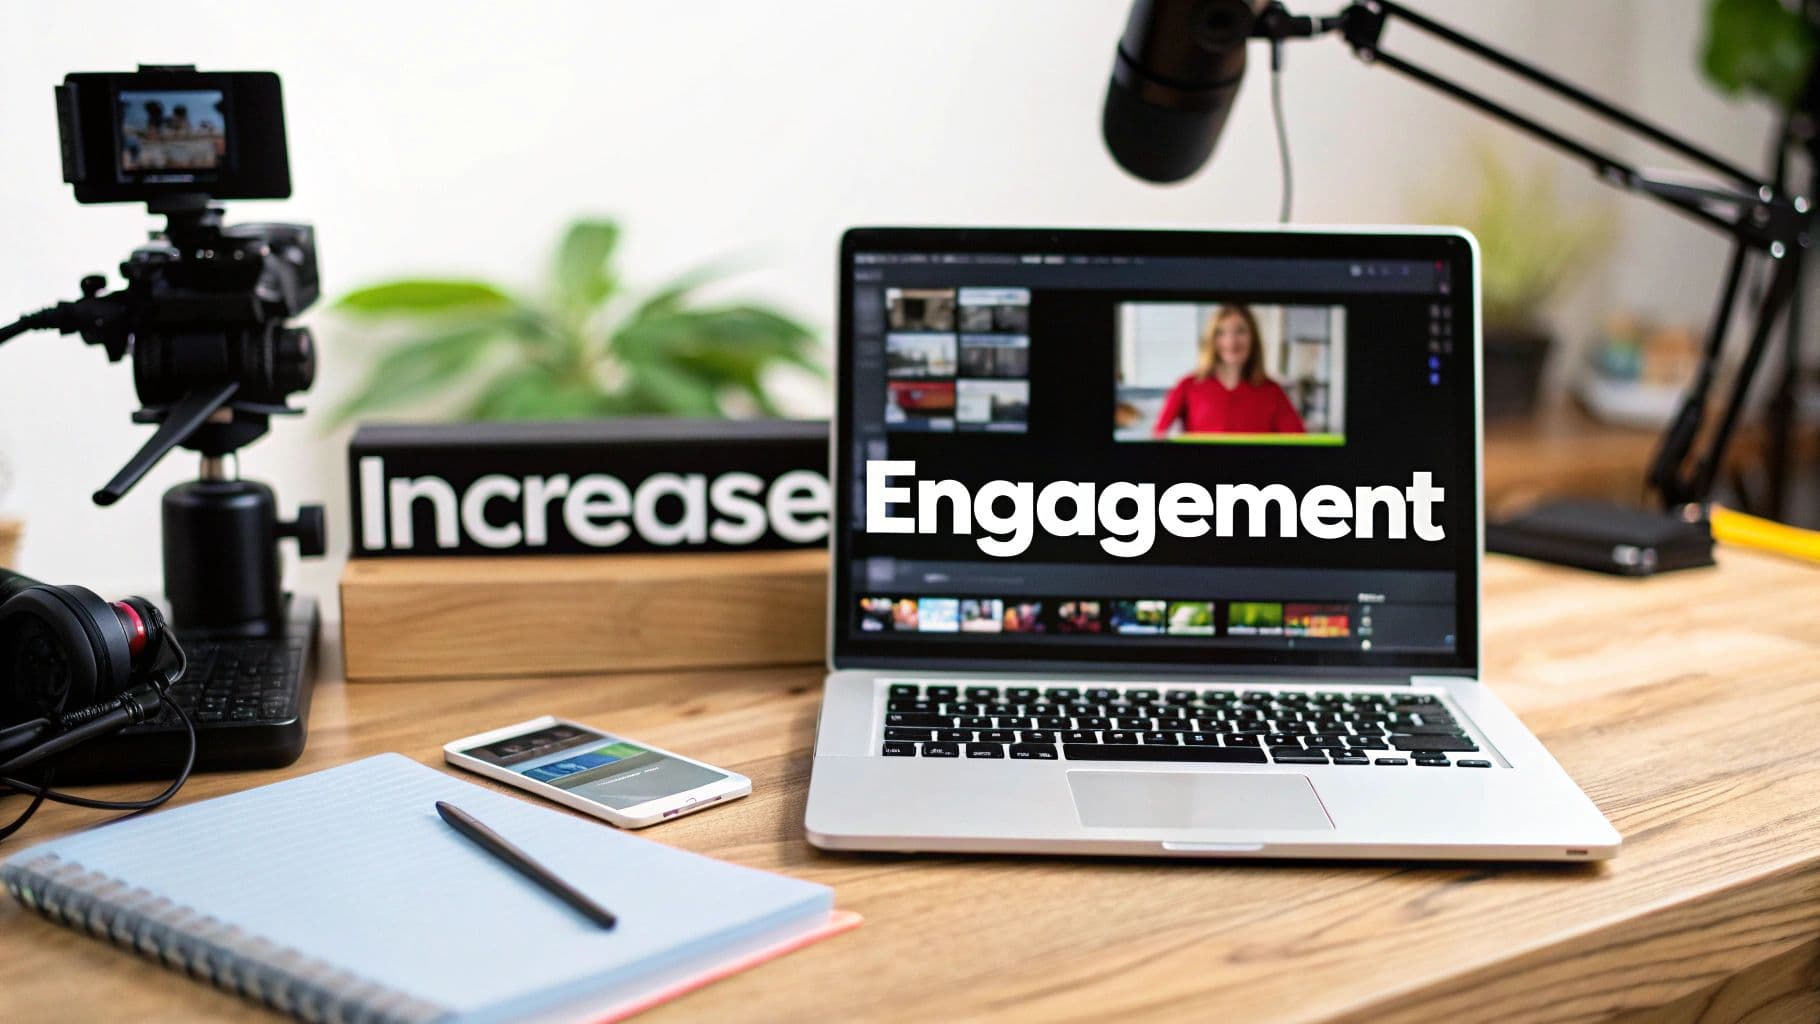
This approach turns a boring data dump into a narrative that people can follow and remember. Building a talk that genuinely resonates is all about understanding how to create engaging content, and these principles apply whether you're building a slide deck or scripting a video.
Sponsored by the makers
Tired of boring screen recordings?
Try Screen Charm.
Auto-zoom, motion blur, camera overlay, and background music. All built in. Record once, export a polished video.
See what it doesDesign Slides That Guide, Not Distract
Let’s get one thing straight: your slides are your backup, not your script. They're the visual billboard supporting your story, not the story itself. On a Mac, Keynote is a fantastic tool for creating clean, powerful slides that keep your audience focused on you.
Every slide needs a purpose. You’ve got about three seconds to grab your audience’s attention when you click to the next slide. That’s it. Since a staggering 55% of communication is non-verbal, your slides play a huge role in that visual conversation. This makes your slides a critical part of every presentation.
Embrace a Minimalist Design
Great slide design is all about what you take away, not what you add. The whole point is to cut through the noise so your message is crystal clear. This means plenty of white space, a single easy-to-read font, and a simple, consistent color scheme.
Keynote's interface is practically built for this. It nudges you toward a clean, uncluttered workflow, making it simple to produce professional-looking slides.

The layout helps you focus on one strong visual element at a time—a photo, a chart, or a single powerful phrase. That's the secret to keeping people locked in.
Instead of cramming your slides with text, find a powerful, high-quality image and pair it with a short, punchy headline. This simple shift turns your deck from a teleprompter into a dynamic visual aid that actually amplifies what you're saying.
Your audience should be listening to you, not reading your slides. If they can understand your deck without you, you've made a document, not a presentation.
Create Clear and Impactful Visuals
Nothing makes an audience’s eyes glaze over faster than a wall of text. The moment you feel the urge to type out a full paragraph, stop. Ask yourself: "Can I show this instead?"
Creating crisp visuals on a Mac is pretty straightforward. Here are a few tips you can put into practice in Keynote right now:
-
One Idea Per Slide: This is the golden rule. Seriously. Don't try to cram three points onto one slide. Give each concept its own stage.
-
Use High-Quality Imagery: macOS lets you drag and drop photos right from your Photos app or Finder. For great, free-to-use professional images, I always turn to sites like Unsplash or Pexels. A good photo adds an emotional punch that text just can't match.
-
Simplify Your Data: Don't just paste in a complex spreadsheet. Pull out the single most important number or trend and build a simple chart for it in Keynote. Use a bold color to highlight the one thing you want your audience to walk away with.
By sticking to clear, singular visuals, you’ll build a slide deck that not only looks sharp but also keeps your audience right there with you, hanging on your every word.
Master Your On-Stage Presence and Delivery
You can have the most brilliant message and the slickest slides, but if your delivery falls flat, so will your presentation. This is where the magic happens—where you stop just sharing information and start creating a real experience for your audience.

True confidence on stage isn’t about being flawless; it’s about being fully present. The way you use your body, your voice, and your eyes are the tools that make your message stick.
Command the Room with Vocal Variety
Nothing sends an audience to sleep faster than a monotone voice. To keep people leaning in, you need to think of your voice as a dynamic instrument. Varying your pitch, pace, and volume is what adds color and emotion to your words.
- Pace: Speed up when you’re building excitement or telling a story. Then, slow right down to let a critical number or insight really land.
- Volume: Drop your voice to almost a whisper to create a moment of intimacy and draw everyone closer. Then, project with more force to show conviction.
- Pauses: The strategic pause is your best friend. Seriously. Pausing for just a couple of seconds before a big reveal builds suspense and gives people a moment to think. It's one of the most powerful and underused tools in a presenter's kit.
This isn't about putting on a performance. It's about tapping into your natural vocal range to guide your audience through the story you're telling. A dynamic voice simply sounds more confident and passionate.
True stage presence is not about being the loudest person in the room. It’s about having the quiet confidence to own your message and connect authentically with the people listening.
And for those pre-presentation jitters? A little physical prep goes a long way. Many presenters swear by power posing techniques backstage to get into a more assertive headspace right before they walk out.
Let Your Mac Give You a Hand
Want to instantly look more professional? Stop reading your slides. On a Mac, Keynote’s Presenter Display is the key to breaking this habit and speaking like you’re having a conversation.
While your audience sees your polished slide on the main screen, your laptop shows you a private dashboard. You get your current slide, a preview of the next one, your speaker notes, and a timer—all in one place. It’s your secret weapon.
This setup lets you maintain crucial eye contact with the audience, glancing down only for a quick prompt. You’ll never have to turn your back to read the screen again. It puts you in complete control and makes you look like a seasoned pro.
Rehearse Smarter, Not Just Harder
Real confidence on stage isn’t something you’re born with—it's forged in rehearsal. But let’s be honest, just clicking through your slides a couple of times isn’t practice. It’s a preview. To truly prepare, you have to simulate the real thing and work out the kinks before you have a live audience.
The single most important thing you can do? Practice out loud. This is where you’ll catch the sentences that sounded brilliant in your head but feel like a mouthful to actually say. It’s also the only way to get a real feel for your timing.
Use Your Mac to Become Your Own Coach
One of the best ways I've found to get better fast is to see myself the way an audience would. Your Mac has a simple, powerful tool for this built right in: QuickTime Player. Most people think it's just for watching movies, but you can use it to record yourself.
Just open QuickTime, navigate to File > New Movie Recording, and hit the red button. It feels a little awkward at first, I know. But watching that recording back is an absolute game-changer. You’ll instantly notice every time you say "um" or "like," you'll see if you're rushing through important points, and you can check your body language.
Watching a recording of yourself is like getting feedback from the most honest coach you'll ever have. It shows you exactly what your audience sees and hears, giving you a clear, actionable list of things to work on.
This simple step gives you the data you need to turn a pretty good delivery into a fantastic one.
Break Your Rehearsal Into Chunks
Trying to do a full, perfect run-through every single time is exhausting and, frankly, not very effective. A better approach is to practice in focused segments.
- Nail the intro: Spend one session just on your opening until it feels completely natural.
- Polish transitions: Dedicate another to practicing how you move from one key idea to the next. These are often the moments where presentations fall apart.
- Stick the landing: Your opening and closing are what people remember most, so give them extra attention. A strong start hooks them, and a powerful finish makes your message unforgettable.
Once you have each part down, you can start stringing them together into a full, confident practice session. This builds your presentation piece by piece, helping you deliver it like a conversation, not a script.
A huge part of this is timing. We all know attention spans are short. Research from platforms like Decktopus consistently shows the sweet spot for holding an audience's focus is between 10 and 15 minutes. A well-timed rehearsal is the only way to hit that mark.
When you know your material this deeply, you're no longer chained to your slides. The goal isn't to memorize words; it's to internalize ideas. That's the secret to walking into any room feeling prepared, in control, and ready to connect. For more on creating polished demos, be sure to check out our detailed guide on video marketing best practices.
Elevate Your Demos with Specialized macOS Tools
When your presentation pivots from slides to a live software demo, the game changes. All of a sudden, clarity isn't just about a good story; it's about making sure your audience can follow every single click, drag, and keystroke on a busy screen. I've seen it happen countless times—an otherwise great presentation loses all its momentum the second the screen share begins.

If you're on a Mac, relying on the standard screen sharing in a video call just won't cut it. Your cursor gets lost in a sea of pixels, important menus are too small to read, and your audience is left squinting, trying to figure out what you’re doing. This is where a tool built for the job can make all the difference.
Guide Attention with Automatic Zoom
Picture this: you're explaining a complex workflow in a piece of software. You’re talking, clicking, and moving quickly, but your audience's eyes are struggling to keep up. A dedicated macOS app like Screen Charm was built to solve this exact problem.
Its best feature, by far, is an auto-zoom function that intelligently tracks your cursor. When you pause over a button or click on a menu item, the screen automatically and smoothly zooms in on that specific area. It’s like having a professional camera operator for your screen, instantly guiding your audience's focus and making your actions impossible to miss.
This dynamic highlighting turns a confusing follow-along session into a crystal-clear guided tour. Your audience doesn't have to work to see what you're doing; the software does the heavy lifting for them.
A demo should feel effortless. If your audience has to ask, "Wait, where did you just click?" you've already lost them. Smart tools get rid of that friction entirely.
Create Polished Recordings in Minutes
Live demos are great, but a pre-recorded, polished video can often be even more powerful. It lets you present a flawless walkthrough without the pressure of a live audience or the risk of a server going down mid-demo. The problem is, the thought of video editing makes most of us want to run for the hills.
This is another area where specialized macOS tools really shine. After you record your demo, you can jump straight into a simple, built-in editor designed for this one task.
- Trim Mistakes: Fumbled a sentence or clicked the wrong thing? Snip those moments out in seconds to make your final video look concise and professional.
- Add Annotations: Need to call out a specific feature? Easily overlay arrows, text boxes, or highlights to add another layer of guidance.
- Refine the Flow: You can even adjust the timing of the auto-zoom effects to perfectly match your narration, creating a seamless viewing experience.
By combining recording and editing, you skip the headache of learning complex, general-purpose video software. If you're looking for more options, this guide on https://screencharm.com/blog/screen-recording-editing-software is a great resource. And for those focused on product demos, it's also worth learning how to create engaging ecommerce demos with AI video generators.
At the end of the day, using the right tool for the job transforms your technical presentations from simple screen shares into compelling, easy-to-follow tutorials.
Answering Those Nagging Presentation Questions
No matter how much you prepare, things can go sideways. A tough question comes out of left field, your anxiety spikes, or you realize you're talking to a sea of blank, virtual stares. Learning to handle these common moments with a bit of grace is what separates a good presenter from a great one. Let's tackle some of the questions I hear most often.
"How Do I Get Over My Fear of Public Speaking?"
This is the big one, isn't it? The key is to understand that presentation anxiety is a beast you tame with two weapons: preparation and perspective.
First, true confidence comes from competence. You need to know your material so thoroughly that you could talk about it casually over coffee. That means rehearsing until the words flow naturally, not like you've just memorized a script.
A trick I love is to record myself. If you're on a Mac, the built-in QuickTime Player is perfect for this. Watching it back gives you a brutally honest look at your pacing, your filler words, and your overall vibe. It can be cringey, but it’s incredibly effective.
Next, you have to work on your mindset. The physical feelings of anxiety—that racing heart, the adrenaline dump—are the exact same as excitement. Seriously. So, instead of letting the "I'm so nervous" track play on a loop in your head, try switching it to, "I'm excited to share this with them." This small mental judo flip can channel all that nervous energy into a more dynamic delivery.
Finally, get out of your own head. Your presentation isn't about you; it's about what you're giving to the audience. When you focus on delivering value and solving their problem, your self-consciousness starts to melt away.
True confidence isn't the absence of fear. It's knowing you did the work. You've earned your spot on that stage, and that competence is the ultimate cure for anxiety.
"What's the Best Way to Handle Questions I Didn't Expect?"
Getting a tough question can feel like a pop quiz, but handling it well is a massive opportunity to build trust.
First rule: don't interrupt. Let them finish their entire question. Then, repeat or rephrase it back to them. This does two brilliant things at once: it shows them you were actually listening, and it gives your brain a few extra seconds to fire up an answer.
- If you know the answer: Give it to them straight. Be clear and concise. No need to ramble.
- If you don't know the answer: The absolute best thing you can do is be honest. Trying to bluff your way through is a recipe for disaster. A simple, "That's a fantastic question, and I want to make sure I give you the right information. Let me look into that and get back to you," is a thousand times more professional than making something up.
- If the question is off-topic: Acknowledge their point, but gently steer the conversation back. Something like, "That's an interesting tangent. I'd be happy to chat about that with you one-on-one after we're done so we can stay on track here."
"How Can I Possibly Keep People Engaged on a Virtual Call?"
Presenting to a remote audience is a whole different ballgame. You're competing with emails, Slack notifications, and probably someone's dog. You have to be much more deliberate.
Your voice is your number one tool here. You absolutely cannot speak in a monotone. Vary your tone, speed, and volume. A flat, droning voice is basically a lullaby for adults who are trying to multitask.
Next, you have to make it interactive. Use the polling features in your meeting software. Ask direct questions and call on people by name. When you say, "Sarah, that's a great point in the chat," you pull everyone else back into the moment.
On the visual side, less is more on your slides. And if you're doing any kind of software demo, you need a tool like Screen Charm. It's a lifesaver because it automatically zooms in on your cursor and highlights where you click, so your audience never has to squint and ask, "Wait, where did you just click?"
And for goodness sake, keep your camera on. Look right into that little green dot on your Mac's screen. It's the closest thing you have to making real eye contact, and it makes all the difference.
Ready to create product demos that are impossible to ignore? Screen Charm gives you the tools to record, edit, and produce stunning, professional-quality videos on your Mac, no advanced skills required. Learn more and get started at screencharm.com.
Related: How to make product demo videos | Best screen recording software for Mac