Your Guide to Video Screen Grabber Mac Tools
Oct 20, 2025

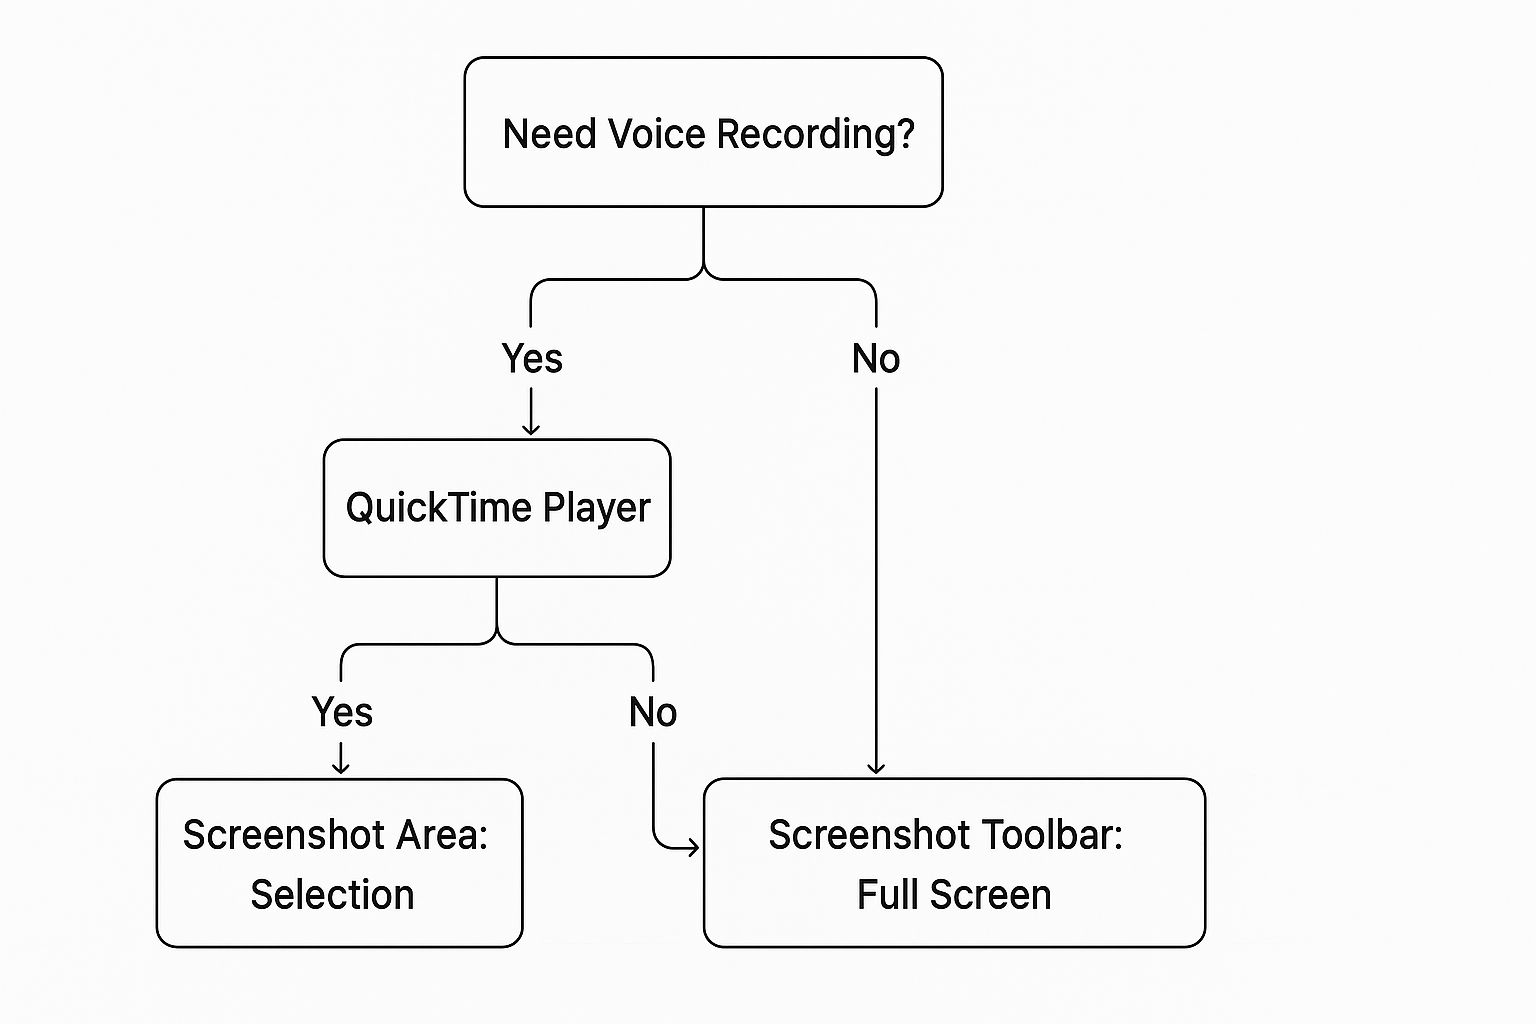
Wondering how to record the screen on your Mac? The good news is, the answer is already built right into macOS. You can start recording in seconds using either the Screenshot Toolbar for quick captures or QuickTime Player when you need to add a voiceover—no extra software required.
Your Go-To Methods for Recording Your Mac Screen
When you need to make a screen recording on macOS, you've got two fantastic, free tools ready to go. Deciding which one to use really just comes down to what you're trying to accomplish: speed and simplicity, or narration and a bit more control.
For most day-to-day tasks, your best bet is the Screenshot Toolbar. You can pull it up instantly with the keyboard shortcut Shift + Command + 5.
I use this all the time for things like capturing a weird bug to send to IT or quickly showing a colleague how to do something. It's incredibly handy because you can either record your entire screen or just drag a box to select a specific window or area.
Here’s what the on-screen controls look like once you hit the shortcut:
As you can see, the icons are straightforward, letting you switch between recording the whole display or just a portion of it with a single click.
Choosing Your Built-in macOS Screen Recorder
Sometimes, a silent video just won't cut it. Your other built-in option, QuickTime Player, steps in when you need to talk through your recording. This is the key difference—QuickTime makes it simple to select a microphone and record your voice along with your screen. That makes it the perfect choice for creating tutorials, walking through a presentation, or giving video feedback.
Not sure which tool to grab for your next recording? This quick comparison should help you decide.
Use Case | Screenshot Toolbar (Shift+Cmd+5) | QuickTime Player |
|---|---|---|
Quick & Simple Recordings | Excellent. The fastest way to start recording. | Good. Takes a few more clicks to get started. |
Recording with a Voiceover | Not Available. This tool doesn't capture microphone audio. | Excellent. The go-to choice for narrated videos. |
Recording a Specific Area | Yes. Easily drag a selection box around what you need. | Yes. You can also select a portion of the screen. |
Best For... | Bug reports, short how-to clips, capturing an animation. | Tutorials, presentations, software demos, video feedback. |
Ultimately, the choice is simple. If you need to talk, open QuickTime. For everything else, the Screenshot Toolbar is your fastest path from idea to video.
These native recording features have been standard since Apple introduced macOS Mojave back in 2018, and millions of Mac users rely on them every day. It’s a great example of how screen recording has become a fundamental part of how we communicate and share information. You can dig deeper into the evolution of screen recording in macOS if you're curious.
Using the Screenshot Toolbar for Quick Captures
When you need to record your screen right now and don't want to mess with opening an app, your Mac has a fantastic built-in tool just for that. The secret is a simple keyboard shortcut: Shift + Command + 5.
Hitting that combination instantly brings up the Screenshot Toolbar, which is my go-to for grabbing a quick recording to show a colleague a bug or walk my parents through a setting. No fuss, no fanfare, just the controls you need.
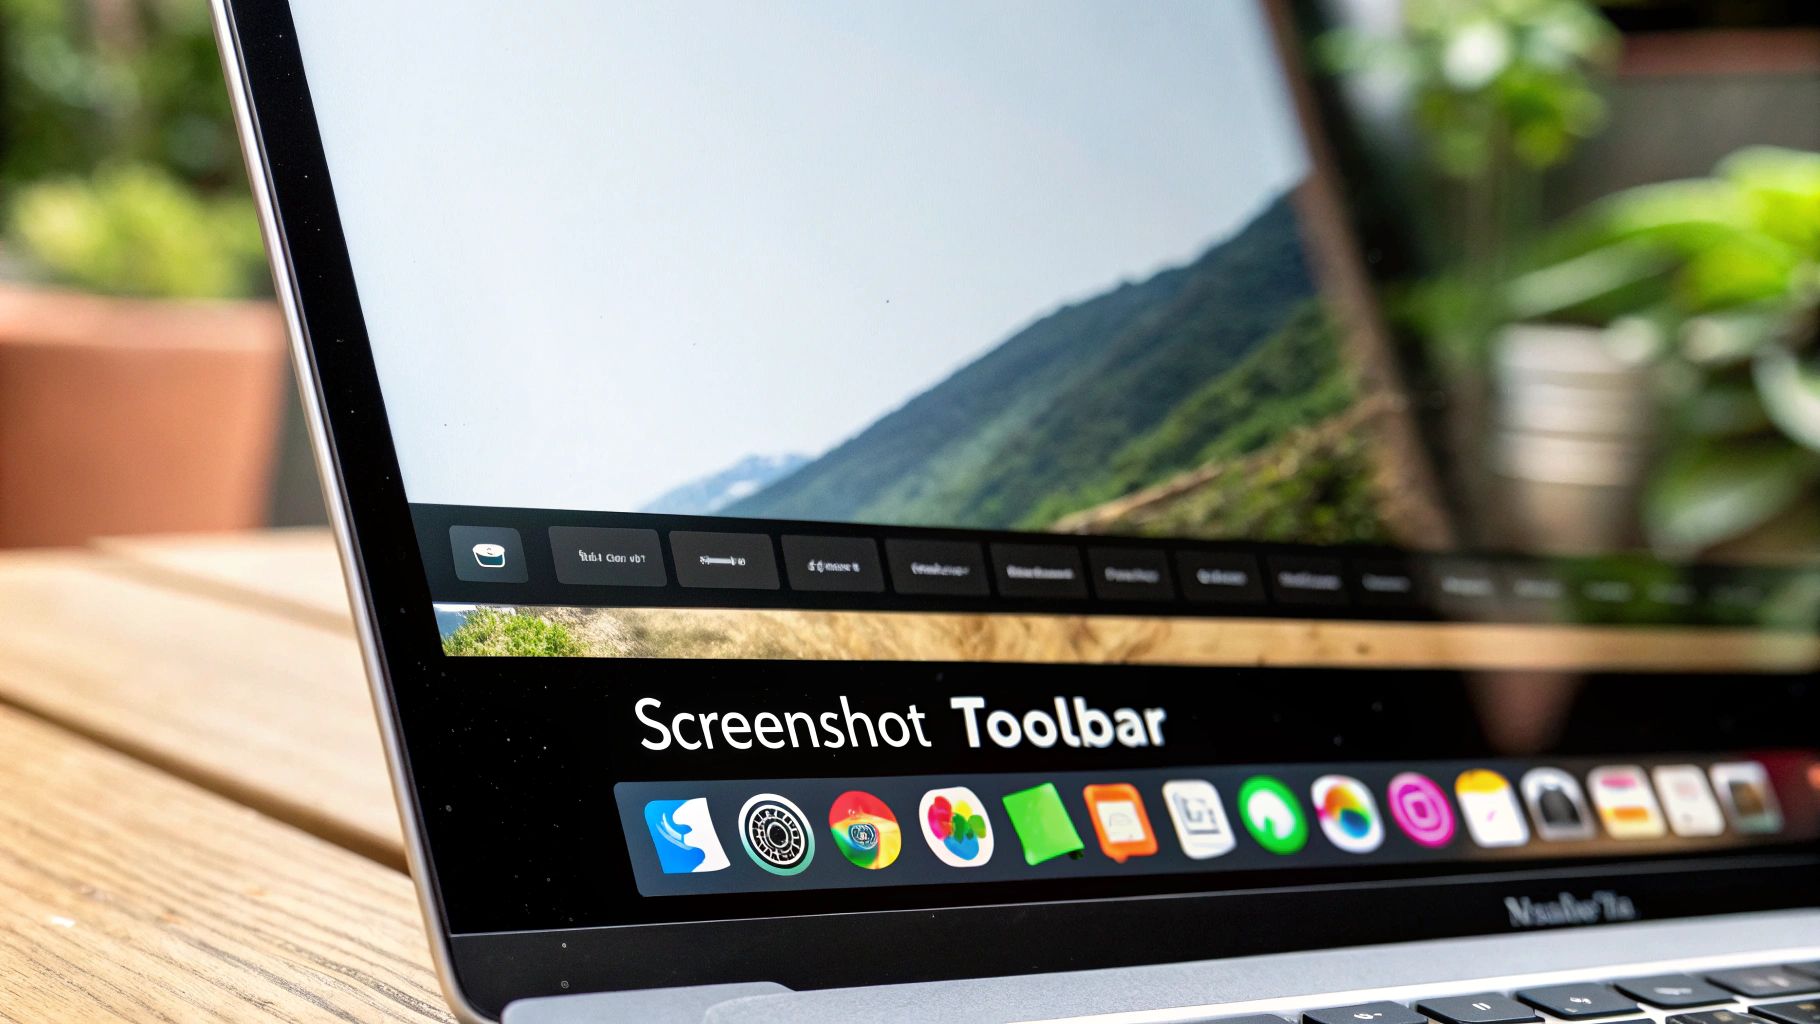
You’ll see a few icons on the toolbar. The ones for video are easy to spot—they have a small circle in the corner. You can either record your entire screen (the icon with the solid outline) or just a specific part of it (the dotted outline). I find the partial recording incredibly useful for focusing on one window and keeping my cluttered desktop out of the shot.
Mastering the Toolbar Options
Before you jump in and hit record, take a second to click on the "Options" menu. This is a step most people skip, but it’s where you can really tailor the recording to your needs and save a lot of cleanup work later.
Inside the Options menu, you have a few powerful settings:
Save To: By default, your recordings clutter up your Desktop. You can change this to a dedicated "Recordings" folder, Documents, or even save it directly to your Clipboard to paste into a message.
Timer: You can set a 5 or 10-second countdown. I use this all the time. It gives me a moment to get my cursor in the right starting position and arrange my windows perfectly before the recording begins.
Show Mouse Pointer: For tutorials, you’ll definitely want this checked. It ensures your cursor is visible in the final video so viewers can follow along.
Pro Tip: Once you stop recording, a little thumbnail of the video pops up in the bottom-right corner of your screen. Don't ignore it! Clicking that thumbnail opens a preview where you can quickly trim the start or end of the video. It's a lifesaver for cutting out the awkward silence at the beginning.
When you’re all set, just click "Record." A small stop icon will appear in the menu bar at the very top of your screen. Click that when you're done, and your video is saved. It’s a beautifully simple process for most day-to-day recording tasks.
Recording with a Voiceover Using QuickTime Player
Sometimes, just a screen recording isn't enough. You need to add your voice.
Maybe you're walking a new team member through a tricky bit of software, or perhaps you're recording a presentation for a class project. For these situations, the basic Screenshot Toolbar falls short. That’s when you’ll want to fire up QuickTime Player, your Mac's other built-in recording powerhouse.
Firing Up QuickTime for Narration
Getting started with QuickTime is a little different than using a keyboard shortcut. You'll need to open the app itself. The quickest way is to hit Command + Spacebar to bring up Spotlight and just type "QuickTime."
Once it's open, head up to the menu bar at the top of your screen and click File > New Screen Recording.
This will launch a control panel that should look familiar—it's almost identical to the Screenshot Toolbar. But it has one key difference: it lets you bring your voice into the recording.
Choosing Your Microphone
Before you jump in and hit that record button, take a moment to click on the "Options" menu. This is the crucial step for adding narration.
You'll see a "Microphone" section with a list of all your available audio inputs. Just choose your Mac’s built-in microphone or any external one you have plugged in. Simple as that.
This is what the QuickTime recording interface looks like—your command center for setting up the audio and deciding which part of the screen to capture.
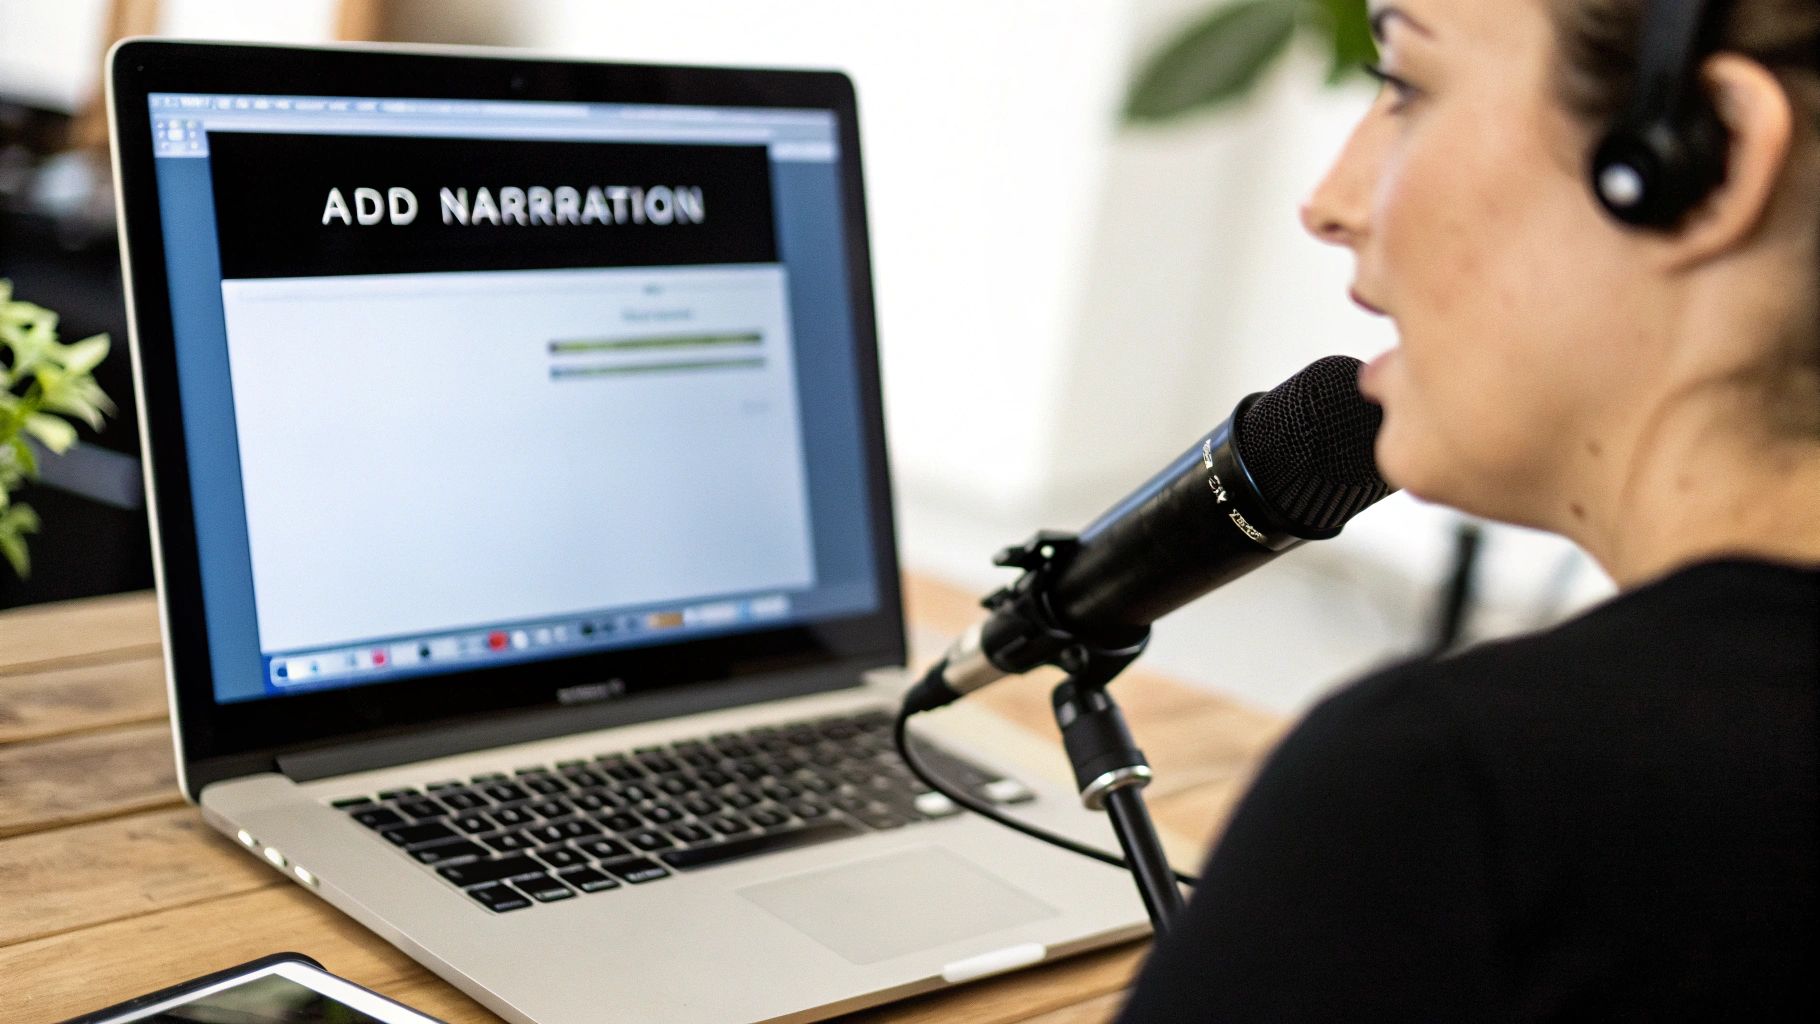
It’s this little menu that transforms a silent movie into a genuinely useful, narrated guide.
What about recording system audio? It's a question I get all the time. People want to capture the sounds coming from their apps, not just their voice. By default, macOS doesn't allow this for privacy reasons. While QuickTime is great for your microphone, it won't pick up system sounds. If you need to do both, we have a complete guide that explores the workarounds. Check out our deep dive on how to record your screen with voice for solutions that capture everything.
After picking your mic, you have the same choices as before: record your entire screen or click and drag to select a specific area. Click "Record" to start, and when you're done, just click the little stop icon in your menu bar. QuickTime will immediately pop open a window with your new video, ready to be saved and shared.
Taking Your Screen Recordings to the Next Level with Screen Charm
The built-in macOS recorder is great in a pinch, but you'll hit a wall pretty fast if you need to create something truly polished. That moment when you realize you can't record your app's audio or draw on the screen to highlight a key step? That's when you know it's time for a dedicated tool.
This is where you graduate from just capturing your screen to creating a genuinely useful, professional-looking video. For Mac users, an app like Screen Charm is built to fill exactly these gaps. It does what the native tools can't, giving you a much better final product without a complicated process.
Why Settle for Basic Recording?
One of the biggest frustrations with QuickTime is its inability to capture system audio. Need to record a software demo with its sound effects or a tutorial where the app's audio cues are important? You're stuck. Screen Charm solves this by letting you record both your microphone and your Mac's internal audio at the same time, a total game-changer for many projects.
Beyond that, the built-in tools just hand you a raw video file. The real work of trimming out mistakes or highlighting key moments has to happen somewhere else. A specialized app rolls all of that into a single, smooth workflow.
I've learned that for any creative work, efficiency is key. A tool that lets you record, annotate, and edit in one place doesn't just save a few minutes—it makes you more likely to create a dynamic, engaging video because the cool features are right at your fingertips.
Features That Genuinely Make a Difference
When you're aiming for a professional look, you need more than just a record button. Dedicated software comes packed with tools that are simply missing from the standard macOS options.
Here's a look at what you get when you upgrade your toolkit:
Live Annotation Tools: This is a big one. Instead of adding arrows and text in post-production, you can draw on your screen, point things out, and add notes as you're recording. It makes tutorials incredibly clear and keeps your audience locked in.
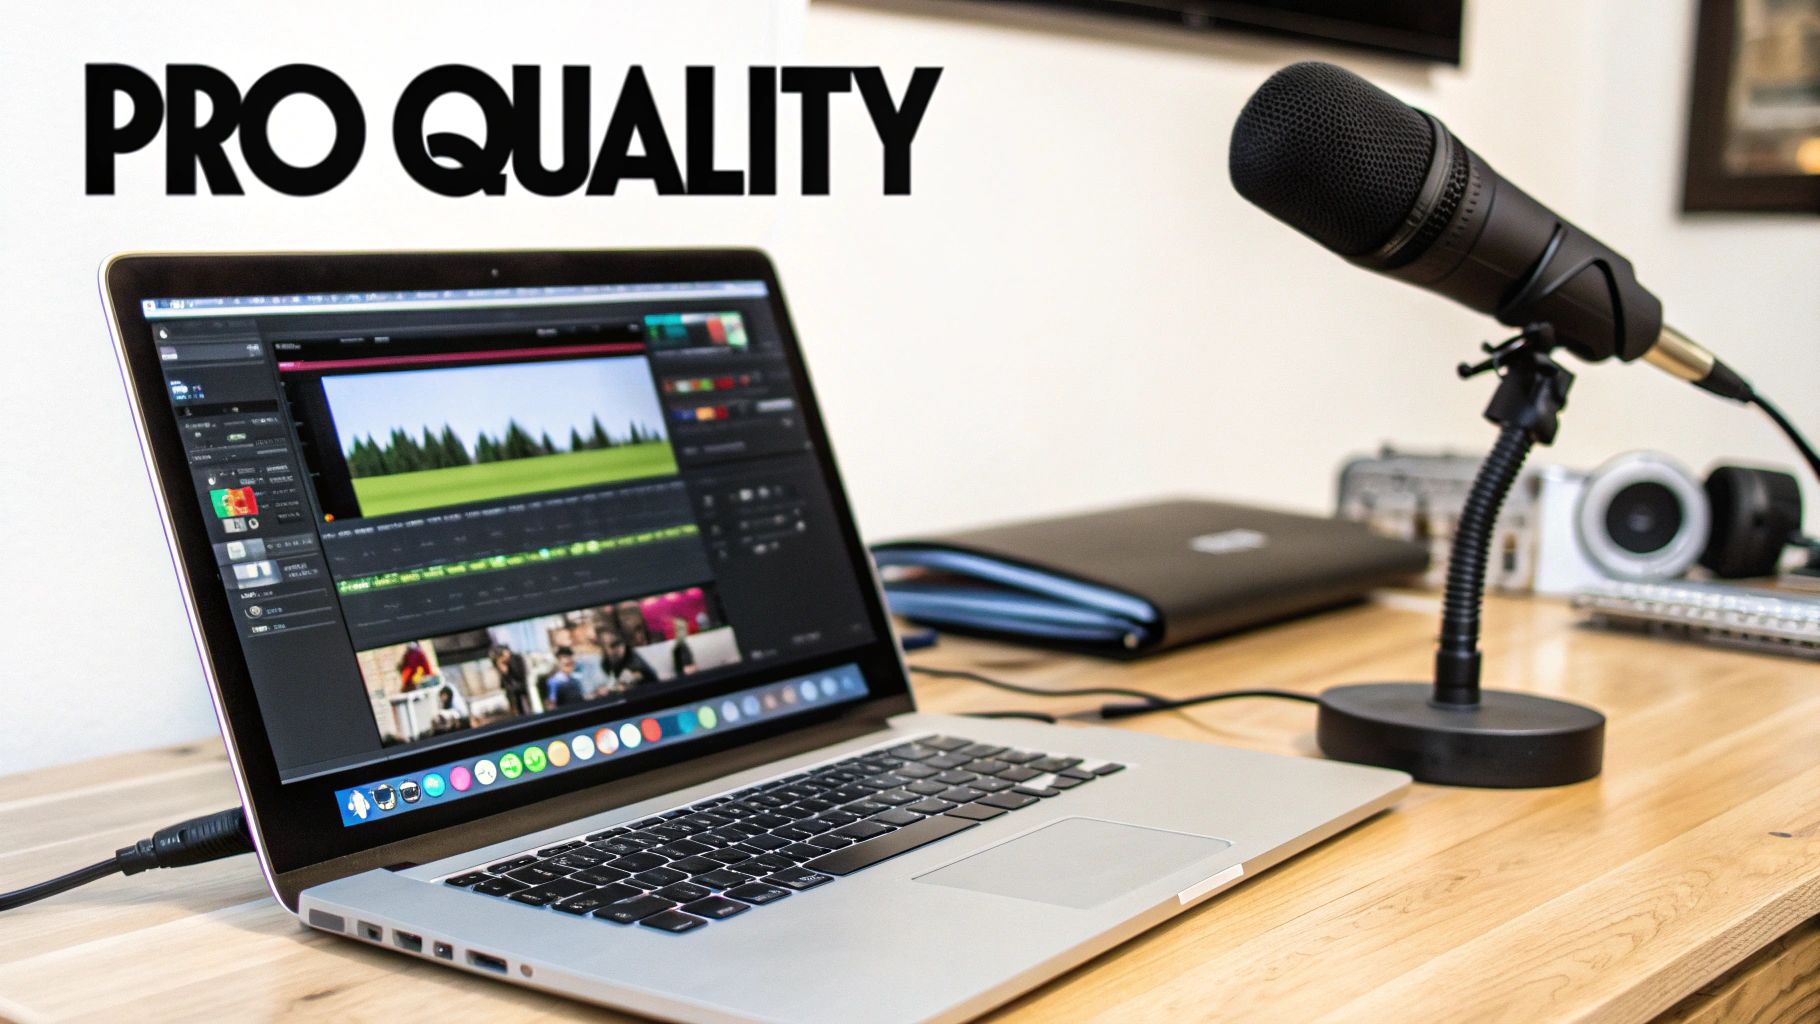
Superior Video Quality: Get access to higher resolutions and frame rates for recordings that are razor-sharp on any screen. Many professional tools, for instance, can easily handle up to 4K recording.
Integrated Editing: Snip out mistakes, add a slow zoom to focus on a critical detail, and manage all your clips without ever leaving the app. This alone saves you the headache of exporting to a separate video editor.
These aren't just bells and whistles; they transform screen recording from a simple utility into a powerful way to communicate. If you want to see how these capabilities can improve your own projects, check out what’s possible with dedicated macOS screen recorders like Screen Charm. It’s the natural next step for creating demos and tutorials that really stand out.
Creating Professional-Quality Screen Recordings
Making a great screen recording is about more than just hitting the record button. I've found that a few simple prep steps can make a world of difference, turning a potentially confusing clip into a polished, professional video that anyone can follow.
It helps to think of your screen as a stage. Before the show starts, you need to clear the set. Start by decluttering your desktop—hide any distracting files or personal folders. A clean wallpaper and an organized dock instantly make your recording look more focused.
Next, you'll want to silence all the digital noise. Just flip on your Mac's "Do Not Disturb" mode. Trust me, nothing breaks the flow of a good tutorial like a personal text message popping up on screen.
Optimize Your Recording Environment
For a smooth, high-quality video, both your Mac's performance and your physical surroundings matter. Go ahead and close any applications you won't be using for the recording. This frees up system resources and is the best way to prevent frustrating lag or stuttering in the final video.
Your audio quality is just as important as your video. A recording with crisp, clear sound is perceived as being 50% more professional than one with poor audio, even if the visuals are identical.
To really nail your audio, here are a couple of things I always do:
Use an External Microphone: Your Mac’s built-in mic is okay in a pinch, but a decent external USB microphone will capture your voice with far more clarity and less background hiss.
Find a Quiet Space: Try to record in a room with minimal echo. Soft furnishings like carpets, curtains, and even pillows can help absorb sound and cut down on that hollow, reverb-y sound.
Once you get the hang of creating these professional-quality screen recordings, they become fantastic assets for showcasing your skills and projects. They can be a game-changer when you want to create an online portfolio that gets you hired.
And when you're ready for post-production, you can explore our guide to the best screen recording editing software to take your videos to the next level.
Got Questions About Screen Recording? We've Got Answers.
Even with the best tools, you're bound to have a few questions when you start screen recording. Let's tackle some of the most common ones that Mac users run into so you can solve problems fast and get back to your project.
How Can I Actually Record My Mac’s System Audio?
This is a classic Mac stumbling block. For privacy reasons, Apple's own tools don't let you record the audio coming directly from your apps. QuickTime is great for capturing your microphone, but it won't pick up sounds from a YouTube video, a game, or a software notification.
The simplest way around this is to use an app built for the job. A tool like Screen Charm is designed from the ground up to capture both your microphone and the system audio at the same time, no complex workarounds needed.
Where Do My Screen Recordings Go?
By default, macOS drops your finished recordings right onto your Desktop. It's convenient for a moment, but that screen real estate can get messy in a hurry.
I’ve learned this the hard way. My pro tip? Set up a dedicated folder for all your recordings. You can change the default save location right from the Screenshot app’s 'Options' menu (just press Shift + Command + 5). It’s a small change that makes a huge difference in staying organized.
Can I Edit a Screen Recording on a Mac?
Absolutely. As soon as you finish a recording, you'll see a little thumbnail pop up in the corner of your screen. Click on it, and you can immediately trim the beginning or end. It's perfect for snipping off that awkward moment when you were getting started or fumbling to stop the recording.
If you need to do more, like adding text overlays or stitching multiple clips together, you can open the video file in a free app like iMovie for more powerful editing.
How Do I Stop a Screen Recording?
When you’re ready to wrap up, just look for the small, square stop icon in the menu bar at the very top of your screen. A single click will end the recording and save the file.
For a quicker, cleaner exit, use the keyboard shortcut Command + Control + Esc. This is my go-to method because it stops the recording instantly without you having to move your mouse and show that action in the final video.
Ready to create tutorials and demos that really stand out? Screen Charm gives you the power to record system audio, draw on your screen live, and edit your videos, all in one smooth process. Check out Screen Charm today!
